VAX 4000 Model 105A/106A Operator Information Order Number: EK–513AA–OP. B01 May 1995 This manual describes how to operate VAX 4000 Model 105A and 106A systems.
May 1995 Digital Equipment Corporation makes no representations that the use of its products in the manner described in this publication will not infringe on existing or future patent rights, nor do the descriptions contained in this publication imply the granting of licenses to make, use, or sell equipment or software in accordance with the description.
Contents Preface . . . . . . . . . . . . . . . . . . . . . . . . . . . . . . . . . . . . . . . . . . . . . . . . . . . . . 1 ix VAX 4000 Model 105A/106A Hardware 1.1 1.2 1.3 System Unit Description . . . . . . . . . . . . . . . . . . . . . . . . . . . . . . . Terminal Settings . . . . . . . . . . . . . . . . . . . . . . . . . . . . . . . . . . . . . System Unit Icons . . . . . . . . . . . . . . . . . . . . . . . . . . . . . . . . . . . . 1–1 1–6 1–7 2 Internal System Devices 2.1 2.2 2.2.1 2.2.2 2.2.
2.7.1 2.7.2 2.7.3 2.8 2.9 RRD43 Controls and LEDs . . . . . . . . . . . Inserting a Compact Disc into the RRD43 Drive . . . . . . . . . . . . . . . . . . . . . . . . . . . . Removing the Disc from the RRD43 . . . . . Cleaning Device Drive Heads . . . . . . . . . . . . . System Disk . . . . . . . . . . . . . . . . . . . . . . . . . . ............ Compact Disc ............ ............ ............ ............ ... 2–35 . . . . . . . . 2–36 2–38 2–41 2–42 .. 3–2 . . . . 3 Network Information 3.1 3.
A Associated and Related Documents A.1 A.2 Associated Documents . . . . . . . . . . . . . . . . . . . . . . . . . . . . . . . . . Related Documents . . . . . . . . . . . . . . . . . . . . . . . . . . . . . . . . . . . A–1 A–2 B Removable Storage Media B.1 B.1.1 B.1.2 B.1.3 B.2 B.2.1 B.2.2 B.3 B.3.1 B.3.2 B.4 B.4.1 B.4.2 Tape Cartridges . . . . . . . . . . . . . . . . . . . . . . . . . . . . . Labeling a Tape Cartridge . . . . . . . . . . . . . . . . . . Writing to and Write-Protecting Tape Cartridges .
Examples 4–1 4–2 4–3 Checking Q–bus Devices . . . . . . . . . . . . . . . . . . . . . . . . . . . . Checking DSSI Devices . . . . . . . . . . . . . . . . . . . . . . . . . . . . . Checking SCSI Devices . . . . . . . . . . . . . . . . . . . . . . . . . . . . . 4–12 4–12 4–13 VAX 4000 Model 106A System Ports, Controls, and LEDs . VAX 4000 Model 106A System Expansion Ports . . . . . . . . VAX 4000 Model 105A Expansion Ports . . . . . . . . . . . . . . . System Unit Icons . . . . . . . . . . . . . . . . . .
3–3 3–4 3–5 3–6 3–7 3–8 3–9 3–10 4–1 4–2 4–3 4–4 4–5 4–6 4–7 4–8 B–1 B–2 B–3 B–4 B–5 B–6 B–7 B–8 C–1 C–2 Connecting the ThinWire Ethernet Cable to the System Unit . . . . . . . . . . . . . . . . . . . . . . . . . . . . . . . . . . . . . . . . . . . . Connecting the System Unit to a DECconnect Faceplate . . . . Connecting a Transceiver Cable to the System Unit . . . . . . . Disconnecting a ThinWire Ethernet Cable from the System Unit . . . . . . . . . . . . . . . . . . . . . . . . . . . . . . . . . . . . .
Tables 1–1 1–2 2–1 2–2 2–3 2–4 4–1 B–1 B–2 B–3 B–4 B–5 C–1 viii Model 105A and 106A Differences . . . . . . . . . . . . Terminal Settings . . . . . . . . . . . . . . . . . . . . . . . . . TZ30 Controls . . . . . . . . . . . . . . . . . . . . . . . . . . . TZ30 LEDs . . . . . . . . . . . . . . . . . . . . . . . . . . . . . . TZK10/TZK11 Eject Button and LED Functions . TLZ06/TLZ07 LED Functions . . . . . . . . . . . . . . . Interface Standards and Cable Part Numbers . . .
Preface This manual describes how to operate VAX 4000 Models 105A and 106A systems. It also contains information on using software storage devices, connecting the system to a network, and connecting hardware options to the system. Audience This manual is intended for anyone using a VAX 4000 Model 105A or 106A system. It is written for both experienced and inexperienced users.
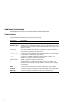
Additional Information See Appendix A for the list of associated and related documents. Conventions The following conventions are used in this manual: x Convention Description MONOSPACE Text displayed on the screen is shown in monospace type. boldface type Boldface type in examples indicates user input. Boldface type in text indicates the first instance of terms defined either in the text, in the glossary, or both.
1 VAX 4000 Model 105A/106A Hardware This chapter describes the VAX 4000 Model 105A and 106A system units. It covers the following: • The Model 105A/106A system unit • Terminal settings • System unit icons 1.1 System Unit Description The VAX 4000 Model 106A system differs from the Model 105A system in two ways.
Figure 1–1 VAX 4000 Model 106A System Ports, Controls, and LEDs 1 1 2 3 2 3 4 5 6 7 8 9 10 11 12 MLO-011850 Note Figure 1–1 shows a Model 106A system. If you have a Model 105A, the expansion box will not look the same. (Expansion boxes for both models are shown in detail elsewhere in this manual.) ! " # $ 1–2 Optional Asynchronous Communications Ports A and B—These are the ports to which you can connect devices or options that use asynchronous communications. Port A is on the bottom.
% & ' ( ) +> +? +@ Halt Button—This button halts the system and returns it from the operating system to console mode. Break/Enable Switch and LED—When the break/enable switch is in the up position, you can halt the system by pressing the break key on the console terminal keyboard. When the break/enable switch is in the up position, the LED is on. When the break/enable switch is in the down position, the LED is off.
Figure 1–2 shows the expansion ports on a VAX 4000 Model 106A system. Figure 1–2 VAX 4000 Model 106A System Expansion Ports 1 1 3 2 2 ! " # $ 1–4 4 3 MLO-011851 DSSI ports—These ports enable connection of external DSSI devices to the system and the building of a DSSI-based VAXcluster. Q–bus port—This is a port through which the external Q–bus expander is connected to the computer system. Q–bus port—This is a port through which the external Q–bus expander is connected to the computer system.
Figure 1–3 shows the expansion ports on the VAX 4000 Model 105A. Note The VAX 4000 Model 105A has one less DSSI port on the expansion box than the Model 106A Figure 1–3 VAX 4000 Model 105A Expansion Ports 1 1 3 2 2 3 4 MLO-010221 ! " # $ DSSI ports—These ports enable connection of external DSSI devices to the system and the building of a DSSI-based VAXcluster. Q–bus port—This is a port through which the external Q–bus expander is connected to the computer system.
1.2 Terminal Settings Terminals must have the settings shown in Table 1–2 to communicate with the system unit on port 3: Table 1–2 Terminal Settings Feature Setting Terminal mode VTnnn-7bit Transmit speed 9600 baud Receive speed receive = transmit Character format 8 bits, no parity Stop bits 1 Comm1 port DEC423 (data-leads-only) See the terminal documentation for more information on setting up the terminal.
1.3 System Unit Icons Figure 1–4 shows the system unit icons. Figure 1–4 System Unit Icons 1 2 3 4 5 6 7 8 MLO-009281 ! " # $ % & ' ( This icon indicates optional asynchronous communications port A. A similar icon indicates the optional asynchronous communications port B. This icon indicates optional synchronous communications port 0. A similar icon indicates the optional asynchronous communications port 1. This icon identifies the SCSI port. This icon identifies a DEC423 MMJ port 0.
2 Internal System Devices This chapter describes how to access and operate the internal devices that are options of the system.
2.1 Accessing the Removable Media System Devices To access the system devices, follow these steps: 1. Position the system unit so that the front of it is facing you. 2. Open the cover by pushing it and then releasing it, as shown in Figure 2–1. Close the cover when you are not using the system devices.
2.2 TZ30 Tape Drive The TZ30 uses CompacTape™ or CompacTape II cartridges that contain magnetic tape on a single reel. When you insert the tape cartridge into the drive and load it, the tape is automatically threaded onto a take-up reel inside the drive. 2.2.1 TZ30 Controls and LEDs Figure 2–2 shows the location of the controls and LEDs on the TZ30 tape drive. Table 2–1 explains the functions of the TZ30 controls. Table 2–2 explains the functions of the TZ30 LEDs and beeper.
Figure 2–2 TZ30 Tape Drive Controls and LEDs 1 2 3 4 5 ! " # $ % MLO-010223 Operate Lever Write-Protect LED (Red) Tape-in-Use LED (Yellow) Operate-Lever LED (Green) Unload Button 2–4 Internal System Devices
Table 2–1 TZ30 Controls Control Function Unload button The unload button rewinds and disengages the tape from the takeup reel inside the TZ30. The tape must be completely rewound and unloaded into the tape cartridge before you can remove the tape cartridge from the drive. The tape is fully unloaded when the operate lever LED is on. Operate lever1 Use the operate lever to lock or unlock a tape cartridge. To insert a tape cartridge, the operate lever must be in the unlock position.
Table 2–2 TZ30 LEDs LED State Condition Operate-lever LED On Safe to use the operate lever. Off Do not use the operate lever. Flashing The drive has detected a tape cartridge or calibration error. Flashing Tape in use. On Tape loaded and ready to use. On Tape is write-protected. Off Tape is write-enabled. All three LEDs On The power-up diagnostic test is in progress. All three LEDs Flashing Drive fault. Beeper One beep The TZ30 beeps once when you turn on the system unit.
2.2.2 Inserting and Using a Tape Cartridge To insert a tape cartridge, see Figure 2–3 and follow these steps: 1. Slide the operate lever to the unlock position. 2. Insert the tape cartridge following these rules: • If you insert the tape cartridge more than half-way into the drive, you must insert the tape cartridge fully. • If you want to use another tape cartridge, insert the tape cartridge fully, unload the tape cartridge, and then remove it.
3. Move the operate lever to the lock position to lock the tape cartridge in the drive. The green LED turns off, and the yellow LED starts to flash, indicating that the tape is loading. When you load the tape and it is ready for use, the yellow LED stays on. When the yellow LED stays on and the green LED stays off, the tape is ready to use. See the VAX 4000 Model 105A/106A Troubleshooting and Diagnostics Information manual if errors occur while you are using the TZ30 tape drive.
Figure 2–3 Inserting a Tape Cartridge 1 95 M 29 B 6M B ! MLO-010224 Operate Lever Internal System Devices 2–9
2.2.3 Removing a Tape Cartridge from the Drive To remove a tape cartridge, follow these steps: Caution • The tape must fully rewind before you can remove the tape cartridge from the tape drive. • Remove the tape cartridge from the drive before setting the on/off switch on the system unit to the off (O) position. 1. Press the unload button (see Figure 2–4) or enter the appropriate system software command. The yellow LED flashes as the tape rewinds.
Figure 2–4 Removing a Tape Cartridge 2 1 95 M 29 B 6M B ! " MLO-010225 Unload Button Operate Lever Internal System Devices 2–11
2.3 TZK10/TZK11 QIC Tape Drive The TZK10/TZK11 QIC tape drives are quarter-inch cartridge, streaming tape drives; both are operated in the same manner. You can use them for archival, data storage and retrieval, and data collection purposes. 2.3.1 TZK10/TZK11 Controls and LEDs The TZK10/TZK11 QIC tape drive has one dual-color LED (green and amber) and an eject button. Figure 2–5 shows the positions of the LED and the eject button. Table 2–3 lists the functions of the LED and the eject button.
Figure 2–5 TZK10/TZK11 Eject Button and LED 2 1 MLO-010226 ! " Eject Button Dual-Color LED Internal System Devices 2–13
2.3.3 Inserting a QIC Tape into the TZK10/TZK11 To insert a QIC tape into the TZK10/TZK11, follow these steps: 1. Press the eject button to open the door on the front of the TZK10/TZK11 (see Figure 2–6). The door partially opens. 2. Open the door fully. 3. Insert the QIC tape into the TZK10/TZK11. Figure 2–6 shows the correct orientation of the tape as you insert it. Slide the tape in until you feel resistance. 4. Close the door.
Figure 2–6 Inserting a QIC Tape 2 1 ! " MLO-010227 Eject Button Dual-Color LED Internal System Devices 2–15
2.3.4 Removing a QIC Tape from the TZK10/TZK11 To remove a QIC tape from the TZK10/TZK11, follow these steps: 1. Dismount the QIC tape by entering the commands from the operating system. Before you go to step 2, wait until the tape stops moving (the TZK10/TZK11 stops whirring) and the LED stops flashing green and stays green. 2. Press the eject button (see Figure 2–7). 3. Open the door fully and remove the tape. 4. Close the door.
Figure 2–7 Removing a QIC Tape 2 1 ! " MLO-010228 Eject Button Dual-Color LED Internal System Devices 2–17
2.4 TLZ06/TLZ07 Cassette Tape Drive The TLZ06/TLZ07 cassette tape drive is a streaming tape drive that uses 4 millimeter (mm) tape. You can use it for archival, data storage and retrieval, and data collection purposes. The TLZ06/TLZ07 tape drive design incorporates both digital data storage (DDS) and digital audio tape (DAT) technologies. 2.4.1 TLZ06/TLZ07 Controls and LEDs The TLZ06/TLZ07 cassette tape drive has two LEDs (amber and green) and an unload button.
Table 2–4 TLZ06/TLZ07 LED Functions Status Write-protect LED Tape/activity LED No tape loaded Off Off Tape loaded and write enabled Off On Tape loaded and write protected On On No drive activity Signals the cassette’s write-protect status On Drive activity Signals the cassette’s write-protect status Signals the drive activity Loading a tape Off at first, then signals the cassette’s write-protect status Flashes dimly, then stays on.
2.4.2 Inserting a Cassette Tape into the TLZ06/TLZ07 To insert a cassette tape into the TLZ06/TLZ07, slide the tape in until the TLZ06/TLZ07 draws the tape inside. Figure 2–9 shows the correct orientation of the tape as you insert it. When you insert the tape correctly, the tape/activity LED flashes dimly and then stays on. You can now send operating system commands to the TLZ06 /TLZ07 cassette tape drive.
Figure 2–9 Inserting a Cassette Tape 1 ! " 2 MLO-009290 Tape/Activity LED Write-Protect LED Internal System Devices 2–21
2.4.3 Removing a Cassette Tape from the TLZ06/TLZ07 To remove a cassette tape from the TLZ06/TLZ07, follow these steps: 1. Dismount the cassette tape by entering the commands from the operating system. Before you go to step 2, wait until the tape/activity LED stops flashing and stays on. 2. Press the tape unload button (see Figure 2–10). 3. Remove the cassette tape.
Figure 2–10 Removing a Cassette Tape 1 2 ! " MLO-009291 Tape/Activity LED Tape Unload Button Internal System Devices 2–23
2.5 RX23/RX26 Diskette Drive The RX23/RX26 diskette drives allow you to read information from and write information to 3.5 inch removable diskettes. You can use high-density (HD) or extra-density (ED) diskettes. The RX26 diskette drive can read from and write data to HD diskettes that have been formatted by an RX23 diskette drive. However, the ED diskettes used by the RX26 diskette drive cannot be used by the RX23 diskette drive. Appendix B contains information about both types of diskette.
Figure 2–11 Inserting a Diskette 1 ! RE_EN06156A_91 Diskette Internal System Devices 2–25
2.5.2 Removing a Diskette You must dismount the diskette drive before removing a diskette. For information on dismounting a diskette, see the software documentation. To remove a diskette from the diskette drive, press the eject button on the front of the diskette drive. Remove the diskette when it extends slightly from the diskette slot.
2.6 RRD42 Compact Disc Drive The RRD42 compact disc drive is a read-only device that can read information from 600MB compact discs. The compact disc fits into a supplied caddy, which you insert into the drive. Note You can order additional caddies from your Digital™ sales representative. The part number is 30-34512-01. 2.6.1 RRD42 Controls and LEDs The front panel of the RRD42 compact disc drive has a disc slot, an eject button, a busy LED, and an emergency eject hole.
Figure 2–12 RRD42 Compact Disc Drive Front Panel 1 2 3 4 5 MLO-010229 ! " # $ % Volume control and headphone socket. Disc slot. Busy LED—This LED turns on when data is read from the disc. It flashes during seek operations. Eject button—Press this button to eject the caddy from the RRD42. Emergency eject hole—Use the emergency eject hole to manually eject the caddy if a power failure occurs (see Section 2.6.3).
2.6.2 Inserting a Compact Disc into the RRD42 Compact Disc Drive Inserting a compact disc involves two stages: • Loading the compact disc into the caddy • Inserting the caddy into the RRD42 These stages are described in the following subsections. Loading the Compact Disc into the Caddy To load the compact disc into the caddy, follow these steps: 1. If there is a protective film on the center of the caddy lid, as shown in Figure 2–13, remove it before using the caddy.
2. Open the lid of the caddy by pressing the tabs on both sides of the caddy, shown in Figure 2–14. These tabs are each marked with an arrowhead and the word open.
3. Place the compact disc in the caddy, as shown in Figure 2–15. The disc label must face upwards. Figure 2–15 Inserting Disc into Caddy 1 MLO-010772 ! Compact disc 4. Close the lid of the caddy firmly.
Inserting the Caddy into the RRD42 Insert the caddy into the slot on the front of the RRD42 with the disc label facing upwards, as shown in Figure 2–16. Push the caddy until it is completely inserted. Figure 2–16 Inserting Caddy with Disc into RRD42 2 1 ! " MLO-010773 Disc and disc caddy Busy LED The busy LED then stays on for a few seconds. When the busy LED goes off, the RRD42 can receive commands and you can read data from the compact disc.
2.6.3 Removing the Caddy from the RRD42 Press the eject button on the front, as shown in Figure 2–17 of the RRD42 to remove the caddy. Figure 2–17 Removing Caddy with Disc from RRD42 1 2 MLO-010774 ! " Eject button Disc and disc caddy If the eject button is disabled by software, you must manually remove the caddy.
Removing a Caddy Manually To remove a caddy manually from the RRD42, see Figure 2–18 and follow these steps: 1. Set the on/off switch on the system unit to the off (O) position. 2. Insert a straightened large paper clip or metal rod, 1.2 millimeters (mm) (0.047 inches) in diameter and not less than 35 mm (1.38 in.) long, into the emergency eject hole and push the clip or rod in until the caddy rises. 3. Push the clip or rod hard until the caddy emerges from the slot.
2.7 RRD43 Compact Disc Drive The RRD43 compact disc drive is a read-only device that can read information from industry standard 600MB compact discs. The compact disc is inserted directly into the drive. 2.7.1 RRD43 Controls and LEDs The front panel of the RRD43 compact disc drive contains the disc tray and has an eject button, a busy LED, and an emergency eject hole. Figure 2–19 shows the front panel of the RRD43 compact disc drive.
2.7.2 Inserting a Compact Disc into the RRD43 Compact Disc Drive To insert a disc in the RRD43, see Figure 2–20 and follow these steps. 1. Push the eject button inward to release the disc tray. The tray will eject part way out; pull the tray out manually to its full extention. 2. Pick up the disc by the edges; taking care not to touch the bottom (unlabelled) side of the disc with any part of your hand or fingers. 3. Insert the disc into the tray with the disc label facing upwards. 4.
Figure 2–20 Inserting a Disc in the RRD43 1 2 3 4 MLO-012262 ! " # $ Eject button Disc (hold by the side edge and set into place in the disc tray) Disc tray (push in) Busy LED If the disc is upside-down, not properly inserted in the tray, or if other conditions prevent the RRD43 from reading the disc, the busy LED will blink, then stay on steadily.
2.7.3 Removing the Disc from the RRD43 To remove a disc from the RRD43, see Figure 2–21 and follow these steps. 1. Push the eject button inward to release the disc tray. The tray will eject part way out; pull the tray out manually to its full extention. 2. Remove the disc from the tray; pick up the disc by the edges, taking care not to touch the bottom (unlabelled) side of the disc with any part of your hand or fingers. 3. Push the disk tray back into the RRD43 until it is completely inserted and latched.
Figure 2–21 Removing a Disc from the RRD43 1 2 3 MLO-012263 ! " # Eject Button Disc (hold by the side edge and remove from the disc tray) Disc tray (push in) Internal System Devices 2–39
Removing a Disk Manually To remove a disc manually from the RRD43, in the event of a power failure for example, see Figure 2–22 and follow these steps: 1. Set the on/off switch on the system unit to the off (O) position. 2. Insert a straightened large paper clip or metal rod, 1.2 millimeters (mm) (0.047 inches) in diameter and not less than 35 mm (1.38 in.) long, into the emergency eject hole and push the clip or rod in until the disc tray disengages. 3.
2.8 Cleaning Device Drive Heads This section describes the cleaning recommendations for the drive heads of the following devices: • TZ30 tape drive • TZK10/TZK11 QIC tape drives • TLZ06/TLZ07 cassette tape drive The heads are the components of the drives that read data from and write data to the media. Digital recommends that, when cleaning the heads, you use the following Digital-supplied cleaning kits: • TZ30—Use the TKXX-HC head cleaning kit. • TZK10/TZK11—Use the TZK1X-HA head cleaning kit.
2.9 System Disk The system unit contains at least one hard disk. You cannot physically access the hard disk. This hard disk, called the system disk, holds the factory installed software (FIS). FIS is a VMS™ operating system, which is installed before the system is shipped. You can use an operating system stored in a different location if you prefer, but VMS version 5.5-2H4 or later is mandatory. See the VMS Factory Installed Software User Guide for more information on using VMS FIS.
3 Network Information This chapter describes how to connect the system unit to a network and how to disconnect it from a network.
3.1 Selecting the Ethernet Type You can connect the system unit to either a ThinWire Ethernet or a standard Ethernet network. Before starting to connect the system unit to the network, ask the network coordinator to tell you which network type to use with the system. The system unit has a network select switch that you must set depending on which Ethernet type you want to use. When you know which Ethernet type you want to use, set the network select switch as follows: 1.
Figure 3–1 Network Select Switch Positions 2 1 1 3 2 ! " MLO-011852 Standard Ethernet Switch Position ThinWire Ethernet Switch Position Note: For graphic clarity, the SCSI terminator is not shown.
3.2 Connecting the System Unit to a ThinWire Ethernet Network To connect the system unit to a ThinWire Ethernet cable, follow these steps: 1. If the ThinWire Ethernet cable is already assembled, remove the ThinWire Ethernet T-connector and terminators from the system and connect the cable (see Figure 3–3). Go to Section 3.5 if you are not connecting the system to a DECconnect faceplate. 2.
Go to Section 3.5 if you are not connecting the system to a DECconnect faceplate.
3.3 Connecting the System Unit to a DECconnect Faceplate If DECconnect products are installed, a DECconnect faceplate may be on the wall. You can connect VAX systems to DECconnect faceplates using different methods. You can connect either a single VAX system or connect several VAX systems in series. Ask the network coordinator for advice on how to connect the system to the DECconnect faceplate. If you want to connect only one system to the faceplate, see Figure 3–4 and follow these steps: 1.
Figure 3–4 Connecting the System Unit to a DECconnect Faceplate 1 3 2 2 1 2 ! " DECconnect Faceplate ThinWire Ethernet Cable Network Information 3–7
3.4 Connecting the System Unit to a Standard Ethernet Network To connect the system unit to a standard Ethernet network, follow these steps: 1. Attach the 15-pin connector on the standard Ethernet transceiver cable to the back of the system unit. See Figure 3–5. 2. Move the sliding lock on the standard Ethernet connector to the left, securing the standard Ethernet connection. 3. Set the Network Select Switch to the correct position. See Section 3.1.
Figure 3–5 Connecting a Transceiver Cable to the System Unit 1 3 2 2 3 1 MLO-011855 ! " # Standard Ethernet Transceiver Cable Sliding Lock Network Select Switch Note: For graphic clarity, the SCSI terminator is not shown.
3.5 Testing the Ethernet Installation When you complete the network installation procedure, follow these steps to test the installation: 1. Set the system unit on/off switch to the on ( | ) position. 2. Enter the following command to test the installation: Run test 5F with the first parameter set to 0 (default) to test the SGEC chip using internal loopback mode. An example of success is shown by the console prompt returning without any messages as shown in the next two examples.
3.6 Completing the Ethernet Installation The network coordinator must complete the installation. You must give the following information to the network coordinator: • A unique node name comprised of a maximum of six alphanumeric characters Choose any node name and ask the network coordinator to make sure that the node name is unique on the network. • The system’s Ethernet address To determine the system’s Ethernet address, follow these steps: 1.
3.7 Removing the System Unit from a Network The following subsections describe how to remove the system unit from a network. Note Before removing the system unit from a network: • Get the approval of the network coordinator. • See the operating system documentation for information on the shutdown procedures before stopping or turning off the system. • If the system is the server in a network, do not turn off, halt or restart the system without notifying the other network members. 3.7.
Figure 3–6 Disconnecting a ThinWire Ethernet Cable from the System Unit 1 3 2 A B 2 3 1 MLO-011856 ! " # T-Connector ThinWire Ethernet Cable Terminator added Network Information 3–13
3.7.2 Removing the System Unit from a Standard Ethernet Transceiver Cable To remove the system unit from a standard Ethernet transceiver cable, follow these steps: 1. Set the on/off switch on the back of the system unit to the off (O) position. 2. Push the sliding lock to the right (see Figure 3–7). 3. Disconnect the transceiver cable from the standard Ethernet connector on the back of the system unit (see Figure 3–7).
Figure 3–7 Disconnecting a Transceiver Cable from the System Unit 1 3 2 1 2 ! " # 3 MLO-011857 Sliding Lock Standard Ethernet Transceiver Cable Network Select Switch Network Information 3–15
3.8 Connecting Systems Into a DSSI VAXcluster Configuration Note A DSSI VAXcluster configuration is supported only under VMS Version 5.5-1HN or later. A DSSI VAXcluster configuration consists of two or more systems configured as a DSSI VAXcluster and sharing their DSSI devices through a Digital Storage System Interconnect (DSSI) bus. See Figure 3–8 and Figure 3–10 for connections. Each system can have direct access to any of the devices on the DSSI bus, including a shared system disk.
Figure 3–8 shows how to attach a DSSI cable to a DSSI port on a VAX 4000 Model 106A system, and Figure 3–9 shows a VAX 4000 Model 105A system. DSSI cables may be attached to any of the DSSI ports in the same way. Figure 3–10 shows a typical DSSI connection between a VAX 4000 Model 105A/106A system and another VAX 4000 system. Figure 3–8 Connecting a DSSI Cable to a VAX 4000 Model 106A System 2 1 1 3 2 ! " MLO-011858 Remove the DSSI terminator. Insert the DSSI cable and tighten the two screws.
Figure 3–9 Connecting a DSSI Cable to a VAX 4000 Model 105A System 2 1 1 3 2 ! " MLO-010783 Remove the DSSI terminator. Insert the DSSI cable and tighten the two screws.
Figure 3–10 Connecting Systems Into a VAXcluster 1 3 2 1 2 1 0 MLO-011859 ! DSSI Cable (BC21M–09) Network Information 3–19
4 Hardware Options This chapter describes the hardware options of VAX 4000 Model 105A/106A systems. It also describes how to connect the external hardware options to the system. It includes information on the following topics: • Internal hardware options • External hardware options • Connecting a SCSI expansion box • Connecting peripherals Note Illustrations in this manual show the VAX 4000 Model 106A system rather than the Model 105A system unless otherwise noted. 4.
Table 4–1 Interface Standards and Cable Part Numbers Interface Standard Cable Part Number Extension Cable Part Number EIA-232/V.24 1 BC19D-02 BC22F-nn3 EIA-423/V.10 BC19E-022 BC55D-nn4 EIA-422/V.11 BC19B-022 BC55D-nn4 1 Supplied with the DSW42-AA option. 2 Optional cable, order separately. 3 Optional cable, order separately. The value of nn represents the cable length in feet (10, 25, or 50). 4 Optional cable, order separately.
Attach one of the following cables to a connector on the breakout cable if you require longer cable lengths: BC22F-10, BC22F-25, or BC22F-50. The peripheral you are using may require a null-modem extension cable. See the peripheral documentation or contact your Digital Sales representative for information on the correct null-modem cable to use.
– Up to eight nodes (one interface and up to seven additional DSSI Devices (RF-series ISEs, TF85s, and adapters)) – Eight data lines – One parity line – Eight control lines DSSI architecture improves system performance as follows. – Each device queues requests and each performs seek ordering. – Mass storage devices can act independently, since each device contains its own controller. Several devices can work simultaneously. An ISE can maintain connection to more than one DSSI interface.
4.
4.4.1 Guidelines for Connecting Expansion Boxes Use the following guidelines when connecting expansion boxes: • The recommended maximum length of the SCSI cables (internal length plus external length) is 19.6 feet (6 meters). • Each device in the expansion boxes and the system box must have a unique SCSI ID. • You must attach the 50-pin terminator that comes with the expansion box to an unused SCSI connector on the back of an expansion box.
4.4.2 Selecting Available SCSI IDs on the System You must identify which SCSI IDs are available before connecting an expansion box. Use the configuration display to determine this information. To see the configuration display, enter the following command: >>> SHOW CONFIG The system displays information similar to the following: KA53-A Vn.n, VMB 2.
4.4.3 Preparing the System Unit for an Expansion Box To prepare the system unit for an expansion box, follow these steps: 1. Shut down the operating system using the procedure outlined in the operating system documentation. 2. Set the on/off switch on the system unit to the off (O) position. 3. Remove the SCSI terminator as shown in Figure 4–1. 4. Move the terminator to the last open port on the SCSI expansion box. 4.4.
Connect the SCSI cable to the system unit and to the expansion box as follows: 1. Set the on/off switches on the system unit and the expansion box to the off (O) position. 2. Make sure that you have set the correct SCSI ID for each device in the expansion box. See Section 4.4.2 for information on selecting the available SCSI IDs. 3. Connect one end of the 50-pin to 50-pin cable, supplied with the expansion box, to the SCSI port on the system unit. Close the bail lock loops. See Figure 4–2. 4.
Figure 4–1 Removing the SCSI Terminator from the System Unit 1 3 2 1 2 MLO-011860 ! " Release the bail lock loops. Remove the terminator.
Figure 4–2 Connecting the SCSI Cable to the System Unit 1 3 2 2 1 MLO-011861 ! " SCSI Cable Bail Lock Loop Hardware Options 4–11
4.4.5 Checking Expansion Box Connections Three different kinds of items can be connected to the expansion ports of VAX 4000 Model 105A/106A systems. They are the following: • Q–bus • DSSI • SCSI Examples 4–1, 4–2, and 4–3 show these types of items that are connected to the system, both internally and through the expansion ports.
Example 4–3 Checking SCSI Devices >>>SHOW SCSI SCSI Adapter A, SCSI ID 6 -DKA300 (DEC RZ24L) -DKA700 (DEC RRD42) If you do not see the names and the IDs of the devices, see the VAX 4000 Model 105A/106A Troubleshooting and Diagnostics Information manual. 4.
3. Connect the other end of the DEC423 cable to the correct port on the peripheral. 4. Set the on/off switch on the peripheral to the on ( | ) position. BC16E cables are available in the following lengths: 10 feet (BC16E-10), 25 feet (BC16E-25), or 50 feet (BC16E-50).
4.5.2 Connecting a Peripheral to the Asynchronous Modem Control Port You can connect peripherals that use EIA-232 connectors to the asynchronous modem control port (port 2) on the back of the system unit. Alternatively, the supplied EIA-232 to DEC423 adapter (H8575-A) allows you to connect peripherals that use DEC423 connectors. To connect a peripheral to the asynchronous modem control port, follow these steps: 1. If you are connecting a peripheral using EIA-232 cables, follow these steps: a.
Figure 4–4 Connecting a Peripheral to the Asynchronous Modem Control Port 1 3 2 1 ! MLO-011863 EIA-232 Connector 4–16 Hardware Options
2. If you are connecting a peripheral using DEC423 cables, follow these steps: a. Set the on/off switch on the peripheral to the off (O) position. b. Connect the EIA-232 to DEC423 adapter to the asynchronous modem control port (see Figure 4–5). c. Tighten the screws on each side of the adapter using a small screwdriver. d. Connect the DEC423 cable to the MMJ port on the adapter. e. Connect the other end of the DEC423 cable to the correct port on the peripheral. f.
Figure 4–5 Connecting a Peripheral to the Asynchronous Modem Control Port Using an EIA-232 to DEC423 Adapter 1 3 2 1 2 ! " MLO-011864 EIA-232 to DEC423 Adapter (H8575-A) DEC423 MMJ Connector 4–18 Hardware Options
4.5.
Figure 4–6 Connecting a Peripheral to Asynchronous Port A 2 1 1 2 3 2 3 MLO-011865 ! " # Asynchronous Option Cable (BC16C-10) Bail Lock Loops Harmonica 4–20 Hardware Options
Connecting Peripherals to a DHW42-CA Option If the system has the DHW42-CA asynchronous communications option installed, the system has two four-line asynchronous ports with modem control. You can connect up to four peripherals to each of these ports using the breakout cable (BC29J-06) supplied with the option. Section 4.1 gives more information on the DHW42-CA asynchronous communications option. To connect a peripheral to an asynchronous port, follow these steps: 1.
Figure 4–7 Connecting a Peripheral to Asynchronous Port A (DHW42-CA) 1 3 2 1 3 2 MLO-011866 ! " # Asynchronous Option Breakout Cable (BC29J-06) Connector Clip Hook 4–22 Hardware Options
4.5.4 Connecting Peripherals to an Optional Synchronous Port If the system has the DSW42-AA synchronous communications option installed, the system has two synchronous modem ports. Section 4.1 gives more information on the DSW42-AA synchronous communications option. Table 4–1 lists the cables that you can use with the option. The EIA-232/V.24 cable (BC19D-02) is the standard cable shipped with the option. If you are using a synchronous interface standard other than EIA-232/V.
Figure 4–8 Connecting the Cable to Synchronous Port 0 1 3 2 1 2 ! " MLO-011867 Option Cable (BC19D–02) Optional Screws (2) 4–24 Hardware Options
A Associated and Related Documents This appendix lists the associated and related documents. Some of the following documents may not be available in every country. Contact your Digital sales representative for information on the availability of particular documents. A.
A.
B Removable Storage Media This appendix contains information on the use and storage of the following media types that are used by the optional removable media storage devices: • Tape cartridges • QIC tapes • Cassette Tapes (DAT) • Compact discs B.1 Tape Cartridges The CompacTape cartridge (see Figure B–1) is a 10 cm by 10 cm (4 inches by 4 inches) plastic tape cartridge that can be used by TZ30 or TK50 tape drives. The TZ30 tape drive is supplied with a CompacTape.
Figure B–1 CompacTape Cartridge MLO-010793 Table B–1 and Table B–2 show the compatibility of CompacTape and CompacTape II tape cartridges with TZ30, TK50, and TK70 tape drives.
B.1.1 Labeling a Tape Cartridge Always label tape cartridges. There is a slot for the label on the front of the cartridge. See Figure B–2. The label is visible when the cartridge is in the drive. Labels or markings on any other part of the cartridge can interfere with the proper operation of the drive. Do not write on the cartridge with a pen, pencil, or other marking instrument. The labels supplied with the CompacTape II cartridges have spaces that mark the capacity of the tape cartridge.
B.1.2 Writing to and Write-Protecting Tape Cartridges CompacTape and CompacTape II cartridges have a write-protect switch that prevents an accidental overwrite of data. The system can read information on the tape regardless of the position of the write-protect switch. However, the system cannot write data to a write-protected tape.
Figure B–3 Write-Protect Switch Positions 1 2 3 ! " # MLO-010795 Write-Protect Switch Write-Enable Position Write-Protected Position Removable Storage Media B–5
B.2 Quarter-Inch Cartridge (QIC) Tapes Compatible tapes are shown in Table B–3 for the TZK10, and Table B–4 for the TZK11. Figure B–4 shows a DC6320 as an example. Table B–3 TZK10 Cartridge Compatibility Cartridge Capacity Format R/W DC6525 Up to 525MB QIC-525 R/W DC6320 Up to 320MB QIC-320 R/W Table B–4 TZK11 Cartridge Compatibility Cartridge Capacity Format R/W DC9200XL Up to 2.5 GB QIC-2GB R/W DC9200 Up to 2.0 GB QIC-2GB R/W DC9100L Up to 1.2 GB QIC-1GB R/W DC9100 Up to 1.
Figure B–4 QIC Tape 1 MLO-010796 ! Write-Protect Switch Removable Storage Media B–7
B.2.1 Guidelines for Using QIC Tapes Use the following guidelines when using QIC tapes: • Do not drop the tape. • Store the tape where the room temperature is between 10°C and 40°C (50°F and 104°F) and the humidity is between 20% and 80%. • Do not expose the tape to direct sunlight, abrasive particles, or electromagnetic fields. • Store the QIC tape in its protective container, placed on its edge, or stacked. Do not stack QIC tapes more than five high.
Figure B–5 QIC Tape Write-Protect Switch 2 3 1 ! " # MLO-010797 Write-Protect Switch Write-Enable Position Write-Protected Position Removable Storage Media B–9
B.3 Cassette Tapes (DAT) The TLZ06/TLZ07 tape drive is a 4-mm DAT DDS SCSI-2 device. It reads data from and writes data to industry-standard cassette tapes. Table B–5 lists the supported cassette tapes. Figure B–6 shows a TLZ06/TLZ07 cassette tape and write-protect switch. Table B–5 TLZ06/TLZ07 Cassette Tape Compatibility Cassette Capacity Capacity with Compression TLZ04-CA 1.3 GB Up to 2.6 GB TLZ06-CA 2.0 GB Up to 4.0 GB 4.0 GB Up to 8.
B.3.1 Guidelines for Using Cassette Tapes Use the following guidelines when using cassette tapes: • Do not drop the tape. • Store the tape where the room temperature is between 5°C and 32°C (40°F and 90°F) and the humidity is between 20% and 60%. • Do not expose the tape to direct sunlight, abrasive particles, or electromagnetic fields. • Store the cassette tape in its protective container, placed on its edge, or stacked. Do not stack cassette tapes more than five high. B.3.
Figure B–7 Setting the Write-Protect Switch on a Cassette Tape 1 3 D D igi S ata tal to ra g e 2 MLO-009352 ! " # Write-Protect Switch Write-Enable Position Write-Protected Position B–12 Removable Storage Media
B.4 Compact Discs Compact discs are used with caddy in the RRD42 (see Section B.4.1) and without a caddy in the RRD43 (see Section B.4.2). B.4.1 RRD42 Compact Disc with Caddy When you use the RRD42 compact disc drive, you insert the disc, enclosed in a caddy, into the drive. You must take the following precautions when handling discs and caddies: • Do not drop the disc or the caddy. • The shutter on the caddy, shown in Figure B–8, automatically opens when you insert it into the RRD42.
• Hold the compact disc by its edges; never touch the surface. • Use a proper compact disc cleaner to wipe the compact disc if it gets dirty. • Return the disc to its storage device when not in use. B.4.2 RRD43 Compact Disc without Caddy When you use the RRD43 compact disc drive, you insert the disc directly into the drive. You must take the following precautions when handling discs. • Do not drop the disc. • Remove the disc from the RRD43 before moving the system.
C Programming Parameters for DSSI Devices This appendix describes the console mode procedures for setting and examining parameters for DSSI devices. Note Before you reprogram DSSI devices, you should have a good understanding of DSSI architecture and VAXcluster software operation. If you do not have that understanding, you should read the VMS manuals listed in Appendix A or call your Digital service representative.
C.1 DSSI Device Parameters Seven principal parameters are associated with each DSSI device: • Bus Node ID • ALLCLASS • UNITNUM • FORCEUNI • NODENAME • SYSTEMID • DSSI NODE ID Each of these seven parameters, with the exception of the Bus Node ID, are programmed and examined using the console-based Diagnostic and Utility Program (DUP) driver utility. The Bus Node ID is physically determined by jumpers on the disk drive. A brief description of each parameter follows.
driver utility to supply values to the UNITNUM parameter and to set a value of zero to device parameter FORCEUNI. The FORCEUNI parameter controls the use of UNITNUM to override the default device unit number supplied by the jumpers. When FORCEUNI is set to a value of zero, the operating system uses the value assigned to the UNITNUM parameter; when FORCEUNI is set to a value of one, the operating system uses the value supplied by the jumpers.
Table C–1 RF31/RF35/RF36 DSSI ID Jumper Combinations DSSI ID Pin 5 Pin 3 Pin 1 0 Out Out Out 1 Out Out In 2 Out In Out 3 Out In In 4 In Out Out 5 In Out In 6 In In Out 7 In In In C.2 How VMS Uses the DSSI Device Parameters This section describes how the operating system uses the parameters to form unique identifiers for each device. Configurations that require you to assign new unit numbers for devices are also described.
Figure C–2 VMS Operating System Requires Unique Unit Numbers for DSSI Devices Allocation Class=0 Nonzero Allocation Class (Example: ALLCLASS=1) R7BUCC$DIA0 $1$DIA0 R7CZZC$DIA1 $1$DIA1 R7ALUC$DIA2 $1$DIA2 R7EB3C$DIA3 $1$DIA3 TFDR1$MIA5 $1$MIA5 R7IDFC$DIA0 $1$DIA0 R7IBZC$DIA1 $1$DIA1 R7IKJC$DIA2 $1$DIA2 R7ID3C$DIA3 $1$DIA3 R7XA4C$DIA4 $1$DIA4 R7QIYC$DIA5 $1$DIA5 R7DA4C$DIA6 $1$DIA6 * Duplicate 0 * Duplicate 1 * Duplicate 2 * Duplicate 3 * Nonzero allocation class examples with an a
C.3 Examining and Setting DSSI Device Parameters The following instructions describe how to change DSSI parameters, using the DUP driver utility. In the example procedures, the allocation class will be set to 2. 1. Enter the console mode. The procedure for programming parameters for DSSI devices from console mode requires that you issue commands to those devices at the console prompt >>>. You may enter the commands in either uppercase or lowercase letters.
Note The DUP driver examples throughout this appendix are for RF-series ISEs. The displays for the TF-series tape drive differ slightly from the RF-series displays. C.3.1 Entering the DUP Driver Utility To examine and change DSSI parameters, you must first activate the DUP driver utility by setting host to the specific device for which you want to modify or examine parameters. Use the following command for embedded DSSI.
PARAMS>SHOW ALLCLASS Parameter Current Default Type Radix --------- ---------------- ---------------- -------- ----ALLCLASS 0 0 Byte Dec B PARAMS>SET ALLCLASS 2 PARAMS>SHOW ALLCLASS Parameter Current Default Type Radix --------- ---------------- ---------------- -------- ----ALLCLASS 2 0 Byte Dec B C.3.3 Setting the Unit Number After entering the DUP driver utility for a specified device, you can examine and set the unit number for the device as follows. 1.
C.3.4 Setting the Node Name After entering the DUP driver utility for a specified device, you can examine and set the node name for the device as follows. 1. At the PARAMS> prompt, enter SHOW NODENAME to check the node name of the ISE to which you are currently connected. 2. Enter SET NODENAME SYSDSK (or enter the desired alphanumeric node name of up to eight characters). 3. Enter SHOW NODENAME to verify the new node name.
This shows the steps for changing the system ID of a specified device from the factory-supplied ID to 1402193310841 (the system ID for the replacement device is programmed to match that of the original).
>>>SHOW DSSI DSSI Bus 0 Node -DIA10 (RF73) DSSI Bus 0 Node -DIA11 (RF73) DSSI Bus 0 Node -DIA12 (RF73) DSSI Bus 0 Node -MIA5 (TF85) DSSI Bus 0 Node >>> 0 (SYSDSK) 1 (R7EB3C) 2 (R7EB22) 5 (TFDR1) 6 (*) Note You must repeat the procedures in this appendix for each device for which you want to change parameters.
Glossary The glossary defines some of the technical terms used in this manual. backup copy A copy of data stored on a disk. backup process The process of making copies of the data stored on a disk so that you can recover that data after an accidental loss. You make backup copies on tape cartridges or on another disk. binary A number system that uses two digits: 0 and 1. They are represented in system circuitry by two voltage levels, and programs are executed in binary form.
communications line A cable along which electrical signals are transmitted. Devices or systems that are connected by a communications line can share information and resources. console mode The state in which the computer is controlled from the console terminal. You can put the system in console mode by pressing the halt button on the back of the system unit. Console mode is indicated by the console prompt (>>>) on the monitor screen.
DEMPR A multiport repeater that provides eight ThinWire Ethernet drops from a single standard Ethernet connection. device The general name for any unit connected to the system that is capable of receiving, storing, or transmitting data. device name The name by which a device or controller is identified in the system. diagnostics Programs, located in read-only memory, that detect and identify abnormal system hardware operation. (See ROM.
ground A voltage reference point in a system that has a zero voltage potential. hard disk A hard disk resides permanently inside a disk drive. hardware The physical components—mechanical and electrical—that make up a system. (Compare with software.) head The part of a fixed disk drive, diskette drive, or tape drive that reads, records, and erases data. Also called read/write head. IEEE Institute of Electrical and Electronics Engineers. IEEE 802.
memory The area of the system that electrically stores instructions and data, often temporarily. memory module A printed circuit board that contains additional memory for the system. module A printed circuit board that contains electrical components and electrically conductive pathways between components. A module stores data or memory or controls the functions of a device. multiport repeater A repeater used to connect two or more cable segments.
peripheral A device that provides the CPU with additional memory storage or communication capability. Examples are disk and diskette drives, video terminals, and printers. port The name of the socket or connector at the back of the computer to which a terminal, printer, or other communication devices are connected. printer A peripheral device that provides paper copies of information stored on the system.
SIMM Single inline memory module. This refers to the physical shape of the memory module. Small computer system interface See SCSI. software Programs executed by the system to perform a chosen or required function. (Compare with hardware.) standard Ethernet IEEE standard 802.3 compliant Ethernet network composed of standard Ethernet cable as opposed to ThinWire Ethernet cable. storage medium Any device capable of recording information; for example, a diskette.
terminal An input/output device that lets you communicate with the system. Terminals are divided into two categories: video and hard-copy. terminator A connector used on one or both ends of an Ethernet segment that provides the 50-ohm termination resistance needed for the cable. ThinWire A Digital trademark used to describe its 10 base 2 (IEEE standard 802.3 compliant) Ethernet products used for local distribution of data.
Index A Activity LED location on RX23, 2–26 location on RX26, 2–26 use with RX23, 2–26 use with RX26, 2–26 Adapter EIA-232 to DEC423 (H8575-A), 4–15, 4–17 Address Ethernet, 3–11 ALLCLASS, C–2 setting, C–7 Alternative console port, 1–3 MMJ port 3, 1–3 Associated documents, A–1 Asynchronous communications options connecting to, 4–19, 4–21 DEC423 data-line-only ports, 4–19 DHW42-AA, 4–2, 4–19 DHW42-BA, 4–2, 4–21 DHW42-CA, 4–2 DHW42-UP, 4–2 Asynchronous communications port A optional port icon, 1–7 optional por
C Cables See also Extension cables associated synchronous interface standards, 4–1 BC16C-10, 4–2, 4–19 BC16E, 4–13 BC16E-nn, 4–13 BC19B-02, 4–1 BC19D-02, 4–1, 4–23 BC19E-02, 4–1 BC22F-nn, 4–15 BC29J-06, 4–2, 4–21 breakout, 4–2, 4–21 connecting ThinWire cable to system unit, 3–4 DEC423, 4–17, 4–19 DEC423 cables, 4–13 SCSI cable connection, 4–9 SCSI cables maximum length, 4–6 transceiver, 3–8 Caddy for compact discs, 2–27 inserting into RRD42, 2–32 loading compact discs, 2–29 opening, 2–30 ordering spares, 2–
Compatible drives CompacTape/CompacTape II, B–2 Configuration memory, 4–1 Configuration display, 4–7 Connectors DEC423, 4–15, 4–17 EIA-232, 4–15 Console mode returning to, 1–3 Console port, 1–3 alternative, 1–3 MMJ port 0, 1–3 Console terminal, 1–2 Controls locations, 1–2 TZ30, 2–3 Cover system unit, 2–2 D DEC423 asynchronous data-line-only communications, 4–2, 4–19 connecting to MMJ ports, 4–13 earth drain wire, 4–13 grounding pillar, 4–13 MMJ ports, 4–2, 4–19 peripherals, 4–13 to EIA-232 adapter (H8575-A
DUP driver utility, C–2, C–6 entering, C–7 exiting, C–10 E Earth drain wire MMJ ports, 4–13 EIA-232 asynchronous, 4–2, 4–21 synchronous, 4–1, 4–23 to DEC423 adapter (H8575-A), 4–15, 4–17 V.24, 4–1, 4–21, 4–23 EIA-232 port See Asynchronous modem control port EIA-232/V.24, 4–2 EIA-422/V.11, 4–1 EIA-423/V.
G Grounding pillar, 4–13 H Halt button icon, 1–7 location, 1–3 use, 1–3 Hard disk, 2–42 Hardware options, 4–1 to 4–24 Harmonica (H3104), 4–2, 4–19 Headphone socket location on RRD42, 2–28 location on RRD43, 2–35 use with RRD42, 2–28 use with RRD43, 2–35 I Icons on system unit, 1–7 Installation guidelines expansion boxes, 4–6 Integrated storage element (ISE) and support on DSSI bus, 4–4 Interface standards EIA-232/V.24, 4–1, 4–2, 4–21 EIA-422/V.11, 4–1 EIA-423/V.
MS44-DC memory module, 4–1 MS44L-BC memory module, 4–1 N Network coordinator, 3–1, 3–2, 3–6, 3–11, 3–12 Network select switch icon, 1–7 location, 1–3 setting for standard Ethernet, 3–2 setting for ThinWire Ethernet, 3–2 use, 1–3 Networks, 3–1 to 3–19 installation failure, 3–11 Node name Ethernet, 3–11 NODENAME, C–3 setting, C–9 Null modem extension cables, 4–2, 4–15 O On/off switch location, 1–2 use, 1–2 Operate lever location on TZ30, 2–4 use with TZ30, 2–6 Operating system shutting down, 3–12 Optional a
QIC tapes (cont’d) TZK10 compatible, B–6 TZK11 compatible, B–6 use and care of, B–6 write enabling, B–8 write-protect switch, B–6, B–8 write-protecting, B–8 writing to, B–8 Quarter-inch cartridge tape See Cassette tapes See QIC tapes R Related documents, A–2 Removable media devices accessing, 2–2 cover, 2–2 RRD42, 2–27 to 2–34 accessing, 2–2 busy LED location, 2–28 busy LED use, 2–28 compact disc care and handling, B–13 compact disc drive, 2–27 disc caddy care and handling, B–13 eject button location, 2–28
SCSI expansion boxes checking connections, 4–12 connecting, 4–5, 4–11 connecting cables, 4–9 connection guidelines, 4–6 preparing system unit for, 4–8 SCSI IDs controller ID, 4–7 selecting available IDs, 4–7 SCSI port icon, 1–7 SCSI terminator, 1–4, 1–5, 4–6 connecting, 4–9 removal, 4–8 SHOW commands, C–6 SHOW CONFIG command, 4–7 SHOW DSSI command, 4–12 SHOW ETHERNET command, 3–11 SHOW Q-BUS command, 4–12 SHOW SCSI command, 4–12 Software installing with tape cartridges, B–4 Standard Ethernet connecting to,
Tape cartridges (cont’d) removing from TZ30, 2–10 use and storage of, B–1 write-protect switch, B–4 write-protecting, B–4 writing to, B–4 Tape drives TLZ06 cassette tape drive, 2–18 TLZ07 cassette tape drive, 2–18 TZ30 tape drive, 2–3 TZK10/TZK11 QIC tape drive, 2–12 Tape/activity LED location on TLZ06, 2–18 location on TLZ07, 2–18 use with TLZ06, 2–18 use with TLZ07, 2–18 Terminal settings, 1–6 Terminator connecting the SCSI terminator, 4–9 SCSI, 4–6 SCSI terminator removal, 4–8 ThinWire Ethernet, 3–4 Thin
TZK10/TZK11 (cont’d) eject button use, 2–12 inserting QIC tapes, 2–14 QIC tape drive, 2–12 removing QIC tapes, 2–16 TZK11 cleaning the heads, 2–41 U UNITNUM, C–2 setting, C–8 Unload button location on TLZ06, 2–18 location on TLZ07, 2–18 location on TZ30, 2–4 use with TLZ06, 2–18 use with TLZ07, 2–18 use with TZ30, 2–6 V VAX 4000 Model 105A, 1–5 differences, 1–5 Volume control location on RRD42, 2–28 location on RRD43, 2–35 use with RRD42, 2–28 use with RRD43, 2–35 W Write-enable write enabling cassette t
Reader’s Comments VAX 4000 Model 105A/106A Operator Information EK–513AA–OP. B01 Your comments and suggestions help us improve the quality of our publications. Thank you for your assistance.
d Do Not Tear – Fold Here and Tape TM BUSINESS REPLY MAIL FIRST CLASS PERMIT NO. 33 MAYNARD MASS.