
Technical data


VAX/VAXserver 4000-300, -400, and -500 Conversion
5.6 Removing and Replacing the BA440 Backplane
5.6.4 Replace the Outer Shell
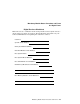
To replace the outer shell:
1. Pull the shell over the enclosure and up to the front edge bracket as shown
in Figure 5–4.
2. Install the hinge bracket with the five screws that were previously
removed.
Install all screws loosely. Tighten the screws during door alignment.
3. Install the screws in the second and fourth hole from the top and into the
edge of the plastic side panel (before installing the latch bracket). These
screws must be tightened down now.
4. Install the latch bracket to the right front edge by installing the remaining
three self-tapping screws and the 6-32 screw. The 6-32 screw is the
aligning screw, therefore, install this screw first.
5. Install the internal DSSI and SCSI bus cables (upper left of backplane).
6. Slide the fan draw in and feel the drawer lock into the backplane connector.
Tighten screws at 9 in. lbs.
7. Install the connector end of the SCP cable into the backplane.
8. Reseat all ISEs into the original storage slots, and tighten both screws at
9 in. lbs.
9. Install each front panel (one screw at the top) with the cable attached. Be
sure the front panel is attached to the proper ISE. The bus node ID plug
could be affected.
10. Insert the tape drive into its designated right side bus slot.
Caution
If the tape is a TK-series, be careful not to damage the controller cable
while seating the drive.
11. Tighten both screws at 9 in. lbs.
VAX/VAXserver 4000-300, -400, and -500 Conversion 5–15