
Owner`s manual


You must take special precautions when inserting the KA65A module in or
removing it from the XMI card cage.
1. Do not let the module touch other modules or cables when you are
putting it in or taking it out of the XMI card cage.
2. When you swap out a module, temporarily place it in an unused XMI
slot, if one is available, or put it in an ESD box or on an ESD mat before
you install the new module.
An unused XMI slot is the best place to leave a module that is being
swapped out until it can be placed in the ESD box.
CAUTION: If you temporarily leave a module in an unused XMI slot,
be sure to remove the module before powering up the system.
If you put the module on an ESD mat, make sure the mat is on a stable,
uncluttered surface, with side 1 of the module facing up (the side with
the heat sinks). Do not put it on the top of the system cabinet. And
never slide the module across any surface. The leads on the components
are fragile and can be damaged by contact with fingers or any surface.
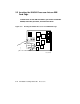
3. Hold the XMI card cage handle while removing or inserting the module.
If it is not held in place, the handle can spring down and damage the
module.
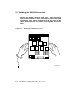
4. When inserting the module in the card cage, grasp it as shown in
Figure 5–2, being careful not to touch any 25 mil devices, and slide
it slowly and gently into the slot.
5. Make sure that the module is seated firmly in the XMI slot and engaged
with the XMI backplane. Then lower the lever to close the connector.
6. When all new modules have been installed and oldmodules repositioned
(if necessary), note the new configuration, and replace the clear door in
front of the XMI card cage.
NOTE: If you are doing a full power and packaging upgrade (H9657-CU
kit), the installation will entail changing DWMBA-A modules in the XMI
card cage to DWMBB-A modules.
Installing the KA65A Processor 5–5