
User guide


9
impact printer
Installation
PAPER
ROLL
Install (replace) the Paper Roll as follows:
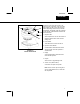
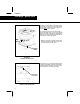
Pull the Access Panel ( see FIGURE #97 ) for-
ward and lift the Keyboard. A self--contained
bracket / spring will retain it in position.
Remove the old Paper Roll Core.
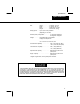
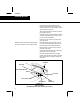
Install the new paper roll between the retainers
so that the paper feeds from the top of the roll
as shown in ( FIGURE #99 ).
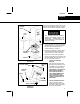
Route the leading edge of the paper through the
Paper Feed Slot until the paper appears at the
back of the printer.
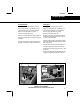
Feed the paper into the Printer ( Reference #1 ).
The Printer will detect the paper and feed out
approximately 3 inches of paper and stop. ( Ref-
erence #2 ).
Lower the the Keyboard, while feeding the lead-
ing edge of the paper through the Cutoff Slot.
FIGURE #99
PRINTER PAPER / RIBBON
(RETAINER BRACKET NOT SHOWN FOR CLARITY)
PRINTER
RIBBON
Install (replace) the Paper Ribbon as follows:
Pull the Access Panel ( see FIGURE #97 ) for-
ward and lift the Keyboard. A self--contained
bracket / spring will retain it in position.
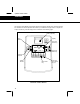
Observe the Printer Mechanism.
Remove the Printer Ribbon by lifting straight up.
Carefully install the ribbon to prevent damage to
the ribbon.
Lower the the Keyboard, while feeding the lead-
ing edge of the paper through the Cutoff Slot.
Paper Roll
Paper Feed Slot
Paper Feed Exit
1
2
Printer
Ribbon