
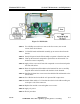
Specifications


5/9/13 888-2857-001 5-9
WARNING: Disconnect primary power prior to servicing.
Section 5 Maintenance and Alignments
Platinum VAX-C Series
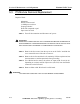
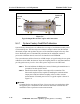
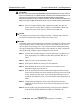
Figure 5-4 PS Module
STEP 6 Use a Phillips screwdriver to remove the four screws (one in each
corner) from the PS board.
STEP 7 Lift the PS board and heatsink assembly up to remove them from the
chassis.
STEP 8 Gently lift upward on the PS assembly to separate it from the heat sink.
STEP 9 Clean up the heat sink compound or pad residue on the heatsink. Use
alcohol to remove completely.
STEP 10 Apply a thin, even coat of heat sink compound or a new heat sink pad to
the heat sink surface.
STEP 11 Place the replacement PS module on the heatsink. Be sure to carefully
align the holes in the PS module with the holes in the heatsink.
STEP 12 Install and tighten four corner screws that hold the PS and heatsink to the
chassis base.
STEP 13 Use a WAGO tool to install the AC input and DC output wires.
STEP 14 Attach ribbon cable to J1. Note that the red wire in the ribbon cable goes
to the pin 1 side of the connector.
STEP 15 Replace PA module cover and tighten cover screws.
STEP 16 Apply AC power.
STEP 17 End of procedure.