
Instruction manual
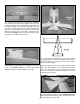

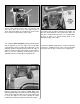

❍ 1. For this step you will need the following items as
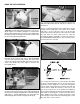
shown in the photograph above.
#1 Fuselage (1)
#2 Wing Mounting Dowels (2)
#3 2.6mm x 8mm Wood Screws (4)
#4 Molded Wing Dowel Covers (4)
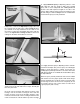
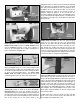
❍ 2. Locate the four positions for the 7mm wing dowel
holes by gently pressing the covering in the areas on the
fuselage sides just below the wing saddles. These
positions can be seen from the inside of the fuselage.
Carefully cut the covering material from the holes using a
sharp hobby knife.
❍ 3. Note: One of the wing mounting dowels is 3mm
longer. Place the longer one in the position to the front of
the fuselage.
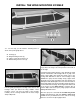
Insert both wing mounting dowels so they protrude an equal
amount on both sides of the fuselage. Mix ¼ oz. [7ml] of 30-
minute epoxy. Apply glue around the dowels next to the
fuselage and slide them in and out of the fuselage to help
distribute the epoxy into the fuselage. Using a paper towel
spread the excess epoxy around the ends of the dowels. This
will fuelproof and add strength to the wood. From the inside of
the fuselage, apply more epoxy around the dowels where they
meet the sides of the fuselage. These wing dowels will be used
as the anchors for the rubber bands to hold the wing in
position. Wipe off all excess epoxy using a paper towel and
rubbing/denatured alcohol.
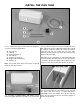
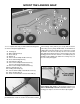
After the epoxy has cured add the molded wing dowel
covers and attach them with four 2.6mm x 8mm wood
screws into the pre-drilled holes in the ends of the wing
dowels as shown in the photograph above.
13
INSTALL THE WING MOUNTING DOWELS