SD-9 04W OWNER' S MANUAL
VALOR ------------------------------------------------------MULTIMEDIA--Table of Contents Thank you for purchasing a Valor Multimedia product. We hope you will find the instructions in this user manual clear and easy to follow. If you take a few minutes to look through this user manual, you will have a better understanding of how to use all of the features on this infotainment system which will allow you to have maximum enjoyment.
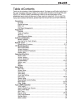
VALOR ---MULTIMEDIA------------------------------------------------------Auto Store (AS) · · · · · · · · · · · · · · · · · · · · · · · · · · · ·· · · · · · · · · · · · · · ·· ·· · · · · · · · · · · · · · · · · · · · · · · · · · · · · · · · · · · · · · · · · ·25 Program Scan (PS) · · · · · · · · · · · · · · · · · · · · · · · · · · · · · · · · · · · · · ·· ·· · · · · · · · · · · · · · · · · · · · · · · · · · · · · · · · · · ·· · · · · · ·25 OX and LOC Stations Signals·········································
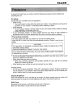
VALOR -------------------------------------------------------MULTIMEDIA--To prevent the risk of injury or accident, read the following precautions before installing and operating the unit. On Safety Comply with your local traffic rules and regulations. • While driving r:r You must not watch a video while the vehicle is in motion. It may distract you and cause an accident. Park your vehicle in a safe place before watching a video.
VALOR ---MULTIMEDIA------------------------------------------------------Playable Discs The following types of discs/files are compatible: • CD-ROM (ISO), CD-R, CD-RW, DVD+RIRW, DVD-RIRW • CD-DA, DVD Video • MP3 data • WMAdata • JPEG images • XVID Video • AVI format • MPEG 1&2 formats The following types of discs/files are not compatible: • WMA files that are protected by DRM (Digital Rights Management) • WMA lossless format • Discs recorded with Track At Once or packet writing • MP3 PRO format • MP3 playl
VALOR -------------------------------------------------------MULTIMEDIA--Read all of the instructions below before beginning your installation. We recommend that you have your unit installed by an experienced car audio/navigation system installer (MECP certified). IMPORTANT NOTICE: It is very important that you read the WARNINGS and NOTES in this manual to ensure correct installation and use of your unit.
V1lLOR ----MULTIMEDIA-------------------------------------------------------Disconnecting the Battery To prevent a short circuit during installation of this unit, please turn off the ignition and remove the negative (-) battery cable prior to starting the installation. NOTE: If the unit is to be installed in a car equipped with an on-board drive or navigation computer, do not disconnect the battery cable. If the cable is disconnected, the computer memory may be lost.
VALOR ------------------------------------------------------MULTIMEDIA--- Controls and Indicators Buttons Operation CD Flip down touch screen @ Eject Press to eject disc. @ Bluetooth Microphone @ Source Press to change the source. ® Power offNOL Press and hold to turn off the unit. Press once to power on when the unit is turned off. Short press while unit is on to mute the volume. Rotate to adjust the volume. ® Menu Press to enter MAIN menu, press again to return to previous source.
V1lLOR ----MULTIMEDIA-------------------------------------------------------Key Areas for the Touch Screen The key areas are outlined below, for DVD, VCD playback mode and so forth. A- Return to MAIN MENU B- Select previous chapter C - Select next chapter D- Display the on-screen controls, and different mode displays different menu.
V1lLOR -------------------------------------------------------MULTIMEDIA --- Remote Control Remote Control Functions Name Ref# Signal Function Power Eject Mute SRC Numeric button VOL up VOL down Information GOTO search 1 2 3 4 Q) Stop/Band 10 Select ESC Menu Picture 11 12 13 14 15 16 17 Turn the power on/off Eject Disc Toggle on/off audio output Select source Directly access certain chapter I track I preset station in current band Increase the volume Decrease the volume Display playing informa
VALOR ---MULTIMEDIA------------------------------------------------------... ~ buttons Title 18 TITLE Go back to title while playing DVD Root 19 ROOT Enter the main menu of the disc Turn on PBC while playing DVD Repeat 20 Q Repeat playback for current chapter Next 21 Previous 22 ... ... Fast Reverse 23 ...
VALOR -------------------------------------------------------MULTIMEDIA--Rear Camera Mode When the vehicle is placed in "Reverse", and a rear camera is connected to the unit, the monitor will automatically switch to the camera input source. Please make sure the reverse wire is properly connected. Screen Adjustment "COLOR" "CONTRAST" and "BRIGHTNESS" can be adjusted. Screen Adjustment Procedure 1.
VALOR ----MULTIMEDIA-------------------------------------------------------Power On I Off Press the POWER NOL button to turn the unit on. You can also turn on the unit by pressing the button ( C!> ) on the remote. Press and hold the POWERNOL button on the front panel or press the POWER button ( ) on the remote to power off the unit. Source Selection Press the SRC Button on the front panel to change sources: TUNER, DISC, CARD, FLASH DRIVE, BT-TEL, F-AUX, R-AUX, SETUP, and STANDBY.
YI1LOR ---------------------------------------------------------MULTIMEDIA--Balance & Fader You can adjust the sound from left to right and from front to rear. Loudness This feature will increase the bass & treble level at lower volumes. NOTE: The Bass and Treble levels are only adjustable when EQ is on "User" mode. The Loudness function increases the sound ranges from low level to high level.
VALOR ----MULTIMEDIA-------------------------------------------------------Standby 1. On the Main menu press the Standby icon. 2. In the standby mode, the screen will turn off while the audio output is still active. 3. In the standby mode, touch the screen or press the Menu button to return the screen to the normal stage.
V1lLOR --------------------------------------------------------MULTIMEDIA--- Setup Menu Main Menu There are three methods to access the MAIN menu. ·Press the MENU button on the front papel. ·Press the MENU button on the remote control. ·Touch the A area (Top left corner) on the touch-screen. Note: Touch screen must be used to select menu and adjust settings. The remote control four directional pads cannot be used to select the features on the screen.
V1lLOR ----MULTIMEDIA---------------------------------------------------------Brightness Use this setting to adjust the proper brightness for your needs. Contrast Use this setting to make adjustment to the sharpness of the picture. Color Use this setting to adjust the color tone of the picture.
VALOR -------------------------------------------------------MULTIMEDIA--Date Setting Press the Date icon on the SETUP menu, and then select one of the following options Month/Day/Year to make the date adjustment. Time Setting Press the Time icon on the SETUP menu, and then select the hour or minute to make the time adjustment. Clock Mode Setting Press the Clock Mode icon on the SETUP menu, and then select "12 Hr" or "24 Hr" modes.
V1lLOR ----MULTIMEDIA------------------------------------------------------DVD Setting Press the DVD icon while on the SETUP menu. Selecting a Setting for Adjustment Select one of the three setting options to make any adjustment. Mode Select one of the three setting options to make any adjustment. This will allow you to adjust the movie image to best fit the screen. Aspect Ratio 4:3=Standard Format 16:9=Letterbox Format .
VALOR ---------------------------------------------------------MULTIMEDIA--Parental Control In order to change the parental password, you need to enter this manufacture default password 8888. Warning: If you decide to set your own password, make sure to write it down on the user manual or on a piece of paper and store it somewhere safe that you won't lose it because once a new password is set, you cannot use the default password anymore. System Setting Press the SYSTEM icon while on the SETUP menu.
V1lLOR ----MULTIMEDIA---------------------------------------------------------Steering Wheel Control Setting Press YES to enter Steering Wheel Control setting. 1. Press Learn to begin the steering wheel control programming process. 2. Depend on the vehicle steering wheel control wiring configuration, the user can use mode one or mode two to program the commands function. 3. Press one of the function icon on the list to start the learn command. 4.
VALOR ---------------------------------------------------------MULTIMEDIA--TS Calibration (Touch Screen Calibration) If your touch control seems to be a little off. You can go into this setting to calibrate the touch control. If you select yes, you will see a (+) icon on your screen that you will need to press with your finger. Once the calibration command has been recognize, the (+) icon will move to another part of the screen. Once you have calibrated all of the points.
V1lLOR ----MULTIMEDIA------------------------------------------------------Beep You can turn the Beep sound ON or OFF. TFT You can set the opening of this screen to "ON" (auto open), "OFF" (not open automatically) or "MANUAL" (only open & close when you want it to). Other Settings Press the OTHER icon while on the SETUP menu. Selecting a Setting for Adjustment Select one of the three setting options to make any adjustment. Soft Info (Software Information) This will show you the unit software version.
R ------------------------------------------------------MULTY1lLO IMEDIA--Radio Region This will allow you to change the AM/FM Tuner to work in that country. (Preset USA). Language You can change the language to best serve your needs. (Preset English) SETUP Soft Info 11:28 AM J_[ j Osd Language • --- Audio Language Radio Region Language j DVD Language ; .
VALOR ----MULTIMEDIA--------------------------------------------------------- . : Press to change between FM and AM. II: Press to seek down. Touch and hold for 3 seconds to scan the previous station. II: Press to seek up. Touch and hold for 3 seconds to scan the next station. lJNt Press to scan and store all stations in current band automatically. • : Press to scan the stations in the 12 preset channels in the current band . • : Press to activate the Local function in AM/FM tuner or the OX function .
VALOR ---------------------------------------------------------MULTIMEDIA--tuning frequency one step at a time. Using Preset Stations 12 preset buttons are used to save your favorite stations for each band. First 4 saved stations (P 1-P4) for the current band appear on the screen. You can touch the arrow buttons II or II on the screen to see the other 4 stations. Saving a Station 1. Select a band (AM/FM), and then select a station. 2.
V1lLOR ---MULTIMEDIA------------------------------------------------------NOTE: When properly installed, DVD video cannot be displayed on the main screen unless the parking brake is applied. If you attempt to play a DVD while the vehicle is in motion, the screen will display "caution" with a blue background. Rear video output, (if used) will operate normally. Insert/Eject Disc Inserting a Disc When inserting a DVD disc, DVD mode will be enabled and disc will begin to play.
V1lLOR ---------------------------------------------------------MULTIMEDIA--. : Press to return to DVD main menu . : Press to select Title, Chapter, and Time. II: Press to enter EQ setup. Controlling Playback Stop Playback Press the stop button a •l on the screen or press the (BAND) button on the remote control to stop the DVD playback; press the play/pause button • remote control to resume play.
V1lLOR ---MULTIMEDIA------------------------------------------------------Track Search Time -- -- -Track --I-- Disk Search Time -- -- -Track --I-- VCD Track Search Time - Go to specific time in the current track Track - Go to specific track VCD Disc Search Time- Go to specific time on disc Track - Go to specific track 3. Enter a Time/Track number into the field using the numeric keypad on the remote control or on the screen. 4.
Y1lLOR ---------------------------------------------------------MULTIMEDIA--Changing Subtitle Language If you are watching a disc that contains multiple languages subtitles, press the SUBT button on the remote control to choose the language in which you would like the subtitles to appear. You can also touch area E, and then press this • button.
V1lLOR ---MULTIMEDIA----------------------------------------------------VCD Playback Information The following information is displayed at the middle of the screen during VCD playback: Track 2.115 ~
YI1LOR -------------------------------------------------------MULTIMEDIA--Instructions for Insert/Eject, Play/Pause, Stop Playback, Track Selection, Fast Forward/Fast Reverse, Scan, and Random Play are the same for DVD, CD and MP3 operation. Please see the DVD Player Operation section for information about these topics.
V1lLOR ---MULTIMEDIA------------------------------------------------------Playing CD Files After inserting a CD disc, a file will play in the sequence of the directory. During playing back, you can press the numeric button on the remote control or press a track that you would like to play. MP3/WMA Discs This player allows you to playback MP3/WMA files recorded on CD-R, CD-RW, DVD+RIRW and DVD-RIRW.
VALOR ---------------------------------------------------------MULTIMEDIA--- Accessing the Flash Source 1. To switch to FLASH source, press the Menu button on the front panel and press the Flash Drive icon or press the (SRC) button on the remote control until the FLASH appears at the top of the screen. NOTE: Make sure the USB cable is connected with a flash drive device. 2. Select the Main menu, and then touch the FLASH DRIVE icon to select FLASH as your source.
V1lLOR ---MULTIMEDIA------------------------------------------------------Accessing CARD Source 1. To switch to CARD source, press the Menu button on the front panel and press the CARD icon or press the (SRC) button on the remote control until the CARD appears at the top of the screen. NOTE: Make sure the SO card is inserted properly into the unit. 2. Select the Main menu, and then touch the CARD icon to select CARD as your source.
V1lLOR -------------------------------------------------------MULTIMEDIA--Before using the Bluetooth Before using the Bluetooth, it is necessary to perform the following steps. 1. Go to the Main menu and select the "SET UP" icon, select the "BASIC icon" option and select "Biuetooth", make sure the "On" option is highlighted to activate the Bluetooth feature. 2. Pair your mobile phone to this unit (refer to the "Pairing" operation).
YI1LOR ----MULTIMEDIA-------------------------------------------------------Bluetooth User Interface Dial Interface Press and hold the "Phonebook" icon lrl for 2 seconds on the right side of the Bluetooth screen, and then your contact list from your phone will display on the screen. Press one of the following icons received calls • • missed calls • . . . to access a listing of the following categories.
VALOR --------------------------------------------------------MULTIMEDIA--A2DP Pairing Access the Bluetooth "Setup" screen and select "Pair Mode" to "Yes", then select "Phone" and a "Waiting to pair" message will be displayed on the screen. Now you can begin pairing a phone to the unit. Once your Bluetooth device has received the signal from the radio, then you will see the Bluetooth device name "VALOR" displaying on the screen.
V1lLOR ---MULTIMEDIA------------------------------------------------------Making a Phone Call There are four ways to make a phone call from this unit: 1. You can enter the phone number using the numeric keypad on the screen of the unit and press the green "pick up" button . . on the screen or on the remote control press the "OK" button to make a phone call. (must be connected to the Bluetooth) 2. You can use the contact listing to make a phone call by selecting one of the contacts. 3.
VilLOR -----------------------------------------------------MULTIME DIA--Camera Mirror To access the reverse image on the back-up camera. Press the bottom left corner of the screen.
V1lLOR ----MULTIMEDIA-------------------------------------------------------- Problem I Cause Corrective Action GENERAL Radio Fuse blown Car battery fuse blown Unit will not power on Illegal operation Battery depleted Remote control does not function Battery installed incorrectly Improper audio output connection Volume set too low Improper "MUTE" connection No/low audio output Poor sound quality or distortion Unit resets itself when engine is off Speakers damaged Heavily biased volume balance Speak
VALOR -------------------------------------------------------MULTIMEDIA--Disc is warped or scratched Disc goes not play back Disc is dirty or wet lncom_Q_atible disc is used Disc rating exceeds Parental Lock rating limit Disc region code is not compatible with unit Disc is inserted upside down Image blurred, Disc is illegally copied distorted, or dark PBC cannot be used PCB is not available on the disc during VCD playback No repeat or PCB is on searching while playing VCD MP3 Interruption occurred Disc
V1lLOR ---MULTIMEDIA------------------------------------------------------Remote control Remote control does not function Battery is covered with insulation tape Battery depleted Battery installed incorrectly Pull out the insulation tape Re_place battery_ with new one Remove battery and install correctly. 1. When using the remote for the first time, you must pull out the insulation tape. 2. Remove the battery if the remote control is not used for a month or longer.
VALOR -------------------------------------------------------MULTIMEDIA--Install the battery Keep the battery ( +) side facing up Insert the battery holder NOTE: Only use one (CR2025 3V) lithium battery. If battery is incorrectly replaced it may explode. Replace only with the same or equivalent type of battery. Do not recharge, disassemble, heat or dispose of the battery in fire. Keep batteries away from children to avoid the risk of accident. Suggestions 1.
V1lLOR ---MULTIMEDIA----------------------------------------------------Main Amplifier Power Output: 45 watts X 4 channels into 4-ohms @ < 1Oo/o THD+N Signal to Noise Ratio: 70d8 below reference. (Reference: 1 watt, 4-ohms) Frequency Response: 20 Hz to 20 kHz, -3d B. Aux input used as source reference Reference Supply Voltage: 14.4VDC DVD/CD Player Compatible formats: DVD-R, DVD-RW, DVD+R, DVD+RW, CD-R, CD-RW, CD-DA, HDCD, SVCD, VCD.
VALOR -------------------------------------------------------MULTIMEDIA--General Auxiliary Input impedance: 1Ok Power Supply: 10.5 to 16V DC, negative ground Fuse: 10-amp, mini ATM type DIN chassis dimensions: 7" X 7" X 2" (178mm x 178mm x50mm) * Specifications subject to change without notice.
VJlLOR -MULTIMEDIA Accessory List Description Image QTY I Frame \ USB cable <[!t Power hamess ... r , Av cable Remote control ~ User manual - Detachable Box EJ - Warranty card Mounting bar/screws ',""~."·. ., _...
VIlLOR MULTIMEDIA 18061 Arenth Avenue City of Industry, CA 91748 888-588-2567 www.3valor.com Note: 1) Manufactured under license from Dolby laboratories.Dolby and the double-D symbol are trademarks of Dolby laboratories. 2) Changes or modifications to this unit not expressly approved by the party responsible for compliance could void the user's authority to operate the equipment. 3) This equipment complies with FCC RF radiation exposure limits set forth for an uncontrolled environment.
SD-904W Multimedie Wiring Diagram WHITE II II REO 11 1 - l l<::i ll I REO 111- l l!:l ll Ill WH ITE II II lll <::i ll VUI!""V I lll!:l lll llllll BLUE I l<:i lll II II YELLOW ll<::illl II II YELLOW ~DREAR OUTPUT VIDEO ~o ~'=} " BLACK WHITE BLACK ~ RED YELLOW FM/AM ANTENNA GROUND you~: ,~ - i' i: ;;; ' - ""' ~ equipment ~nd vehicle. Installation by an experienced technician is recommended, <;}j _, -;; ,. :.
Place Postage Here VilLOR MULTIMEDIA Valor Warranty Validation Dept 18061 Arenth Ave City of Industry.
VIlLOR MULTIMEDIA ONE YEAR LIMITED WARRANTY Valor Multimedia hereby warrants to the original retail purchaser of this product that should this product or any part thereof, under normal use and conditions, be proven defective in material or workmanship within one year parts and labor from the date of original purchase, such defect(s) will be repaired or replaced with reconditioned product (at Valor Multimedia's option) for parts and repair labor.