
Technical data
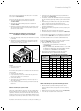

Adapting the boiler to the heating installation
48 Installation and maintenance instructions ecoTEC plus 0020116700_06
11
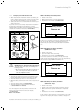
also explained by the plain text display "DHW mode: Burner
on".
S.24
DHW mode
Burner on
Back
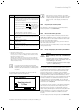
10.11 Display during cylinder charging (VU boilers only)
> If you have connected the controller for the heating
installation using a two-wire eBUS line, then set the hot
water temperature at the boiler to the maximum possible
temperature (¬table11.1).
> Adjust the target temperature for the connected domes-
tic hot water cylinder to the controller.
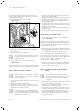
10.13 Final flush of the heating system ("hot")
> Operate the appliance until the boiler and the heating
system are up to temperature.
> Check the heating system for leaks.
> Connect a hose to the drain valve located at the lowest
position of the heating system.
> Shut off the boiler, open the drain valve and all purging
valves on the radiators and allow the water to flow out of
the heating system and the boiler quickly and fully.
> Close the drain valve.
> Fill the heating system again with water as described in
¬section10.7.3.
> Re-fill the system until the system design pressure of
0,1MPa (1,0bar) is attained. (The actual reading on the
digital pressure gauge should ideally be 0,05MPa (0,5
bar) plus an additional pressure corresponding to the
highest point of the system above the base of the boiler
– 10m head equals an additional 1bar reading on the
pressure gauge. The minimum pressure should not be
less than 0,1MPa (1bar) in any installation.) If the system
is to be treated with an inhibitor it should be applied at
this stage in accordance with the manufacturer’s instruc-
tions. Further information can be obtained from Sentinel,
Betz Dearborn Ltd., Tel: 0151 420 9595, or Fernox, Alpha–
Fry technologies. Tel: 0870 8700362.
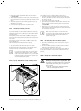
> Refit the boiler casing (¬section4.7).
> Attach the bottom cover to the boiler by sliding the front
edge of the cover into the lip at the bottom front edge of
the appliance chassis.
> Carefully push the rear of the bottom cover upwards
until the spring retaining clips engage at the side of the
appliance. It may be necessary to adapt the bottom
cover by removing the easy break sections.
11 Adapting the boiler to the heating
installation
The installation assistant is started when the boiler is
switched on for the first time (¬section10.2).
If you have already filled the heating installation and termi-
nated the installation assistant, but wish to set the most
important system parameters again, you can also call up
the "Appliance configuration" menu point.
Menu ¬ Installer level ¬ Appliance configuration
All of the settings for more complex systems can be found
in the diagnosis menu.
Menu ¬ Installer level ¬ Diagnosis menu
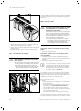
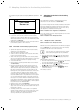
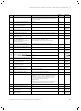
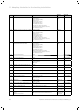
11.1 Diagnosis codes – Overview
Menu ¬ Installer level ¬ Diagnosis menu
With the use of the parameters that are marked as adjusta-
ble in ¬table11.1, you can adapt the boiler to the heating
installation and the needs of the customer:
i
You can enter your settings in the last column
after setting the system-specific parameters.
> Press the minus button
or the plus button
to switch between the displayed diagnosis
codes.
With modifiable parameters:
> Press the right selection button
("Selection")
to select the parameter to make a change.
> Press the minus button
or the plus button
to change the current setting.
> Press the right selection button
("Ok") to
confirm the change.
The change is saved.