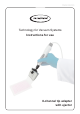
page 1 of 29 Technology for Vacuum Systems Instructions for use 8-channel tip adapter with ejector
page 2 of 29 After sales service: Contact your local dealer or call +49 9342 808-5500. Trademark index: VACUU•LAN® (US-Reg.No 3,704,401), VACUU•BUS®, VACUU•CONTROLTM, chemistry-HYBRIDTM, Peltronic®, TURBO•MODETM, VARIO® (US-Reg.No 3,833,788), VARIO-SPTM, VACUUBRAND® (US-Reg.No 3,733,388) and also the shown company logos are trademarks of VACUUBRAND GMBH + CO KG in Germany and/or other countries.
page 3 of 29 Contents Safety information!.............................................................. 4 Important information!.......................................................................... 4 General information.............................................................................. 6 Intended use........................................................................................ 6 Ambient conditions...............................................................................
page 4 of 29 Safety information! Important information! + Keep this manual complete and accessible to personnel at all times! + Read this manual carefully before installing or operating the equipment. Observe the instructions contained in this manual. + Do not modify the equipment without authorization. NOTICE This manual is an integral part of the equipment described therein. It describes the safe and proper use of the equipment.
page 5 of 29 ➨ DANGER indicates a hazardous situation which, if not avoided, will result in death or serious injury. + WARNING indicates a hazardous situation which, if not avoided, could result in death or serious injury. NOTICE • CAUTION indicates a hazardous situation which, if not avoided, could result in minor or moderate injury. NOTICE is used to address practices not related to personal injury.
page 6 of 29 General information ☞ Read and comply with this manual before installing or operating the equipment. ☞ Before operating the equipment read and comply with the section ”Cleaning and decontamination”! NOTICE Remove all packing material, remove the product from its packing-box and inspect the equipment.
page 7 of 29 Ambient conditions • The systems are designed for ambient temperatures during operation between +10°C and +40°C. Check the maximum temperatures.
page 8 of 29 Safety during operation ➨ Ensure that while operating the device no persons can be endangered. ➨ Wear personal protection equipment. ➨ Comply with requirements when using infectious liquids, pathogenic germs, toxic, radioactive or aggressive substances. ➨ Prior to operation check all relevant safety and health requirements and determine the applicability of regulatory limitations prior to use if necessary. ➨ Comply with material safety data sheets and notes on safe use of the manufacturer.
page 9 of 29 Maintenance and repair ➨ ����������������������������������������������������� Attention: The device might be contaminated with noxious or otherwise dangerous substances that have been aspirated during operation. Ensure that the device is decontaminated before maintenance. ☞ Take adequate precautions to protect people from the effects of dangerous substances if contamination has occurred. Wear appropriate safety-clothing when you come in contact with contaminated components.
page 10 of 29 Technical data 8-channel tip adapter with ejector Type Permissible ambient temperature storage / operation °F °C 14 to 140 / 50 to 104 (-10 to +60 / +10 to +40) Autoclaving 121°C and 2 bar absolute (1 bar overpressure) Adapter for pipette tips 2 - 200 µl and 5 - 300 µl Distance between nose cones mm 9 Dimensions L x W x H approx. mm 80 x 42 x 116 Weight approx.
page 11 of 29 System parts Position Designation 1 nose cone with V-ring 2 ejector 3 screw cap 3 2 1
page 12 of 29 Use and operation Unpack the equipment. Scope of delivery 1 - 8-channel adapter (1) - bench-top rack (2) - mounting tool for nose cones (3) - reagent reservoir / bowl for disinfectant (4) 2 NOTICE The 8-channel tip adapter with ejector is intended to be connected to a VACUUBRAND VHCpro.
page 13 of 29 Assembling the adapter Ensure that there is no liquid in the tube to avoid risk of contamination. Aspirate until the aspiration tube is empty and decontaminate if necessary. Select continuous aspiration. We recommend to switch off vacuum supply or to close connection to the vacuum supply. Remove pipette if necessary. ➨ Attention: Liquid in the tube may leak.
page 14 of 29 Attach 8-channel adapter to the hose. Pull the 8-channel adapter with hose back in the VHCpro. Obey mark at the cap when reassembling the cap. Screw cap hand tight. Set the VHCpro to “Aspiration” if necessary. Assembling the bench-top rack Stick together the both halfs of the bench-top rack correctly. NOTICE ➨ Attention: It is not possible to disassemble the bench-top rack nondestructively.
page 15 of 29 Prior to aspiration Insert pipette tips. Ensure that the tips are securely seated. Align the adapter. The adapter can turn freely in both directions. Attention: Pipette tips are disposables items. Never insert filled pipettes due to risk of contamination and infection. Wear protective gloves! Aspiration of liquids Use only appropriate vessels. Dip pipette tip into the liquid. Setting aspiration at the VHCpro: Press the lever until the liquid has been aspirated.
page 16 of 29 Ejecting the tips Hold the device over a suitable disposal container and press the ejector to the stop. Don’t lay the instrument horizontal when the tips are filled. Liquid may enter and contaminate the instrument or the environment. After aspiration At the end of aspiration, continue to aspirate until there is no more liquid in the aspiration tubing and purge with cleaning or disinfectant agent (suck through) if necessary.
page 17 of 29 We recommend to stor the device without tips, placed upright in the supplied bench-top rack.
page 18 of 29 Cleaning and decontaminating Autoclaving The VacuuHandControl VHCpro with adapters and aspiration hose is designated for steam sterilization at 121°C and 2 bar absolute (1 bar overpressure). Time of exposure according to DIN 58946 te = 20 minutes. Ensure not to exceed a temperature of 121°C. Comply with instructions for use of the manufacturer of the autoclave. NOTICE It is the user´s responsibility to ensure effective autoclaving.
page 19 of 29 NOTICE It is not possible to disassemble the 8-channel adapter completely. It is possible to replace the nose cones, see section “Replacing the nose cones”. NOTICE It is not possible to disassemble the VHCpro completely. It is possible to disassemble and replace the adapters, the screw cap and the aspiration hose, see manual of the VHCpro. If the housing opens lightly by mistake, e. g., if the handle is fallen down, press the gap together by hand. Perform a function test.
page 20 of 29 Important notes on use of disinfectants Aggressive disinfectants which release chlorine or oxygen radicals, e.g., sodium hypochlorite (chlorine bleach) or peroxide compounds can corrode the materials. ☞ Therefore, prolonged use of these disinfectants is strongly discouraged. After brief disinfecting operations, rinse thoroughly to avoid leaving residues of disinfectant.
page 21 of 29 Accessories and spare parts Set of nose cones (8 pieces) with V-rings and mounting tool..............................635589 8x 1x Bench-top rack for 8-channel tip adapter .............................................................635584 VacuuHandControl VHCpro................. 688061 Spare hose for VHC .......................... 636156 (minimum order quantity 2 m) For further accessories and spare parts see manual of the VHCpro.
page 22 of 29 Troubleshooting Fault ❑ No aspiration at the VHCpro. Pipette drips. Possible cause Remedy ➨ Adapter or aspiration ✔ Replace adapter with tube defective? aspiration hose. ➨ Aspiration hose kinked? ✔ Correct hose guide. ➨ Aspiration hose clogged ✔ Remove clogged or agor agglutinated? glutinated hose section or replace hose. ➨ Pipette fits loosely or fits ✔ Connect pipette securebad? ly or choose an appropriate adapter. ❑ Pipette does not held properly in the adapter.
page 23 of 29 Replacing the nose cones Tools required: - Flat-bladed screw driver or coin - Mounting tool for nose cones Turn both closures of the housing cover 90° (e.g., using a coin). Slide off the housing. Use the mounting tool to unscrew the nose cone. Position new nose cone and screw hand-tight using the mounting tool. Reassemble the 8-channel adapter.
page 24 of 29 Notes on return to the factory Repair - return - DAkkS calibration NOTICE Safety and health of our staff, laws and regulations regarding the handling of dangerous goods, occupational health and safety regulations and regulations regarding safe disposal of waste require that for all pumps and other products, the “Health and safety clearance form“ must be sent to our office fully completed and signed before any equipment is shipped to the authorized service center.
page 25 of 29 We submit repair quotations only on request and always at the customer’s expense. If an order is placed, the costs incurred for problem diagnosis are offset from the costs for repair or from the purchase price, if the customer prefers to buy a new product instead of repairing the defective one. - If you do not wish a repair on the basis of our quotation, the equipment may be returned to you disassembled and at your expense.
page 26 of 29 Scrapping and waste disposal: Dispose of the equipment and any components removed from it safely in accordance with all local and national safety and environmental requirements. Particular care must be taken with components and waste oil which have been contaminated with dangerous substances from your processes. Do not incinerate fluoroelastomer seals and O-rings. - You may authorize us to dispose of the equipment at your expense.
page 27 of 29 Health and safety clearance form for BVC systems and accessories Devices will not be accepted for any handling before we have received this declaration. Please read and comply with ”Notes on return to the factory” in the instructions for use. Attention: Only devices free of contamiantion hazardous to health may send for inspection / repair! 1. Device (Model): ....................................................................................................................................
page 28 of 29 Description of the decontamination method: Outside: ................................................................................................................................................ Inside (e. g. bottle, screw cap, coupling, filter, hoses, handle):............................................................. .............................................................................................................................................................. ..............
page 29 of 29 Disclaimer: Our technical literature is only intended to inform our customer. The applicability of general empirical values and results obtained under lab conditions to your specific operations depends on a number of factors beyond our control. It is, therefore, strictly the users’ responsibility to very carefully check the application of these data to their specific requirements. No claims arising from the information provided in this literature will, consequently, be entertained.