
User Manual

RPC/RP Configuration RPC/RP Manual
WLL-RPC/RP-IN/UM-1.0 19June2000
4-
60
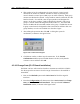
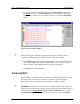
4. This window is for the configuration of Group Control. Group Control
maximizes the number of channels available for traffic by allowing one
control channel to control up to 8 RPs (up to 31 traffic channels). Each group
contains two RP Interface boards. Group members must be within the two RP
Interface boards. For each RP, enter the group number and designate the
master. In the above window, 7 RPs on RP Interface boards 5 and 6 are in
group 17 with the master RP designated as RP number 17. The master RP
must be the RP with the lowest RP number in the group. The RPs that are not
in group control must be designated as their own masters and have their own
group numbers, as is the case for RP# 21 in the above figure.
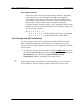
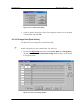
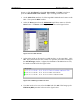
5. After editing the operation data click OK. A dialog box opens for
confirmation, as shown in the figure below.
Figure 4-60: Confirmation Dialog Box
6. Click Yes to confirm, or No to stop the transaction. If the Version
Confirmation window opens when Yes button is clicked, verify that the
version is correct and then click OK.
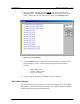
4.3.10 Change Data (E1-IF Board Installation)
Each RPC can have 4 E1 interface boards to communicate with WLL/V5WLL.
Use the steps in this section to select the target E1 interfaces to be installed or
uninstalled.
1. First use the Blockade option under Unit Control to block the target E1
interfaces.
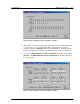
2. From the Configuration pull-down menu, select Service Data, then Change
Data, and then E1-I/F Board Installation. This opens the E1-I/F Board
Installation window, as shown in the figure below.