
User Manual

RPC/RP Configuration RPC/RP Manual
WLL-RPC/RP-IN/UM-1.0 19June2000
4-
18
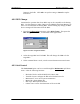
4.2.3.4 Change Master RP
For the operation in a group control mode, it sometimes becomes necessary to
switch a master RP to a slave RP, because the master RP is faulty or because the
NMS operation requires the switch. Use this feature to switch the function.
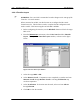
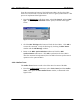
1. Select Unit Control, and then Master RP from the Maintenance pull-down
menu. The Master RP window appears as shown in the figure below.
Another way to access the window is to click the Change Master RP toolbar.
Figure 4-20: Master RP Window
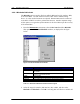
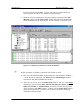
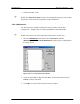
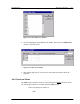
2. Click the Arrow button in the Master RP No. field to get a list of all the 32
RP numbers. Select the RP to be the new master and click OK. That RP
becomes the new master RP. The Self Message window displays a message,
indicating the change has been made. The change can also be verified by
viewing the RP status.
F NOTE: Each group can have a maximum of 8 RPs.
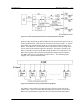
4.2.3.5 RPC Synchronization
The ECNT board on the RPC generates the synchronous clock and the air frame
synchronization signal by extracting clock from the E1 interface signal on the E1-
IF boards, and delivers them to RPs through the RP-IF boards. As a result, all the
RPs that are controlled by the same RPC are operating synchronously. The
following figure illustrates the process of clock synchronization and air frame
synchronization for one RPC.