C1222 USER GUIDE
_______________________________________ Trademark Statement: “‘UTStarcom’, ‘iPAS’, and the UTStarcom logo are trademarks of UTStarcom, Inc.” Copyright Statement: “UTStarcom, Inc. 2005. All rights reserved. No part of this publication may be reproduced in any form or by any means without the prior written permission of UTStarcom, Inc.
Table of Contents SAFETY PRECAUTIONS.................................................... 1 HANDLING THE PHONE, BATTERY AND CHARGER ..................................1 HANDLING THE PHONE ........................................................................2 HANDLING THE BATTERY ......................................................................3 HANDLING THE CHARGER ....................................................................4 1. GETTING STARTED ................................................
3. STORING A PHONE NUMBER ..................................... 14 4. CALL HISTORY............................................................. 16 4.1 OUTGOING CALLS........................................................................16 4.2 INCOMING CALLS .........................................................................16 4.3 MISSED CALLS ............................................................................17 4.4 ERASE HISTORY ...............................................................
.3 INBOX .........................................................................................26 6.3.1 Reply .............................................................................................27 6.3.2 Forward .........................................................................................27 6.3.3 Save Address.................................................................................27 6.3.4 Save CB ................................................................................
.2 ALARM ........................................................................................36 7.2.1 Quick Setting .................................................................................36 7.2.2 personal Setting.............................................................................38 7.3 SCHEDULE ..................................................................................38 7.3.1 Search Schedule ...........................................................................39 7.3.
9.2.4 Clock..............................................................................................52 9.3 CONTRAST ..................................................................................53 9.4 LED SETTING..............................................................................53 10. SETTINGS ................................................................... 55 10.1 LOCK MODE ..............................................................................55 10.1.1 Lock Mode ...........
13.2 SEND OWN NUM .......................................................................65 13.3 SILENT ......................................................................................65 13.4 PRIVACY ...................................................................................66 13.5 TONE LENGTH ...........................................................................66 14. SAFETY AND WARRANTY ........................................ 68 14.1 SAFETY INFORMATION FOR WIRELESS HANDHELD PHONES ...
Safety Precautions SAFETY PRECAUTIONS Handling the Phone, Battery and Charger DANGER Only use the battery and charger specified for the phone. Failure to do so can result in damage to the phone, electric shock or fire. CAUTION Do not store or operate the phone or charger in hot, damp, or dusty areas, which can damage electrical and mechanical components. Avoid prolonged exposure to temperatures below 5°C or in excess of 35°C. DANGER Do not drop, shake or throw the phone or charger.
Safety Precautions Handling the Phone DANGER Do not use the phone while operating a vehicle. Observe local regulations for specialized (hospital, aircraft, etc) when using the phone. areas Do not use the phone near electronic equipment prone to interference. Radio frequency interference may result in electronic equipment malfunction.
Safety Precautions Handling the Battery DANGER Do not dispose of the battery pack in a fire. It may explode. Check with local waste management codes for disposal instructions. Do not force the battery pack into the phone. Improper installation can cause malfunctions or damage the battery pack. This may result in fire or personal injury. Use caution in handling batteries in order not to short the battery on conductive materials such as rings, bracelets, and keys.
Safety Precautions Handling the Charger DANGER Only use a power source that provides the appropriate voltage (AC100~240 V) for the charger. An unsuitable power source can result in damage to the charger, electric shock or fire. Do not use the charger if the power supply cord or plug is damaged or frayed (exposed or broken wires, etc). This can result in the risk of fire or electric shock. Do not short circuit the charger connector jack. This may result in fire or electric shock.
Getting Started 1. GETTING STARTED 1.
Getting Started 1.
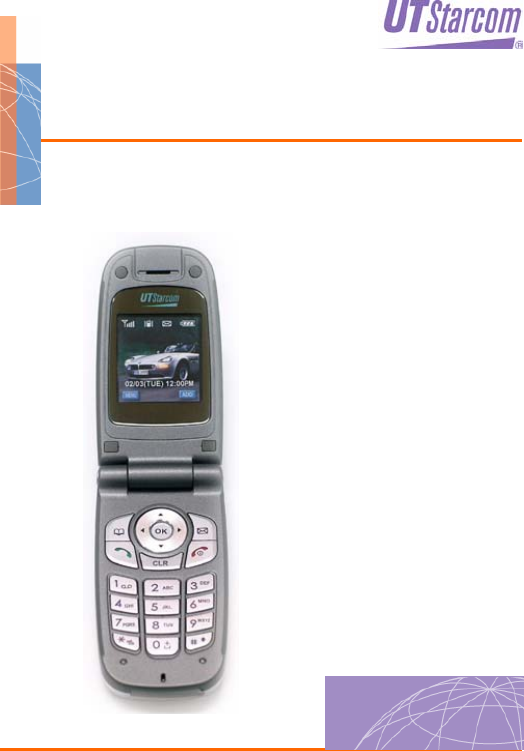
Getting Started 1.3 Function Keys Digit Keys Press to enter telephone numbers. Press to enter letters and symbols. : Press and hold to turn Etiquette Mode on/off. : Press and hold to turn lock mode on/off Key-Board Arrangement Function Keys Press to perform functions indicated on the screen. Press to originate or answer a call. Press to directly access the call history list. Press to terminate a call and to turn the phone ON/OFF. Press to enter the SMS menu. Also used as a left arrow key.
Getting Started 1.4 LCD Display Icons Descriptions Current signal strength: the more lines, the stronger the signal. Phone cannot receive a signal from the system. Call is in progress. Vibrator alert mode on. Phone will vibrate when call is received. Silence alert mode on. Appears when either an event or an alarm is set. Phone is roaming (out of service area). Phone is in Speaker Phone mode. Phone is in TTY mode. Phone is in emergency mode. Phone is in Network Out of Amps mode.
Getting Started charge 1.5 Using the Battery 1.5.1 Installing the Battery As illustrated below, place the metal locators of the battery into the holes located in the bottom of the unit. 1. Place the battery on the back of the handset and slide into place. 2. Push the battery down until it locks into place. Note: If the battery is not correctly placed in the compartment, the phone will not turn on and/or the battery may detach during use. 1.5.
Getting Started z LED Blinking (1sec on, 3 sec off): Battery is charging. z Service Light: Charging completed ~ Note: In case of a sudden electric power interruption, the travel charger may not function properly. If this occurs, disconnect the travel charger from the wall outlet, and try charging again after 5 seconds. 1.5.3 Battery Level Indicator You can monitor the battery status by checking the battery level indicator.
Basic Operations 2. BASIC OPERATIONS 2.1 Turning the Phone On/Off To turn the phone on/off, press and hold seconds. for approximately 3 2.2 Making a Call 1. In idle mode, enter the phone number with the area code. (A maximum of 32 digits can be displayed.) 2. To make a call, press z . To correct a number: . To clear the last digit, press To erase all the digits entered, press and hold z . If the call fails to go through: Press twice to redial the number 2.
Basic Operations 2.6 Emergency Call This feature allows you to place an emergency call even if your phone is in “Phone Lock” or “Restrict” mode when you dial the preprogrammed emergency number, 911, #911, or *911. It also operates in out-of-service areas. The phone maintains the emergency mode until you press after disconnecting an emergency call. In emergency call mode, the phone can receive an incoming call from any available system.
Basic Operations ~ Note: When Caller ID is restricted or not available, “Number Restricted” or “Number Unavailable” appears on the display. 2.9 Adjusting the Earpiece Volume To adjust the earpiece volume during a call, use the navigation key / . 2.10 Viewing Call Histories To view the outgoing call, incoming call or missed call history, press / + . 2.11 Call Waiting Call Waiting notifies you of an incoming call when you are already on a call by sounding a beep tone.
Storing a Phone Number 3. STORING A PHONE NUMBER The phonebook stores up to 500 names, each with up to three different phone numbers 1. Enter the phone number you want to store then press . 2. Use the Navigation Key to select the phone type: Home/Work/Mobile then press or . 3. To select “Name,” press mode. and then press to enter name edit To change the input mode, press . Press or to select the desired input method and language (Symbols, 123, Abc, T9, Language) then press .
Storing a Phone Number Key Function Left Press to move the cursor. Right Input the letters you want to enter pressing the keypad as follows: Keypad . a d G j m p t w Repetitions 2 , Times b e H k n q u x Repetitions 3 Times c F I l o r v y Repetitions 4 ? Times 2 3 4 5 6 s 8 z 1 Time Repetitions 5 ! Times 7 0 9 Repetitions 6 ‘ Times Repetitions 7 @ Times Repetitions 8 : Times Repetitions 9 1 Times ~ Note: This table is for English input mode.
Call History 4. CALL HISTORY 4.1 Outgoing Calls 1. To access your Call History, press , , . 2. Select the parameter by moving the Navigation Key left and right. Displays information of the 20 most recently dialed calls. To call an entry in the list, highlight it then press . z To see a list of the 20 most recently dialed numbers, press , . If the number is already stored in your Phonebook, only the name appears. If the number is not stored, only the phone number appears.
Call History To call an entry in the list, highlight it then press . z Press , , . If the number is already stored in your Phonebook, only the name appears. If the number is not stored, only the phone number appears. z Press the Navigation Key to select a record and then press delete the record or press information. to to view detailed incoming call z After 20 incoming calls, the oldest call will automatically be erased from the history.
Call History z Press the Navigation Key to select a record and then press delete the record or press information. to to view detailed missed call z After 20 incoming calls, the oldest call will automatically be erased from the history. z Call details include type of call, date, time and phone number. 4.4 Erase History To clear all call histories: 1. Press , then . 2. Select “Yes’’ or “No’’ with the scroll key. Press .
Call History z Press , , . This timer is resettable. 4.5.2 Last Call To view the time of the last call: z Press , , , . 4.5.3 Incoming Calls To view the total time and number of Incoming Calls: z Press , , , . This timer is resettable. 4.5.4 Outgoing Calls To view the total time and number of Outgoing Calls: z Press , , , . This timer is resettable. 4.5.5 Home Calls To view the total time and number of Home Calls: z Press , , , . This timer is resettable. 4.5.
Phonebook 5. PHONEBOOK 5.1 Search # The Phone Book stores up to 500 entries, each of which can be assigned to a group. Entries can be retrieved by Quick Search, Srch by Name, Srch No, Srch by Index, Srch by E-mail, and Srch by URL. To search for an entry: 1. Press . 2. Press . Select the parameter using the Navigation Key. 5.1.1 Quick Search To search for phonebook data via address index storing: 1. Press , , . 2.
Phonebook 2. Use the Navigation Key to select the search range of all phonebook or existing groups, then press view detailed information. to delete the record or press to 5.1.3 Srch by # To search phonebook data by number: 1. Press , , . 2. Input part of a phone number then press number. Press information. to find out the matching to delete the record or press to view detail 5.1.4 Srch by Index To search phonebook data via index number: 1. Press , , . Enter the index that you want to find. 2.
Phonebook Enter E-mail address. 2. Press the Navigation Key to select a record then press to view detail information. the record or press z to delete Maximum number of input characters: 48 characters 5.2 Record # To record phone numbers to empty phonebook address: 1. Press . 2. Select the parameter using the Navigation Key. 3. To edit the selected item press , then press . 4. Select one of the following option (UIM Card / Phone) with the Navigation Key. press , to select.
Phonebook You will hear “Added” and the phone’s display will return to phonebook edit mode. Voice Dial Calling z Briefly Press VAD z To make a call, say a recorded tag or name of the phonebook entry. . 5.3 Edit Group To add, edit or remove a phonebook group: 1. Press . 2. To add a new group, press to confirm, and then select a group ringer. name. Press 3. press [Empty], and then input a group . 5.4 Special #’s To add or edit emergency phone numbers: 1. Press . 2. Input lock code.
Phonebook Your phone number appears for about one minute.
Messaging 6. MESSAGING 6.1 Send New To create and send text messages by selecting a new submenu, press . 6.1.1 Input a Destination Phone Number 1. Input the phone number. 2. To search for a phone number in the phonebook or Call History, press or . 6.1.2 Edit a Default Callback Number 1. Press . 2. Edit the default Callback Number. 6.1.3 Select the Priority 1. Press . 2. To change the Priority (Normal/Urgent/Emergency), press or . 6.1.4 Edit Message 1. Input text message. 2.
Messaging - To insert a saved message, press - To save the message, press , , . . 6.2 Voice Mail The phone will notify you when you receive a message and display the number of received voice mail messages. 1. Press 2. Press . . - To get the message, press . - To delete the message, press . 6.3 Inbox To review the received messages: 1. Press . : New message. : New Urgent/ Emergency message. : Read Locked message. : Read message 2. Select the message using 3.
Messaging 4. To use a message option, press or . 6.3.1 Reply 1. To reply to a message, press . 2. Process like a NEW MESSAGE, except input a Destination Phone Number. 6.3.2 Forward 1. To forward the message, press . 2. Process like a NEW MESSAGE, and edit the text message. 6.3.3 Save Address To save the original address (Fr) of the message, press . 6.3.4 Save CB To save the callback number of the message, press . 6.3.5 Lock Msg To lock or unlock the message, press . 6.3.
Messaging - : Failed message - : Failed locked message - : Sent message - : Sent locked message - : Delivered message - : Delivered locked message 2. Select the message using or 3. To display the message, press . or 4. To view message options, press . or . 6.4.1 (Re) Send To resend the message, press . 6.4.2 Send to 1. To forward the message, press . 2. Process like a NEW MESSAGE, then edit the text message. 6.4.3 Detail To see the status of the message, press , 6.4.
Messaging 6.4.6 Move to saved To move the message to the saved folder, press . 6.5 Saved To review saved messages: 1. Press . - : Save message - : Save Lock message - : Message moved from Inbox - : Locked message moved from Inbox - : Draft message - : Locked draft message - : Fail message - : Fail Lock message - : Sent message - : Sent Lock message - : Delivered message - : Delivered Lock message 2. Select the message using or . 3. To display the message, press or . 4.
Messaging 6.5.1 (Re)Send 1. To resend to the message, press . 2. After sending, the message will be automatically deleted from the saved folder. 6.5.2 Lock Msg To lock or unlock the message, press 6.5.3 Delete To delete the message, press . 6.6 Quick Text 1. Press , 6.7 Settings To customize the messaging features: Press , 6.7.1 Receive Alert 1. Press . - Bell: Use beep and lamp - Vibrate: Use vibrator and lamp - Lamp Only: Use lamp only 30 .
Messaging 2. Use the Navigation Key to select the receive alert method then press or to confirm. 6.7.2 Reminder If you have not read new incoming messages, the phone will alert using the selected option. 1. Press sequentially - One Time - Every 2 Min: Alert every 2 minutes 2. Use the Navigation Key to select the alert reminder method then press or to confirm. 6.7.3 Memory Full If your phone memory is full, you might not be able to receive messages.
Messaging 1. Press . 2. Use the Navigation Key to select the priority setting method then press or to confirm. - Normal: Normal messages. - Urgent: Urgent messages. - Emergency: Emergency messages. 6.7.5 Save Sent Msg After sending outgoing messages, you can choose to automatically save sent messages. . 1. Press - Auto Save: Automatically save sent messages - Prompt: Phone asks you each time if you want to save the sent message - Do Not Save: Do not save sent messages 2.
Messaging 6.7.7 Edit Voice CB# 1. Press , 2. Press , or . . 6.7.8 Entry Mode The Entry Mode incorporates a built-in-dictionary to determine a word based on the entered characters. A word can be entered more quickly by pressing a key once per character. To select an Entry Mode: 3. Press , 4. Press , or . . Select the Entry Mode for your default text input mode: - Abc - 123 - T9 6.7.9 Mem Class Set the location where incoming message are saved: 5. press 6. Press , , or keys sequentially ..
Messaging - Phone. 6.8 Erase All To delete Inbox/Outbox Messages (except for Locked Messages): 1. Press , . 2. Use the Navigation Key to select the desired option, then press to confirm.
Tools 7. TOOLS 7.1 Wake-up Call To set an morning call: 1. Press . 2. Press , . 7.2 Alarm To set an alarm: 1. Press . 2. Press , . 7.2.1 Quick Setting To quickly set the alarm: 1. Press , , , . 2. Press the Navigation Key to change the timer value, then press will appear. to start. The icon 3. When time expires, the alarm will ring and will disappear. To turn off the alarm, press any key.
Tools 4. To cancel quick setting, press on the Quick Setting screen.
Tools 7.2.2 personal Setting To customize the alarm setting: 1. Press , , . 2. Press the Navigation Key to select the desired alarm entry then press edit it. to delete or to 3. To change the Date and Time, press the digit keys. 4. To change the value of Repeat, Remind & Melody, press ~ or . Note: The phone does not provide a clock IC, but displays the date and time based on the information from the digital CDMA network.
Tools 7.3.1 Search Schedule Press the Navigation Key to select schedule, then press to delete it or press to edit it. 7.3.2 Record Schedule To record schedule time and contents: Use the digit keys to change the Date and Time values. To change the value of Repeat, Remind & Melody, press desired item, press the Navigation Key. ~ or To move to the Note: You cannot record more than 10 schedules. In order to record more schedules, you must erase an existing schedule. 7.4 Countdown 1. Press 2. Press .
Tools 1. Press the digit keys to enter the countdown date in the “To” column. 2. Press or 3. Enter a text and press 4. Press . to complete the operation 7.4.2 Delete Countdown To delete a Countdown: 1. Press , , , . to cancel, or press 2. Press Countdown. to delete a 7.5 Memo Your phone includes an internal memo pad that can be used to compose and store reminders and notes. To access Memo: 1. Press . 2. Press , 3. Press to select a memo, then input the memo. . To save it, press 40 .
Tools 7.5.1 View Memo To view a saved memo: 1. Press , , . 2. Select the desired memo using the Navigation key, and then press . . 3. To edit the memo, press 7.5.2 Record Memo To add a memo 1. Press , , . 2. Select “Empty” using the Navigation key, and then press memo 3. Press to add a to save the memo 7.5.3 Delete Memo To delete a memo: 1. Press , , . 2. Select the desired memo using the navigation key, and then press 3. Press . to cancel or press to delete it.
Tools 7.6 World Time To display the current time of select cities worldwide: 1. Press . 2. Press , . 3. Use the Navigation Key to select the city: Honolulu, Vancouver, Los Angeles, Denver, Chicago, Mexico City, Toronto, New York, Sao Paulo, London, Paris, Athens, Bucharest, Nairobi, Moscow, New Delhi, Jakarta, Bangkok, Beijing, Hong Kong, Seoul, Tokyo, Sydney Dual Time Display When selected, Dual Time will replace the greeting text on your phone. 1. Press , , . 2.
Tools To operate the stop watch: 1. Press . 2. Press , .
Tools 7.8 Calculator This function allows you to use your phone as a calculator. This calculator will perform basic mathematic functions (addition, subtraction, multiplication, division). To access the calculator: 1. Press . 2. Press , . 3. Press the number keys to input numbers. Press , , for +, -, / or X. To insert a decimal point, press for prefix minus sign. To clear, press the answer. EXAMPLE To calculate 128 X 32 =: 1. Enter 128. 2. Press . 3. Enter 32. 4. Press 44 . , then press or .
Tools 7.9 Conversion Tool To convert units on your phone: 1. Press . 2. Press , . 3. To reach the desired unit item, press (1~6) or press ~ or , then press , . - Length - Weight - Volume - Area - Temperature - Speed 4. To change the unit type (for example: km, m, cm…),press then enter digits. To clear the digits, press or , .
Display 8. SOUNDS 8.1 Ring Mode To select how you want to be notified of an incoming call: 1. Press 2. Press , . Select the desired option using the Navigation Key.
Display 8.2 Ringers To select a ring type: 1. Press . , 2. Press . 3. Press or to display the “Ring tones”, “My Ringer” menu. Select the desired option using the Navigation Key. To listen to the ring tones, scroll down the selection list.
Display 4. To save, press . 8.4 Volume To adjust ringer volume: 1. Press . , 2. Press . 3. Press or to display the “Ringer Volume”, “Earpiece Vol” or “Key Volume” menu - Ringer: Adjusts the bell volume. - Earpiece: Adjusts the earpiece volume. - Key Beep: Adjusts the key volume. 4. Select the desired volume level using the Navigation Key. . 5. To save, press ~ Note: If the volume is set to “0” (mute), the silence icon will appear except when the phone is in Etiquette Mode. 8.5 Alert 8.5.
Display 4. To complete the operation, press . 8.5.2 Fade When this function is active, the phone will sound a beep tone when a call has been disconnected. 1. Press . 2. Press , . 3. Select the desired option using the Navigation Key (On/Off). 4. To save, press . 8.5.3 Minute Beep When this function is active, the phone will sound a beep tone every minute of a call. 1. Press 2. Press . , . 3. Select the desired option using the Navigation Key (On/Off). 4. To save, press .
Display 9. DISPLAY 9.1 Backlight To adjust the lighting time options: 1. Press 2. Press , . 3. Select one of the following options using the Navigation Key: - LCD Time: Adjusts the main screen lighting time. (10, 20, 30 seconds, Flip Open) - Light Level: On, Off - Keypad Light: Adjusts the keypad lighting time. (10, 20, 30 seconds, Flip open) 4. To save, press . 9.2 Graphics 9.2.1 Animations To select your favorite LCD display: 1. Press . 2. Press . 3.
Display - Incoming Call - Power On - Power Off 4. To save, press. 9.2.2 Wallpaper To select a wallpaper for the standby display: 1. Press . 2. Press , , . 3. To display the desired wallpaper option press or : - Idle animation - Still image 1~12 - Calendar 4. To save, press . 9.2.3 Greeting To input a personal greeting or edit an existing one: 1. Press 2. Press , . , , . 3. To select a text color and then edit the greeting, press .
Display 4. Press . 5. Use the Navigation Key to: - Set greeting message display On/Off - Set greeting message slide On/Off - Select the background color 6. Press 7. If the “display” option is set to “Off”, move the greeting message using the Navigation Key. 8. To save, press ~ . Note: You can enter a banner up to 12 English characters long. 9.2.4 Clock To set the clock: 1. Press 2. Press . , , . 3. To select the desired option, press or : - Digital - Analog 4. To save, press .
Display 9.3 Contrast To adjust the main screen contrast level: 1. Press . 2. Press , . 3. To select the desired contrast level, press 4. To save, press or . . 9.4 LED Setting To set the service light to blink when the phone is in the service area: 1. Press 2. Press 3. . , . To select the desired option, press or : - Incoming call - Incoming SMS - Alarm - Service Light 4. To activate or deactivate this function for the option, press 5. To save, press ~ . .
Display standby time.
Settings 10. SETTINGS 10.1 Lock Mode To prevent others from using the phone without permission and allow access to security features only after inputting a password: 1. Press . 2. Press , . The default Lock Code is “0000.” 10.1.1 Lock Mode To set the Lock mode: 1. Press , 2. Press , then enter “Lock Code.” . Select “Off”, “Always”,” Now” or “Power On” and then - Off: Normal phone mode - Always: Phone immediately locks. - Now: Phone immediately locks.
Settings 10.1.2 Change Lock To change your 4-digit password: 1. Press , 2. Press , then enter “password.” . 3. Enter the new password then press . 4. Enter the new password again then press . 10.1.3 Privacy Lock To lock individual functions: 1. Press , , then enter “Lock Code.” 2. Press - Call History - SMS - My Menu - BREW 3. Highlight the desired item use the Navigation key, and press set the item “On” or “Off” to . 4. To save, press 10.1.
Settings 2. Press and check the types of calls (Int., Memory 10, All Outgoing, All Incoming) to restrict using the 3. To save, press key. . 10.1.5 Erase Phonebook To erase all phonebook entries: 1. Press , , or 2. press , then “Lock Code”. : - UIM Card - Phone - All 3. Press to complete the operation. 10.1.6 Reset Phone To restore the phone’s default settings: 1. Press , 2. Press , then enter “Lock Code.” . 3. Select “Yes” or “No” with the Navigation Key. 4.
Settings z Press Key z Folder Open z Auto Answer 3. Press . 10.3 Active Flip 1. Press . 2. Press , . Select from the following: 3. Select “On” or “Off” with the Navigation Key. 4. Press . 10.4 Auto Answer Automatically answer the incoming call: 1. Press 2. Press . , . Select from the following: Select the parameter by using the navigation key. - On - Off 3. To save, press 58 .
Settings 10.5 Language To select the language in which letters are displayed on the screen: 1. Press . 2. Press , . Select the language using the Navigation Key: - English - Español - Français . 3. press 10.6 Phone Info To display your phone number: 1. Press . 2. Press , . Your phone number appears for about one minute. 10.7 System To change the system properties of the phone: 1. Press 2. Press . , .
Settings 10.7.1 Change NAM This function enables Auto NAM (Number Assignment Module) or manually selects a NAM. 1. Press 2. Press , , . Select the parameters using the Navigation Key - NAM1 - NAM2 3. To save, press . 10.7.2 Set Mode To select the Set Mode: 1. Press 2. Press , , . Select the parameters using the Navigation Key: - Standard: Automatic system selection - Home Only: Service is limited to home system only 3. To save, press . 10.7.
Settings 1. Press . 2. Press , , . Select the parameters using the Navigation Key - Standard: Voice privacy not activated when it is available by system - Enhanced: Voice privacy activated when it is available by system 3. To save, press . 10.7.4 TTY Mode Your phone is able to operate with a TTY (Teletypewriter) device in both analog and digital modes. This feature is system dependent and may not be available in all areas. 1. Press , , , .
Settings - Image: - Sound: MIDI, PMD 10.9 UIM Manager 10.9.1 PIN Lock To select the PIN Lock: 1. Press , 2. Press , . Select “Enable” , “Disable” and then press Enter the PIN Code. 10.9.2 PIN Code To change the PIN Code: 1. Press 2. Press , , . Enter the PIN1 code and enter a new PIN1 code and press [ ] Enter the PIN 1 code and enter a new PIN1 code again and press [ ] and then press [ 62 ].
Settings 11. GAMES 11.
Settings 12.
Call 13. CALL 13.1 Mute/Unmute The Mute function prevents the other party from hearing your voice, but allows you to hear the other party: 1. Press . 2. Press , . 3. Select the desired option using the Navigation Key: 4. To save, press . 13.2 Send Own Num 1. Press . , 2. Press . 3. Select the desired option using the Navigation Key: 4. To save, press . 13.3 Silent 1. Press 2. Press . , .
Call 3. Select the desired option using the Navigation Key: . 4. To save, press 13.4 Privacy This function enhances voice privacy and avoids tapping during a call. 1. Press . 2. Press , . Select the parameters using the Navigation Key - Standard: Voice privacy not activated when it is available by system - Enhanced: Voice privacy activated when it is available by system 3. To save, press . 13.5 Tone Length To select the sent DTMF tone length for when you press digit keys in the calling state: 1.
Call 4. To save, press .
Safety And Warranty 14. SAFETY AND WARRANTY This chapter addresses the safety guidelines and precautions to follow when operating your phone. Before operating your phone, please be aware of all the safety details This chapter contains the terms and conditions of services and the warranty for your phone.
Safety And Warranty engineers, and physicians from universities, government health agencies, and industry reviewed the available body of research to develop the ANSI Standard (C951) The design of your phone complies with the FCC guidelines (and those standards) 14.1.2 ANTENNA CARE Use only the supplied or an approved replacement antenna. Unauthorized antennas, modifications, or attachments could damage the phone and may violate FCC regulations 14.1.
Safety And Warranty 14.1.4.1 Pacemakers The Health Industry Manufacturers Association recommends that a minimum separation of six (6”) inches be maintained between a handheld wireless phone and a pacemaker to avoid potential interference with the pacemaker.
Safety And Warranty signs and instructions 14.1.5.3 Potentially Explosive Atmospheres Turn your phone OFF when in any area with a potentially explosive atmosphere and obey all signs and instructions. Sparks in such areas could cause an explosion or fire resulting in bodily injury or even death Areas with a potentially explosive atmosphere are often, but not always, clearly marked.
Safety And Warranty 14.2 SAFETY INFORMATION FOR FCC RF EXPOSURE WARNING: Read this information before using 14.2.1 CAUTIONS In August 1996 the Federal Communications Commission (FCC) of the United States with its action in Report and Order FCC 96-326 adopted an updated safety standard for human exposure to radio frequency electromagnetic energy emitted by FCC regulated transmitters. Those guidelines are consistent with the safety standard previously set by both U.S. and international standards bodies.
Sar Information 15. SAR INFORMATION THIS MODEL PHONE MEETS THE GOVERNMENT’S REQUIREMENTS FOR EXPOSURE TO RADIO WAVES Your wireless phone is a radio transmitter and receiver. It is designed and manufactured not to exceed the emission limits for exposure to radiofrequency (RF) energy set by the Federal Communications Commission of the U.S. Government. These limits are part of comprehensive guidelines and establish permitted levels of RF energy for the general population.
Sar Information with all reported SAR levels evaluated as in compliance with the FCC RF exposure guidelines. SAR information on this model phone is on file with the FCC and can be found under the Display Grant section of http://www.fcc.gov/ oet/fccid after searching on O6YUTS-C1222 Additional information on Specific Absorption Rates (SAR) can be found on the Cellular Telecommunications Industry Association (CTIA) website at http://www.wow-com.
Fda Consumer Update 16. FDA CONSUMER UPDATE FDA: U.S. Food and Drug Administration -Center for Devices and Radiological Health Consumer Update on Wireless Phones 1. Do wireless phones pose a health hazard? The available scientific evidence does not show that any health problems are associated with using wireless phones. There is no proof, however, that wireless phones are absolutely safe. Wireless phones emit low levels of radiofrequency energy (RF) in the microwave range while being used.
Fda Consumer Update z Cooperate in providing users of wireless phones with the best possible information on possible effects of wireless phone use on human health. FDA belongs to an interagency working group of the federal agencies that have responsibility for different aspects of RF safety to ensure coordinated efforts at the federal level.
Fda Consumer Update increasing distance from the source. The so-called “cordless phones,” which have a base unit connected to the telephone wiring in a house, typically operate at far lower power levels, and thus produce RF expo-sures far below the FCC safety limits 4. What are the results of the research done already? The research done thus far has produced conflicting results, and many studies have suffered from flaws in their research methods.
Fda Consumer Update pro-vide answers about some health effects, such as cancer. This is because the interval between the time of exposure to a cancer- causing agent and the time tumors develop - if they do -may be many, many years. The interpretation of epidemiological studies is hampered by difficulties in measuring actual RF exposure during day-to-day use of wireless phones. Many factors affect this measurement, such as the angle at which the phone is held, or which model of phone is used 6.
Fda Consumer Update Rate (SAR) of 1.6 watts per kilogram (1.6 W/kg). The FCC limit is consistent with the safety standards developed by the Institute of Electrical and Electronic Engineering (IEEE) and the National Council on Radiation Protection and Measurement. The exposure limit takes into consideration the body’s ability to remove heat from the tissues that absorb energy from the wireless phone and is set well below levels known to have effects.
Fda Consumer Update using a wireless phone will reduce RF exposure If you must conduct extended conversations by wireless phone every day, you could place more distance between your body and the source of the RF, since the exposure level drops off dramatically with distance. For example, you could use a headset and carry the wireless phone away from your body or use a wireless phone connected to a remote antenna Again, the scientific data do not demonstrate that wireless phones are harmful.
Fda Consumer Update phone EMI. FDA has tested hearing aids for interference from handheld wireless phones and helped develop a voluntary standard sponsored by the Institute of Electrical and Electronic Engineers (IEEE). This standard specifies test methods and performance requirements for hearing aids and wireless phones so that that no interference occurs when a person uses a “compatible” phone and a “compatible” hearing aid at the same time. This standard was approved by the IEEE in 2000.
Protect Your Warranty 17. PROTECT YOUR WARRANTY Read your Warranty carefully, with the special consideration to paragraph seven of the Limited Warranty for your unit “Warranty does not apply to... or to any product or part thereof which has suffered through alteration... mishandling misuse, neglect or accident” Many companies are making look alike accessories and in some cases, promoting that their product is equal to or better than the Audiovox product. Be careful.
12 Month Limited Warranty 18.
12 Month Limited Warranty or for communications range or operation of the cellular system as a whole To obtain repairs or replacement within the terms of this Warranty, the product should be delivered with proof of Warranty coverage (e.g.
12 Month Limited Warranty rights which vary from state to state or province to province IN USA : UTStarcom/Audiovox Communications 555 Wireless Blvd.
UTStarcom, Inc. USA 1275 Harbor Bay Parkway Alameda, CA 94502, USA Tel: 510-864-8800 http://www.utstar.