
Manual

COMPÄSSO
™
Elite and COMPÄSSO
™
Standard Suspension Trim Systems
COMPÄSSO Elite and COMPÄSSO Standard are both suspension trim
systems that share very similar installation methods and techniques.
This guide will address the commonalities of the installations and provide
product-specifi c details through the additional “tip sheet” (IC588, IC589)
that will accompany the actual order. Through this guide, we will use the
term C
OMPÄSSO to refer to both systems.
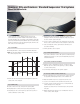
Step 1: Grid Installation
A.
Install the grid that the COMPÄSSO suspension trim will be attached to.
B. Note: The grid should always be extended farther than the perimeter of
the C
OMPÄSSO suspension trim.
C. Examine the refl ected ceiling layout and carefully plan the layout of the
C
OMPÄSSO trim on the ceiling grid.
Step 2: Initial Assembly
A.
Lay the COMPÄSSO trim on top of the grid in the desired pattern.
B. Temporarily hold the COMPÄSSO trim in place using spring clamps.
C. Temporarily splice the sections together (see tip sheet for specifi cs on
C
OMPÄSSO Standard or COMPÄSSO Elite).
D. Working off the refl ected ceiling plan, assemble the COMPÄSSO trim,
arranging the trim into smooth curves. Adjust the clamps as you go and
be sure to check the square of the grid.
E. Once the COMPÄSSO segments are in place and the grid is square, mark
the face or side of each tee where it is intersected by the C
OMPÄSSO trim.
F. Slide each clamp and COMPÄSSO segment back so that the tees are
accessible for trimming.
G. Trim the grid where cuts are required.
Step 3: COMPÄSSO Splicing Information
Your COMPÄSSO Standard or COMPÄSSO Elite system uses different splicing
hardware and techniques. See the tip sheet included with your purchase
for detailed instructions.
Step 4: COMPÄSSO Grid Attachment Installation
A.
Install the COMPÄSSO grid attachment clip to the cut end of the grid.
Attach the clip to the C
OMPÄSSO trim segment (see COMPÄSSO Standard
or C
OMPÄSSO Elite tip sheet).
B. Join trim and permanently splice the segments together.
10" and 12" (12" available in COMPÄSSO Standard only)
A.
Because of their larger sizes, 10-inch and 12-inch COMPÄSSO trim must
be supported by attaching diagonal braces to the installation clips.
B. Attach an installation clip to the tee using a #6 x 3/8" Tek screw.
C. Secure one end of the brace to the clip with a #6 x 3/8" Tek screw.
D. Secure the opposite end of the brace to the tee, ensuring that the clip
remains 90 degrees to the ceiling plane.
Repeat this procedure at 2-foot increments along the entire perimeter
of the grid.
E. With the attachment clips braced, you can now attach the 10-inch or
12-inch C
OMPÄSSO trim to the grid.
General Installation Guide