
User guide


Serial ATA 4-Drive NAS
User Guide
Protecting Local Disks - 122
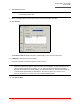
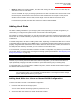
The Restore dialog box appears.
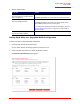
13. Specify whether you are restoring to the original disk or a new disk.
If you are recovering to a new disk, select the desired disk from the list. Then click Restore.
14. When the confirmation message appears, click Yes.
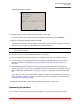
The backup is recovered to your local disk, and the progress of this process is displayed. You can can-
cel the recovery at any time by clicking Stop in the progress dialog box.
15. After the recovery is complete, click OK to restart your computer.
16. Use the appropriate procedure to configure your computer to boot from the local disk once more.
17. If you changed the recovery password, reset it in the Microsoft iSCSI Initiator after your computer
restarts (as described in
“Resetting the Recovery Password in the Microsoft iSCSI Initiator” on
page 145).
18. Start DiskSafe Express and remove protection from all your disks and partitions (as described in
“Removing Protection” on page 122). This disables remote boot and restarts your computer. Then pro-
tect your disks again (as described in “Protecting Your Disks” on page 98), reusing the existing back-
ups.
If you need to recover any other data disks or partitions, you can do so (as described in “Recovering a
Non-system Disk or Partition” on page 115). However, be sure to do this after you have removed pro-
tection and then reprotected the disks.
19. Enable remote boot again (as described in “Enabling Remote Boot” on page 110).
Removing Protection
If you no longer need to back up a particular disk or partition, you can remove protection as long as a
Note: Do not shut down your computer, disconnect from the network, or perform any other tasks until
this process is complete.