
User manual


6-12 Network Dial-Out Acces
s
NPC Client Installation for Windows 3.x
To install the NPC Client software for Windows 3.x:
1.
Start Windows and go to the Program Manager screen.
2.
Insert the NPC Client for Windows 3.x Installation diskette
in the floppy disk drive.
3.
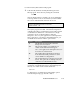
Click File, then click Run. At the Run command line, type:
a:\setup.exe
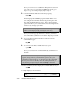
4.
Click the Install button, and click on Yes at the Install NCSI
for Novell based Networks prompt. Accept the default
directory of c:\ncsi or enter a specific directory. The
software will now be installed on your system.
5.
After the software is loaded, click on the Stay Here option
when asked whether or not to restart your computer.
6.
Use Windows File Manager to copy the ncsi.exe and ncsi-
rel.exe files from the installation diskette to the directory
where you installed the rest of the NCSI Client software
(c:\ncsi for example) on your PC.
7.
Use the Text Editor to edit your system’s autoexec.bat file
and add the directory where you just installed the Client
software to your path statement. Then, add the ncsi
command, with any command line options, to load the TSR
program during the boot-up sequence. After saving the file,
your autoexec batch file should look something like:
@echo off
prompt $p$g
path=c:\;c:\dos;c:\windows;c:\ncsi
c:\ncsi\ncsi -C -V4 -W
c:\windows\win /3 :
This will ensure that the NCSI TSR program is loaded each
time, before you load Windows.
Note: You must load the NCSI program before you start
Windows 3.X after installation using the -w command line
option. To remove the NCSI TSR program, you need to go
to the MS-DOS prompt and issue the command ncsi-rel.