
Technical data


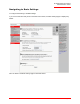
Table Of Contents
- Professional Access Point Administrator Guide
- Contents
- About This Document
- Getting Started
- Web User Interface
- Basic Settings
- Navigating to Basic Settings
- Review / Describe the Access Point
- Provide Administrator Password and Wireless Network Name
- Set Configuration Policy for New Access Points
- Update Basic Settings
- Summary of Settings
- Basic Settings for a Standalone Access Point
- Your Network at a Glance: Understanding Indicator Icons
- Cluster
- Status
- Advanced
- Basic Settings
- Command Line Interface
- Troubleshooting
- Regulatory Information
- U.S. Robotics Corporation Two (2) Year Limited Warranty
- Glossary
- Index
Professional Access Point
Administrator Guide
Setting Up and Launching Your Wireless Network - 33
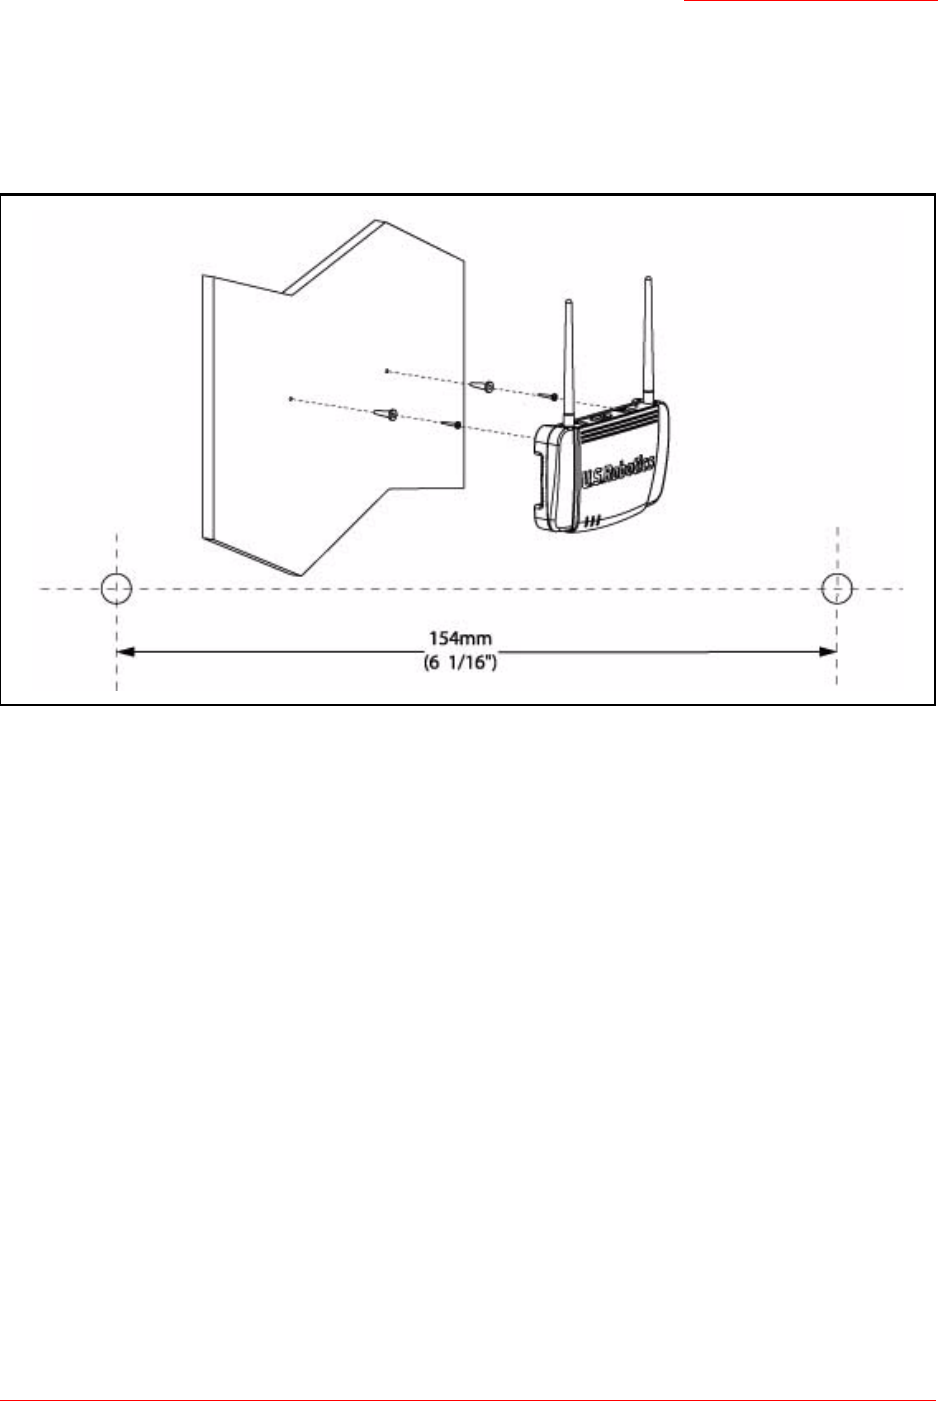
Wall Mounting the Access Point
The access point has keyhole openings for easy wall mounting. To expose the openings, remove the pads
from the rear feet. You can then mount the access point to the wall with two anchored screws, as shown in
the following illustration:
What’s Next?
Next, make sure the access point is connected to the LAN, bring up your wireless clients, and connect the
clients to the network. Once you have tested the basics of your wireless network, you can enable more
security and fine-tune the access point by modifying its advanced configuration features.
Make Sure the Access Point is Connected to the LAN
If you configured the access point and administrator PC by connecting both into a network hub, then your
access point is already connected to the LAN.
If you configured the access point using a direct wired connection via Ethernet cable from your computer to
the access point, do the following:
1. Disconnect the Ethernet cable from the computer.
2. Connect the free end of the cable to the LAN.
3. Connect your computer to the LAN either via Ethernet cable or wireless client card.