
Operating instructions


4-8 LIFEPAK 500 Automated External Defibrillator Operating Instructions
Data Management
3 Turn off the AED and prepare it for the next patient use.
Troubleshooting During Data Transfer
If you cannot transfer data, refer to the application program operating instructions for troubleshooting
information.
SENDING DATA TO A PRINTER
These paragraphs describe the resources, equipment connections, and procedures required to print
AED data on a printer.
Required Resources
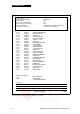
Table 4-4 summarizes the resources required to print AED data.
Table 4-4 Required Resources for Printing Data
Procedure for Printing
Perform these steps to print AED data:
1 Make sure that the AED is turned off for at least 60 seconds.
2 Make sure that the printer is turned on.
3 While holding down the
" button, press ON/OFF to turn on the AED. Do not release the " button until
the AED displays:
BATTERY status message
SELF-TEST xx.xx message
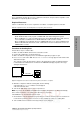
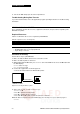
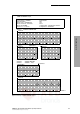
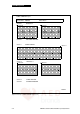
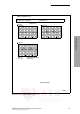
4 Connect the equipment as shown in Figure 4-6.
• Connect the Printer Cable to the AED and the printer.
Figure 4-6 Connecting the AED to a printer
5 After a few seconds, you will see the message:
TO PRINT PUSH "
•Press
" to print the Current Patient.
•Press
! to print the Previous Patient.
• Press both
" and ! to print the Current and Previous Patients.
While the data is being transferred, the AED displays the following message to indicate progress:
SENDING
Description
Printer Cable (for use with the LIFEPAK 500 AED)
Printer (EPSON LX-300-compatible):
– EPSON ESC/P protocol for 9-pin printheads
– 25-pin D style connector
Printer Cable
LIFEPAK 500 AED
Printer