
User`s guide


Page | 24
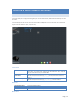
E. MAINTENANCE
The Maintenance facility allows you to format disk and upgrade the MyXerver™ Pro's firmware. Note that the MyXerver™
Pro is unavailable during the upgrade process, and all connections will be lost. The MyXerver™ Pro will reboot once the
upgrade installation is completed. The procedure may take from 5 to 10 minutes.
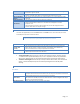
Disk Utility
This utility displays device name, file system type, volume mounted, and disk mount status of both internal and external
Disk installed in this MyXerver™ Pro. For a new disk, formatting is required before ready for use.
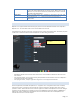
Device Name
The name of the NAS device
Type
This part shows the file system of storage device. There are FAT32, EXT2 and EXT3.
It is recommended to use EXT3.
Status
This show if the storage devices are successfully mounted and ready to be used
Encrypt
Click on this box to enable 128 bits AES encryption.
It required user to key in 20 characters password and format the storage device again
Format Button
Use this button to format the disk. This will partition and quick-format the new disk.
WARNING! This will destroy any data on the disk. Once started, this process can NOT be
halted or reversed
Scan Button
Click on this to check the device integrity
Detail Button
If the storage device support S.M.A.R.T, it will report the device health status
Disk Spin down time
Specify HDD spin down time if there is no access to this device for some time.
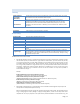
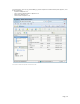
Firmware Upgrade
This displays the version number of the MyXerver™ Pro's current firmware.
Upgrade
You will need to locate the Firmware file.
Browse Button
Click this button to browse the folders on your PC and select the Firmware file (e.g.
C:\downloads\ 20091210-UT-12bay-802.11bg-AD.tar.gz).
Note: Implementation of this feature is Browser-dependent
Other Buttons
Upgrade Button
Click this button to start the firmware upgrade.
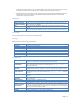
Save Configuration
Save Button
Click this button to save current MyXerver™ Pro configuration to PC. Default file name is
“conifg.tar”.
Restore Configuration
Browse Button
Click this button to browse the folders on your PC and select the Firmware file (e.g.
C:\downloads\ 20091210-UT-12bay-802.11bg-AD.tar.gz).
Note: Implementation of this feature is Browser-dependent
Refresh Button
Click to start recovering configuration.
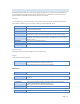
Factory Reset
Factory Reset Button
Click this button to restore to Factory default configuration