
User guide


5
INITIAL CONFIGURATION
This procedure needs to be done once only by the NAS administrator. Subsequently, other NAS users should refer
to the section “Using MyXerver™ MX3600”.
The initial configuration can be done either by using the Setup CD (Windows only), or by using a web browser. Use
the Setup CD method if you have more than one unit of MyXerver™ on your network.
A. USING THE SETUP CD (WINDOWS ONLY)
1. Insert the MyXerver™ MX3600 Setup CD into your CD-ROM drive of your computer.
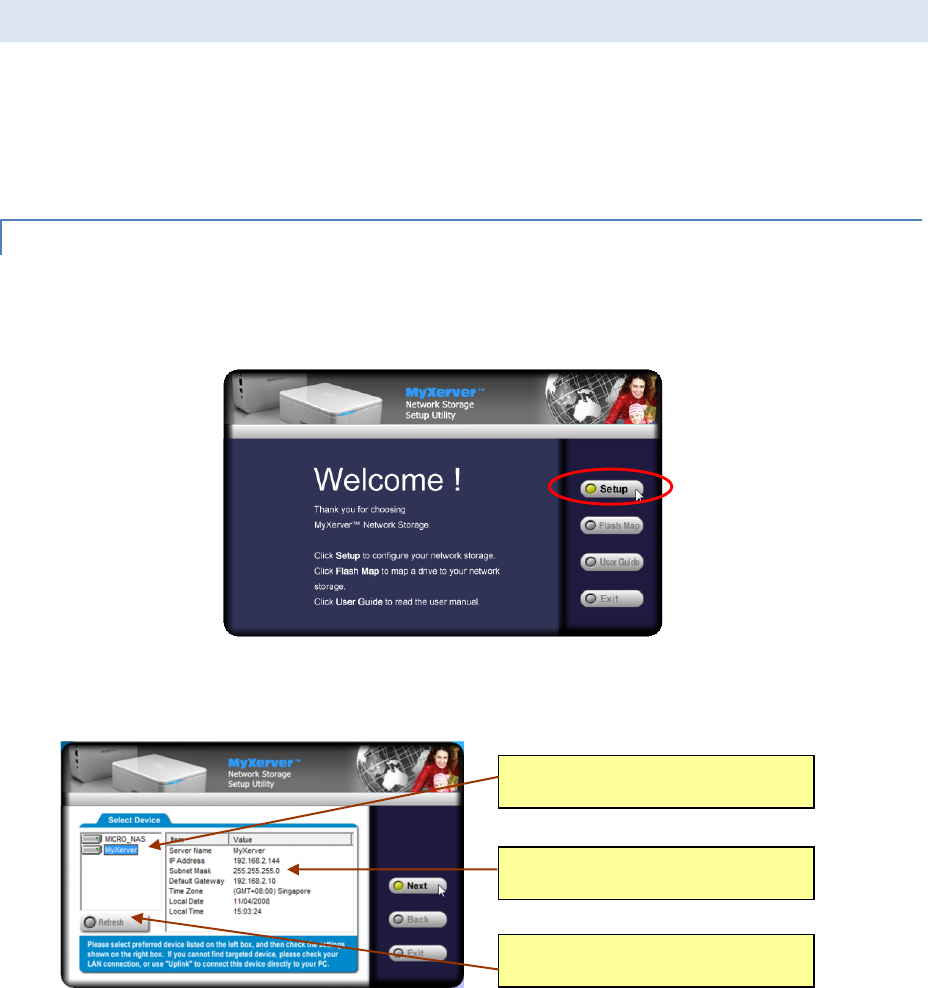
2. Run the program NAS_Setup.exe which is located at the root (top) folder of your CD-ROM. The Welcome
screen will be displayed.
3. Click Setup to start the Setup Utility. The Utility will begin scanning your network for installed NAS drives,
and a screen like the following will be displayed. The default Server Name of MX3600 is “MyXerver”.
A list of MX3600 network storage on your network will show on the left side. The right side displays
details of the currently selected NAS. If the desired MX3600 network storage is not listed, check the
following:
• The MX3600 has finished the start up and boot process.
• Your PC and the MX3600 are on the same LAN segment (there is no Router between your PC and
the MX3600).
Otherwise, select the desired NAS (default name of MyXerver), and click the "Next" button.
Detected server list.
Select preferred one to setup.
Current settings of selected server.
Please make a note.
Press “Refresh” to re-scan whole
network for available NAS/USB.