MyXerver™ MX3600 NETWORK STORAGE Quick Start Guide www.universal-tech.
INTRODUCTION ™ Thank you for selecting MyXerver Network Storage! ™ MyXerver Network Storage is the ideal multimedia storage hub for your home or small-business network. MyXerver™ combines the functionality of a file server, together with a host of other value added features such as the Bit Torrent download feature which allows you do continuous download of internet content without turning on the PC, and an embedded media server, which enables streaming of audio or video to a compatible UPnP player.
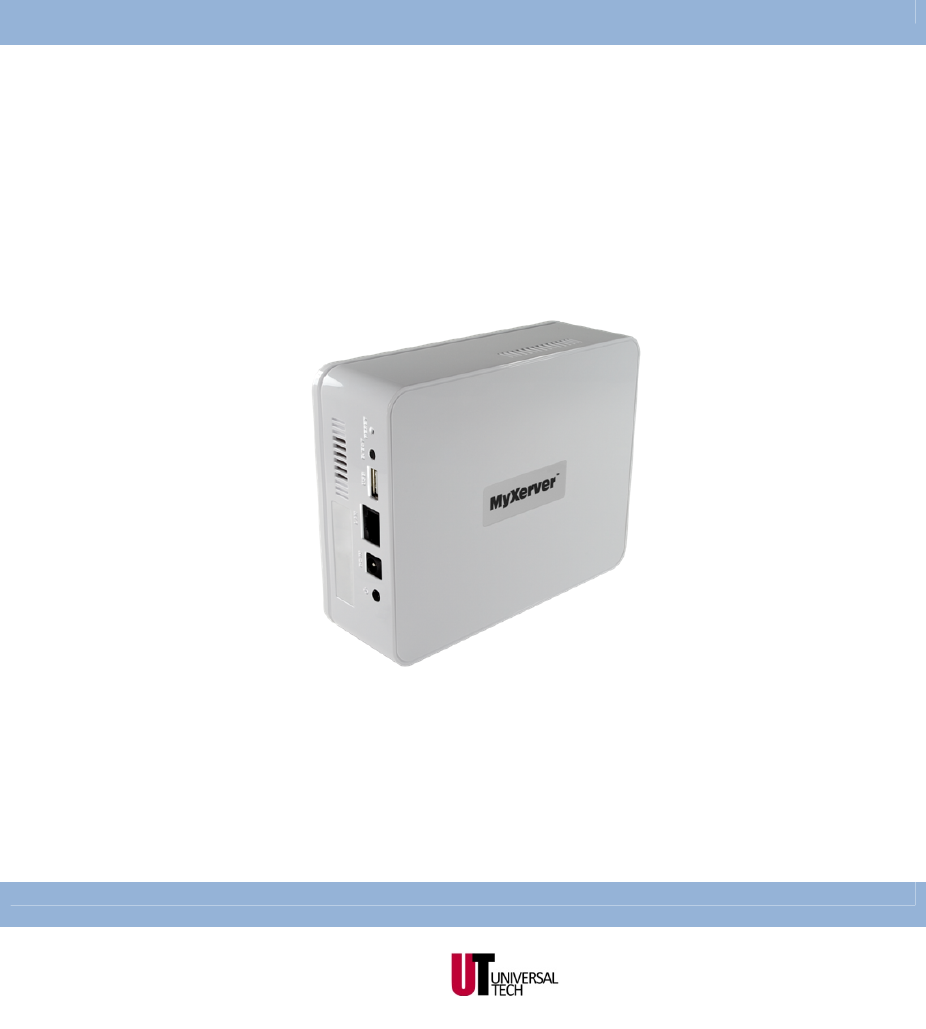
FRONT PANEL System Power LED HDD Activity LED System Power LED OFF Blinking ON ON Cross-blinking NAS is powered off Startup mode (1-3 mins) Normal operation when there is no HDD activity Normal operation when there is HDD activity During: Disk Scanning / SMART disk checking / Firmware upgrade / HDD Format HDD Activity LED OFF ON-OFF-ON ON Blinking Cross-blinking REAR PANEL System Reset USB Eject Button / USB Copy Button USB 2.
5. When the system power LED stops blinking and remains on, boot up process is complete. There will be one beep sound. SHUTDOWN To shut down MX3600, press the power button. There will be one beep sound. Wait for all LEDs to turn off. REMOVING A USB DEVICE There are 2 ways of removing a USB device. METHOD 1 1. 2. 3. Press the USB eject button at the rear panel. The MX3600 will beep once, and when it is ready to dismount the USB, it will beep once again.
INITIAL CONFIGURATION This procedure needs to be done once only by the NAS administrator. Subsequently, other NAS users should refer to the section “Using MyXerver™ MX3600”. The initial configuration can be done either by using the Setup CD (Windows only), or by using a web browser. Use the Setup CD method if you have more than one unit of MyXerver™ on your network. A. USING THE SETUP CD (WINDOWS ONLY) 1. 2. Insert the MyXerver™ MX3600 Setup CD into your CD-ROM drive of your computer.
4. The following screen will then be displayed. Select your desired IP configuration. Select this if your LAN has a DHCP Server, otherwise select “Fixed IP Address” Suggested values are compatible with your LAN. Suggested IP address is currently used. Obtain an IP address automatically (DHCP Client) Fixed IP Address 5. Select this only if your LAN has a DHCP Server which can allocate IP address automatically.
6. Click Next to continue. The following screen is displayed. All Settings are displayed. Please confirm they are correct, then click Save. After saving, a final screen will be displayed. Press Exit to close the Setup Utility. 7. Click Save to save your configuration to the NAS. On the next screen, click Exit to close the Setup utility. The NAS is now operational. B. USING THE WEB INTERFACE 1. Open up your web browser, and type in the address bar: http://myxerver.
2. Click on Administration. A window will pop up, requesting for user name and password. Enter user name as “admin”, and leave the password blank. 3. Click on the Network menu item. The IP configuration screen will be displayed.
Obtain an IP address automatically (DHCP Client) Fixed IP Address Select this only if your LAN has a DHCP Server which can allocate IP address automatically. You need to enter the following data: IP address: The utility will suggest an unused IP address within the address range used on your LAN. If you wish, you can change this, but you must ensure the address is unused. Network Mask: This must match the value used by PCs on your LAN. Gateway: This must match the value used by PCs on your LAN.
5. The NAS is now operational. You can view the Network Storage Status on the Welcome screen. Network Storage Status Other Configuration After the configuration above, all Windows users can access MX3600 with "guest" access rights. However, we recommend creating a "User" for each person on your LAN. This will provide each person on your LAN with their own login (name and password) as well as their own personal folder on the NAS. See the User Guide for details on creating users via the web interface.
USING MYXERVER™ MX3600 FINDING MYXERVER™ MX3600 ON YOUR NETWORK 1. 2. 3. 4. Open Network Neighborhood or My Network Places. Locate the MX3600. If it is not listed, double-click Entire Network. Then double-click the Workgroup that the MX3600 is in. By default, the MX3600 is in Workgroup. Double click on the MX3600 icon. You will then see a list of shares (shared folders). You can read and write files to these shares, unless the MX3600 administrator has blocked access.
2. The Flash Map icon will be installed on the system tray. Right click on the Flash Map icon and select "Shared Folder Mapping". 3. The following will be displayed. A list of all the NAS’s on your network will show on the left side.
4. 5. Select which share folder you want to map and select a drive letter for this share folder then click Map button. This drive will now be available in Windows Explorer, and from the File-Open or File-Save As dialog in all Windows applications. ACCESSING MYXERVER™ MX3600 USING THE WEB INTERFACE To connect to the NAS with your Web Browser within your local network: 1. In your Browser's Address or Location bar, enter "http://" and the MX3600 Server’s IP Address.
The Web interface of the MX3600 has three major functions: Change Password Administration Download Manager 2. 3. Users may change their password to match their Windows Logon Server management can be performed. Default ID is “admin” and default password is empty. BitTorrent download, as well as HTTP/FTP download can be managed from here. To browse the files and folders on the MX3600, click on either the Private Data or Public Data on the main screen.