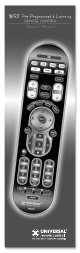
Congratulations! Congratulations on purchasing Universal Remote Control’s WR7 7-Component Pre--Programmed and Learning remote control. You now have the power to control your entire home entertainment system with one easy--to--use remote. The WR7can be used with thousands of audio/video components because of the extensive library of codes that have already been programmed into the remote. So... get ready to sit back, relax, and simplify your home entertainment experience.
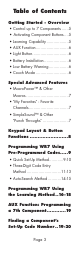
Table of Contents Getting Started - Overview • Control up to 7 Components ......5 • Activating Component Buttons ....5 • Learning Capability ...................5 • AUX Function............................6 • Light Button...............................6 • Battery Installation.....................6 • Low Battery Warning.................6 • Couch Mode ............................6 Special Advanced Features • MacroPower™ & Other Macros ....................................7 • “My Favorites” - Favorite Channels..
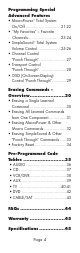
Programming Special Advanced Features • MacroPower™ Total System On/Off ..............................21-22 • “My Favorites” – Favorite Channels............................23-24 • SimpleSound™ Total System Volume Control....................25-26 • Channel Control “Punch Through” .......................27 • Transport Control “Punch Through” .......................28 • OSD (On-Screen Display) Control “Punch Through” ............29 Erasing Commands Overview......................
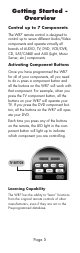
Getting Started Overview Control up to 7 Components The WR7 remote control is designed to control up to seven different Audio/Video components and operate virtually all brands of AUDIO, TV, DVD, VCR/DVR, CD, SAT/CABLE and AUX (Light, Music Server, etc.) components. Activating Component Buttons Once you have programmed the WR7 for all of your components, all you need to do is press a component button and all the buttons on the WR7 will work with that component.
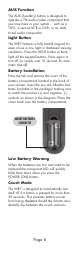
AUX Function The AUX (Auxillary) button is designed to operate a 7th audio/video component that you may have in your system… such as a TIVO, a second VCR or DVD, or an additional audio component. Light Button The WR7 features a fully backlit keypad for ease of use in low light or darkened viewing conditions. Press the LIGHT button to backlight all the keypad buttons. Press again to turn off (or simply wait 10 seconds for automatic shut-off).
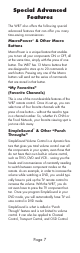
Special Advanced Features The WR7 also offers the following special advanced features that can offer you many time-saving conveniences: MacroPower™ & Other Macro Buttons MacroPower is a unique feature that enables you to turn all your components ON or OFF, all at the same time, simply with the press of one button. The WR7 has 13 Macro buttons that are designed to store up to 20 commands in each button.
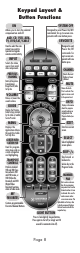
Keypad Layout & Button Functions ON SYSTEM OFF Allows you to turn the selected component on and off. Designed to send Power On/Off commands for up to seven components with one button press. AUD, CD, VCR, AUX, TV, DVD,SAT/CABLE FAVORITE Used to select the component you want to operate and signals remote control activity. Designed to send Power On/Off commands for up to seven components with one button press. INPUT Selects the video source from available components.
Programming WR7 using Pre-Programmed Codes There are three ways you can program your WR7 using the component brand codes that are pre-programmed into the remote. • Quick Set-Up Method • Three-Digit Code Entry Method • Auto--Search Method The Quick Set-Up Method is a unique new feature that enables the fastest and easiest set-up by using one-digit codes for up to 10 major brands for each component. The Three-digit Code Entry Method allows you to set-up the WR7 using 3-digit codes for component brand names.
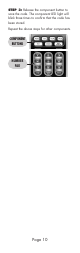
STEP 3: Release the component button to save the code. The component LED light will blink three times to confirm that the code has been stored. Repeat the above steps for other components.
Three-Digit Code Entry Method STEP 1: Find the 3-digit code numbers assigned to your brand from the lists in the back of this manual. The codes are listed by component category (i.e., TV, VCR, DVD, etc.), then by brand name. For instance, if you would like to locate a code for a Sony television, first locate the TV category and then look for the Sony brand.
IMPORTANT: You have 30 seconds to perform the next step while you are in programming mode. If you do not press a button within 30 seconds, the component LED light will turn off. The remote will exit the programming mode and you will have to start over. STEP 5: Point the WR7 toward the component (in this example the TV) and punch in the first 3-digit code that you wrote down for that specific component. Use the Number buttons 0~9 on the remote to punch in the code.
STEP 7: Once you’ve entered a correct code, you must save it. Press the component button you just programmed (in this case TV) one more time to save the code number. The component LED light will blink three times to confirm that the code was successfully stored. Now when you press the TV component button, all of the buttons will work with your TV. Program the remaining components by repeating steps 3 through 7.
Auto-Search Method The Auto-Search Method is a way you can scan through all of the codes in the table to find the right code for your component. STEP 1: Manually or using your old remote, turn on the component you want to program—for example, to program your TV, turn on your TV set. STEP 2: On the WR7, press the Component button that you want to program (in this case the button that says TV) and the SELECT [SEL] button at the same time.
STEP 3: Point the WR7 remote control toward the component and press the UP [ ] arrow (or DOWN [ ] arrow) button once. Each time the UP or DOWN arrow button is pressed, the code will count up (or down) one code number and send a Power OFF signal. When the correct code is sent out, the component will turn off. STEP 4: Once you have found the right code number and the component has turned off, press the POWER [ON] button on the WR7 remote to turn the component back on.
Programming WR7 using the Learning Method STEP 1: Line up the WR7 to the remote control you want to “learn” from, head--to--head as shown below. Start with both remotes’ IR windows touching (or nearly touching). STEP 2: On the WR7, press the Component button that you want to program (in this case the button that says TV) and the ENTER [ENT] button at the same time. Hold down both buttons for two seconds until the TV Component button light turns on. This signals that you are in programming mode.
STEP 4: Press and hold the [MUTE] button on the other remote until the component button LED on the WR7 blinks twice. Now you can continue learning all other buttons from your old remote by pressing the next button on the WR7 and repeating this step. Note: The component LED will blink five times if there was an error in the learning process. In this case, please repeat Steps 3 and 4.
Here are some additional facts regarding the Learning process: • Learned functions override any existing preprogrammed functions on the remote control • Learned functions are automatically erased when a new function is learned on the same button • Learned functions are retained even after a different set-up code number is programmed into the remote control • To return to an original pre-programmed function, a learned function must be erased • Rapidly tapping the Volume Up button on the old remote will teach
AUX Function: Programming a 7th Component After you’ve finished programming the WR7 for six primary components and you did not use AUX, you can take advantage of the AUX function to program a 7th component, such as a second TV, DVD, or any other audio/video component that you may have in your system. Simply program the [AUX] button in the same manner as any other component using either the Quick Set-Up Method, the 3-Digit Code Entry Method, the Auto-Search Method or the Learning Method.
STEP 2: Press the [INFO] button and count the number of times the Component LED light blinks. This number indicates the first digit of the code. Next it will pause for about one second and begin blinking again to indicate the number of the second digit. Then once again it will pause, then blink, to indicate the number of the third digit. Example: One blink, pause, eight blinks, pause, three blinks indicates code number 183. Note that ten (10) blinks represent the number 0.
Programming Special Advanced Features Programming Multi-Commands to Macro Buttons The WR7 has 13 Macro buttons (ON, SYSTEM OFF, 7 Component buttons, and 4 “My Favorites” buttons) that are designed to store up to 20 commands in each button. Pressing any one of the Macro buttons will send out the series of commands that are stored in that particular button. MacroPower™ Total System On/Off MacroPower makes several devices work together by pressing one button.
IMPORTANT: You have 30 seconds to perform the next step while you are in programming mode. If you do not press a button within 30 seconds, the component LED light will turn off. The remote will exit the programming mode and you will have to start over. STEP 2: Press the component button you want to turn on and then the POWER [ON] button; repeat for all other components in the order you want them to turn on. The component LED lights will blink once each time you press the POWER [ON] button.
Programming “My Favorites” Favorite Channel Buttons In Cable mode, the four [MY FAVORITES] buttons are also designed to serve as dedicated Favorite Channel buttons. Each button will access one of your favorite channels with just one button press. Here’s how to program Favorite Channels: STEP 1: Press the [CABLE/SAT] button to select the Cable/SAT mode. STEP 2: Press one of the [MY FAVORITES] buttons and the [MUTE] button at the same time for two seconds until the [CABLE/SAT] component LED turns on.
STEP 3: Using the Number Pad, punch in the Channel number of the Favorite Channel that you want to store in the Macro button. The CABLE/SAT component LED light will blink once for each button pressed. STEP 4: Press the CHANNEL UP [CH ] button to store the commands entered. The [CABLE/SAT] component LED will blink three times to confirm the programming. CHANNEL UP Notes regarding programming multi-commands to Macro buttons: • You can program up to 20 commands on each Macro button.
SimpleSound™ Total System Volume Control SimpleSound is one of the most exciting features of the WR7. It gives you total volume control over ALL the components in your system, even those that do not have built--in volume control, such as TIVO, DVD and VCR. SimpleSound saves you the hassle and inconvenience of constantly switching between component modes just to control volume. First you should identify which device in your system will be used to deliver sound.
STEP 2: Press the VOLUME UP [VOL ] button and then press either the TV or AUDIO component button that you want to use for volume. The Component LED light will blink three times to confirm that it is saved. This sets up three buttons (Volume Up, Volume Down and MUTE) as a group for that component. VOLUME UP Repeat Steps 1-2 for all other components. Note: SimpleSound is what’s technically referred to as a “Punch Through” feature and is not limited to volume control.
Channel Control “Punch Through” This “punch through” enables you to program the WR7 so that either the Cable or TV Channel Controls (CHANNEL UP, DOWN, LAST, CHANNEL NUMBERS 0-9, +10 and ENTER) will also operate in other component modes on the remote control. STEP 1: Press and hold the component button you want to add channel control to, such as [DVD] or [VCR], and the SELECT [SEL] button at the same time for two seconds until the Component LED light turns on.
Transport Control “Punch Through” This “punch through” enables you to program the WR7 so that VCR or DVD Transport Controls (PLAY, STOP, FF, REW, PAUSE, SKIP and RECORD) will also operate in other component modes on the remote control. STEP 1: Press and hold the component button you want to add Transport Control to, such as [CABLE/SAT] or [TV], and the SELECT [SEL] button at the same time for two seconds until the Component LED light turns on.
OSD (On-Screen Display) Control “Punch Through” This “punch through” enables you to program the WR7 so that CBL or DVD OSD Controls (MENU, GUIDE, INFO, EXIT, SEL and 4 Cursor Controls) will also operate in other component modes on the remote control. STEP 1: Press and hold the component button you want to add OSD Control to, such as [TV] or [VCR], and the SELECT [SEL] button at the same time for two seconds until the Component LED light turns on.
Erasing Commands Overview You can erase a single learned command, all learned commands in each component mode, SimpleSound programming, MacroPower commands, or re--set the remote to original factory default settings. Erasing a Single Learned Command from One Component STEP 1: Press the component button where the learned command is stored and the [ENTER] button at the same time for two seconds until the component LED light turns on.
Erasing All Learned Commands from One Component This function allows you to erase all the learned commands from one component. For example, if you want to erase all learned commands on the TV component button because you bought a new TV, the process is very simple. STEP 1: Press the component button where all the learned commands are stored and the [ENTER] button at the same time for two seconds until the component LED turns on.
Erasing MacroPower & Other Macro Commands STEP 1: To erase MacroPower commands on the POWER [ON] or [SYSTEM OFF] button, press and hold either the POWER [ON] or [SYSTEM OFF] button and the [MUTE] button simultaneously for two seconds until the current status component LED turns on. IMPORTANT: If you don’t proceed to the next step within 30 seconds, the LED will turn off and exit set-up mode and you will need to start over. STEP 2: Press the CHANNEL UP [CH ] button to erase and exit Erase mode.
Erasing SimpleSound & Other “Punch Through” Commands STEP 1: Press and hold the Component button you want to erase volume control from, such as DVD or VCR and the SELECT [SEL] button at the same time for two seconds until the Component LED light turns on. ] STEP 2: Press the VOLUME UP [VOL button and the same component button from Step 1. The component LED light will blink three times to confirm the erasure.
Factory Reset You can reset your WR7 remote to the original factory default settings. Press and hold both the [TV] and RECORD [REC] buttons for about five seconds until the [CABLE/SAT] component LED light blinks five times. All programming and set-up codes that you have entered into the remote will be erased and the WR7 will return to the original factory default settings. Warning This procedure will erase all programming and set-up codes that you have entered into the remote.
Pre-Programmed Code Tables The WR7 Pre-Programmed code library is classified by category (Audio, CD, VCR/DVR, etc.). Within each category, the code numbers are listed in rows by brand (Sony, Panasonic, B & K, etc.). Some brands have more than one threedigit code. Circle the correct row and refer to it while you perform setup operations.
AUDIO Brand ADC ADCOM Code Numbers 007 082 092 225 161 269 355 356 AIWA 170 018 104 202 203 213 211 188 AKAI 189 AMC 125 126 127 281 282 ANGSTROM 142 ANTHEM 335 337 ARCAM 141 418 ATLANTIC TECHNOLOGY 342 AUDIO FILE 071 AUDIO MATRIX 167 AUDIO TECHNICA 134 B&K 096 097 BOSE 070 170 224 347 409 460 BOSTON ACOUSTICS 447 BRIX 555 CARVER 006 028 061 071 201 214 226 185 022 077 284 CINEMA SOUND 134 CITATION 148 272 CLARION 026 DELPHI 515 DENON 109 215 230 234 330 001(Default) 801 DVICO 802 ELAN 057 290 ENLIGHTENED
CD Brand ADCOM AIWA AKAI AMC ARCAM AUDIO ACCESS AUDIO EASE AUDIO TECHNICA CALIFORNIA AUDIO CARVER Code Numbers 062 042 089 170 187 202 231 232 238 119 147 165 046 147 008 185 041 050 107 130 134 135 138 139 203 204 167 CREEK 159 DENON 002 123 EMERSON 042 FISHER 050 185 134 008 GENEXXA 010 HARMAN KARDON 033 047 208 HITACHI 042 175 INKEL 130 JCPENNEY 141 JENSEN 158 JVC 004 022 136 163 213 214 242 243 KENWOOD 185 007 023 055 071 072 142 137 254 KRELL 241 255 KYOCERA 005 LUXMAN 011 028 070 249 252 MAGNAVOX 10
VCR/DVR Brand VCRs AIWA AKAI AMPRO ANAM AUDIO DYNAMICS BROKSONIC CANON CRAIG CURTIS MATHES DAEWOO DBX DYNATECH ELECTROHOME EMERSON Code Numbers 034 043 072 145 012 043 129 145 003 135 145 010 112 012 043 034 053 059 006 145 034 101 129 131 153 FISHER 003 010 008 FUNAI 034 GE 145 072 147 144 GOLDSTAR 101 013 012 123 HARMAN KARDON 012 HITACHI 004 034 043 013 INSTANTREPLAY 145 JCL 145 JCPENNEY 012 013 101 JENSEN 043 JVC 048 043 012 145 KENWOOD 048 034 LG 101 013 012 123 LLOYD 034 LXI 034 003 MAGNAVOX 067 145
AUX Brand Code Numbers PC & iPod Controls APPLE 401 412 476 BOSE 409 DLO 418 GRIFFIN 471 IPORT 419 KENSINGTON 406 SONACE 419 TEN TECHNOLOGY 401 MEDIA PC Controls DELL 001 262 GATEWAY 001 262 HAUPPAUGE 294 295 HP 001(Default) 262 KEYSPAN 297 SONY 001 262 TOSHIBA 001 262 WINBOOK 001 262 GAMING SYSTEM Controls MICROSOFT / XBOX 408 107 SONY / PS2 414 SONY / PS3 598 AUDIO AUTHORITY / PS3 622 LIGHTING Controls LITE-TOUCH 208 257 LUTRON 158 159 077 X-10 183 093 D2A ARTEC CASTI CRAIG DIGITAL STREAM GRIDLINK INET
TV Brand ABEX ADMIRAL ADVENT ADVENTURA AKAI Code Numbers 025 072 251 333 160 247 002 197 146 248 473 474 475 405 A MARK 112 143 AMPRO 167 073 AMSTRAD 052 ANAM 043 054 056 080 112 AOC 197 363 112 058 APEX DIGITAL 006 591 AQUAVISION 573 574 ASTAR 477 AUDIOVOX 076 BELCOR 116 BELL&HOWELL 333 072 BROKSONIC 238 BROCKWOOD 116 CAIRN 201 CANDLE 197 002 003 363 CAPEHART 058 CELEBRITY 001 CENTURION 197 CETRONIC 043 CITIZEN 197 002 003 363 043 258 103 143 CLASSIC 043 CLP CLASSIC 333 COLORTYME 116 197 CONCIERGE 073 CO
TV Brand NIKKO NIKO NORCENT NUVISION OLEVIA ONKING ONWA OPTIMUS OPTONICA OPTOMA ORION PANASONIC Code Numbers 116 197 527 390 351 567 432 363 043 043 025 019 251 265 270 249 096 034 056 080 164 208 524 583 PHILCO 197 003 059 060 064 164 363 024 056 063 PHILIPS 164 005 093 038 197 003 363 059 127 206 333 431 594 PILOT 116 PIONEER 135 025 197 018 023 116 234 272 374 393 POLAROID 323 328 353 354 356 457 494 505 PORTLAND 363 143 PROSCAN 144 160 333 165 167 PROTON 363 112 058 143 171 172 193 PROTRON 498 499 392
DVD Brand AIWA AKAI ALPINE APEX DIGITAL BROKSONIC CINEVISION COBY CYBERHOME DENON DURABRAND DVD 2000 EMERSON ESA FISHER FUNAI GE GO VIDEO GOLDSTAR HARMAN KARDON HITACHI ILO INITIAL INSIGNIA INTEGRA JBL JVC KENWOOD KISS KLH KRELL LEXICON LG LITEON MAGNAVOX MALATA MARANTZ MERIDIAN MICROSOFT MINTEK MITSUBISHI MYRYAD NAD NAKAMICHI ONKYO OPPO OPTIMUS ORION PANASONIC PHILIPS Code Numbers 146 281 098 087 282 115 130 091 260 271 138 080 173 091 017 091 143 143 147 143 027 137 091 220 221 265 091 084 140 101 268 2
CABLE/SAT Brand CABLE BOXES ABC ADB ADELPHIA ADVANCED NEWHOUSE ALTRIO AMERICAST AMINO ARMSTONG AT&T BROADBAND ATLANTIC BROADBAND BELL SOUTH BLUE RIDGE BRESNAN BRIGHT HOUSE BUCKEYE COMM CABLEVISION CHARTER CISCO COGECO COMCAST COMSAT COX DIGITAL DIGEO EAGLE EASTERN ENTONE GEMINI GENERAL INSTRUMENT GNC GOLDEN CHANNEL HAMLIN HITACHI INSIGHT JERROLD MAGNAVOX MASSILLON MEDIACOM MOTOROLA MOXI MYRIO NCTC NOW TV NSC OAK PACE PANASONIC PHILIPS PIONEER QUEST RCA RCN REGAL REGENCY RODGERS SAMSUNG SCIENTIFIC ATLANTA SE
Frequently Asked Questions If the batteries run out, will I lose my settings? No. The WR7 stores all of your settings in nonvolatile FLASH memory. You could remove the batteries for months, replace them at your convenience, and the WR7 would still remember your settings. What is MacroPower? MacroPower is a very useful way to make a lot of things happen with one button push.
USA Limited Warranty UNIVERSAL REMOTE CONTROL, INC. warrants this product against defects in material or workmanship for a period of one (1) year and as set forth below. Universal Remote Control will, at its sole option, repair the product using new or comparable rebuilt parts, or exchange the product for a comparable new or rebuilt product. This warranty not does apply to the following: • Units purchased from unauthorized resellers. • Units purchased second-hand (used).
MEMO Page 46
MEMO Page 47
MEMO Page 48
MEMO Page 49
MEMO Page 50
MEMO Page 51
The Pioneer in Control Technology 500 Mamaroneck Avenue, Harrison, NY 10528 Phone: (914) 835-4484 Fax: (914) 835-4532 www.universalremote.