
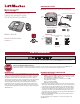
Installation guide
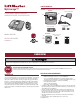

INSTALLATION
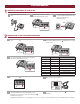
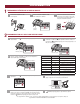
Position the door sensor
vertically and attach to a
clean, dry location on the top
panel of the garage door with
fastening strips.
MOUNT THE DOOR SENSOR
3
Door Sensor
“TOP” MUST always face UP
ALTERNATIVE OPTION (WITH SCREWS)
MUST be mounted on the TOP panel of garage door.
MUST be mounted
on the TOP panel
of garage door.
Fastening Strips
“TOP” MUST always face UP
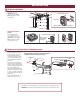
Press
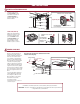
Mount the Wi-Fi hub on the ceiling
near the garage door opener. The
Wi-Fi hub should be mounted on
either side of the garage door opener
(as shown) so the Wi-Fi hub light is
visible if standing in the doorway of
the garage.
Use the bracket as a template and
mark holes for the bracket. Drill 5/32"
pilot holes. Install the bracket with the
hardware. Slide the Wi-Fi hub onto the
bracket. Plug in the Wi-Fi hub.
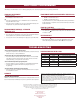
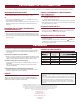
After power is applied the blue LED
will blink indicating the Wi-Fi needs
to be setup. The LEDs on the Wi-Fi
Hub are visible when directly facing
the Wi-Fi Hub.
Attach the warning placard to the
wall next to the door control.
MOUNT THE WI-FI HUB AND INSTALL THE WARNING PLACARD
ALTERNATIVE OPTION (WITH
SCREWS)
Press in the bottom of the
door sensor and remove the
cover. Position the door sensor
vertically and attach to the top
panel of the garage door with
screws. Replace the cover.
4
(mounting area)
Wi-Fi Hub
(ceiling)
Warning
Placard
Door
Control
MUST be mounted in a location where the Wi-Fi Hub light will
be visible if standing in the doorway of the garage.
The installation is complete and ready to be connected to the home’s wireless (Wi-Fi) network.
IMPORTANT: Leave the Wi-Fi Setup card with the homeowner to complete the Wi-Fi setup.