Digital Video User’s Guide THE FUTURE NOW SHOWING
Welcome The NEW WAY to WATCH Digital TV is different than anything you have seen before. It isn’t cable…it’s better. Digital TV offers great channels, many features and many choices. Watch what you want – sports, movies, news, cartoons, dramas, comedies – anything you can imagine is there. Watch when you want – with features like Autotune, video on demand and digital video recording. Watch how you want – high quality digital video and sound. So sit back, relax and enjoy the future.
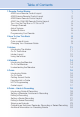
Table of Contents 1 Remote Control Basics ADB Focus Remote Control Layout ADB Potenza Remote Control Layout ADB Polaris Remote Control Layout ADB Titan 2056 ISX Remote Control Layout Turn Your Set Top Box or TV On or Off Change Channels Adjust Volume System Buttons Programming Your Remote 1 1 2 3 4 5 5 5 5 6 2 How To Use This Book Layout Color-codes & Icons Changing Your Onscreen Guide 8 8 8 9 3 Infobar Introducing The Infobar Go To The Infobar Infobar Layout Using the Infobar 11 11 11 12 13 4 Menubar
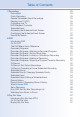
Table of Contents 7 Recording Recordings Quick Recording General Guidelines About Recordings Pausing Live TV (PLT) Controlling Live TV DVR Playback Controller Schedule Event Accessing the Schedule Event Screen Configuring the Schedule Event Screen Record By Search 25 25 25 25 25 26 26 27 27 27 28 8 DVR Introducing DVR Go To DVR The DVR Menu Quick Reference Recorded Programs Recorded Programs: Watching a Recorded Program Recorded Programs: Sorting Recordings Recorded Programs: Locking or Unlocking a Record
Table of Contents 10 On Demand Introducing On Demand To Access Getting Around On Demand Bringing Up the Play Menu Play a Program & Add It to My Library Rent a Program On Demand Browse & Search Options Stop a Video and Exit On Demand 39 39 39 39 39 40 40 41 42 11 My Library Introducing My Library The My Library Menu Go To My Library Go To Rented Videos Watching a Rental Video Introducing PPV Events Go To PPV Introducing Reminders Go To Reminders Cancel a Reminder or Autotune Introducing Messages Go To Mess
Table of Contents 14 Favorites Introducing Favorites Go To Favorites Choosing a Favorites List Creating or Editing a Favorites List Delete a Favorites List 59 59 59 59 60 60 15 Search Introducing Search Go To Search Search for a Program Introducing Web & Email Go To The Web 61 61 61 61 63 63 16 Web & Email (Coming Soon) Go To Email 63 64 17 Widgets (Coming Soon) Introducing Widgets Go To Widgets Using Widgets Stocks Widget Weather Widget Twitter Widget Suggestions Widget 65 65 65 65 65 66 67 68 18 C
Table of Contents Settings (Picasa) Using Settings (Picasa) My Photos & People Search (Picasa) Using Search (Picasa) Introducing Cloud Search 78 78 80 81 81 81 19 Remote Scheduling (Coming Soon) Introducing Remote Scheduling Accessing Remote Scheduling on the Web Recording a Program Record Using the Home Page Record Using the Guide Page Using the Search Guide Option Managing Your Scheduled Recordings Managing Your DVR Recordings Manage your account settings Changing Your Password Renaming Your DVR Set Top
1 Remote Control Basics ADB Focus Remote Control Layout STB Send commands to the set top box TV Send commands to the TV AV Choose between your TV’s different connections Mute Toggles audio on/off Vol +/Adjust the volume; in Guide jumps listings 12 hours ahead/ back Closed Caption Toggles closed captions on or off Menu Display the Menu Bar Direction Buttons Move the highlight in system screens OK Enter a choice you have made Back Tune to the previous channel Function Buttons For future use DVD Send commands
1 Remote Control Basics ADB Potenza Remote Control Layout Device Selection Send commands to TV, audio, DVD, auxiliary device or set top box RCU SETUP Setup remote (see page 5) DVR LIST Displays list of recorded programs MENU Displays Menu Bar Arrow Keys Move highlight in system screens GUIDE Displays Guide DAY - / DAY + Jumps Guide 1 day ahead or back Function Buttons For future use VOL + / Adjust volume MUTE Toggle audio on or off Number Pad Enter a channel number or PIN WWW For future use INPUT Access Dev
1 Remote Control Basics ADB Polaris Remote Control Layout Power (TV) Turn TV on or off REC Begins recording LIST For future use MENU Displays Menu Bar Arrow Buttons Move highlight in system screens GUIDE Displays Guide VOL + / Adjust volume MUTE Toggle audio on or off FAV Toggles closed captions on or off “B” Use when blue button is requested on screen DAY - / DAY + Jumps Guide 1 day ahead or back Number Pad Enter a channel number or PIN SWAP For future use Power (CBL) Turn set top box on or off Playback C
1 Remote Control Basics ADB Titan 2056 ISX Remote Control Layout Device Selection Send commands to AUX, DVD, AUD, TV or STB DVR Controls Go back, bring up DVR list, go to live TV MENU Displays Menubar GUIDE Displays Guide DAY - / + View Guide a day forward or back Function Keys For future use VOL + / Adjust volume MUTE Toggle audio on or off FAV For future use Number Pad Enter a channel number or PIN Keyboard Display on-screen keyboard Hot Keys For future use 4 POWER Turn a selected device on or off Playb
1 Remote Control Basics Turn Your Set Top Box or TV On or Off The device selection buttons tell your remote whether you want to control your set top box or your television. To turn your TV on or off, press the TV button then the POWER button. Note: Your remote control must have the remote code programmed in before it can send the correct signals for your TV. If the list of TV brand codes was not included in your installation pack, please contact customer service.
1 Remote Control Basics INFO displays the Infobar, a feature that lets you see information on what you’re watching, what’s coming on next, and what’s on other channels. For more information on the Infobar, see section 3 Infobar. EXIT causes your set top box to exit whatever screen you are seeing and return you to normal TV viewing. If you ever get lost on a screen, it is always safe to press EXIT and then start over. Programming Your Remote Step 1: Make sure your TV is on.
1 Remote Control Basics Step 7: To lock in the code, press: ADB Focus Remote (page 1 in this guide book) the SHIFT button ADB Potenza Remote (page 2 in this guide book) the RCU SETUP button ADB Polaris Remote (page 3 in this guide book) the SETUP button ADB Titan Remote (page 4 in this guide book) the SETUP button The TV button will blink twice, signaling that the code for your TV is now programmed.
2 How To Use This Book Layout Instructions are paired with screen shots to illustrate the process and provide confirmation of what you should see on your TV. Section headings and on-screen text, such as screen titles, messages and options are shown in Deep Blue Bold Type. Buttons on the remote control are represented by a graphic of that button, or Red Bold Type when a graphic cannot be shown. Color-codes & Icons Program listings may display icons based on settings for a particular program.
2 How To Use This Book Changing Your Onscreen Guide The graphic colors and background on the electronic program guide (skins) may be different than the ones shown in this guide but the operations and features are the same. This User’s Guide uses the NuBlu skin and your United/Turtle Moutain Digital TV onscreen program guide displays a different skin (BlueShadow). You can change the BlueShadow skin to match the NuBlu in the guide.
2 How To Use This Book Step 1: Press Menu on your remote. Use your Arrow Keys to scroll to the Settings icon. You will have to enter a password to enter Settings. Preference under Settings will be highlighted. Navigate to the bar space across from Theme and press OK on the remote. Step 2: The Theme box will show right and left arrows. Use your right and left Arrow Keys on your remote to show NuBlu, then push OK on your remote to select the NuBlu. Step 3: Scroll down to Submit and press OK.
3 Infobar Introducing The Infobar The Infobar is a quick way of finding information about the show you are watching, what comes on later, and what is on other channels. Go To The Infobar There are three ways to make the basic Infobar appear. Press INFO on your remote control. Press the Up or Down Arrow Keys on your remote control. The basic Infobar will also appear any time you change channels. Once the Infobar is active, press INFO again to display the detailed Infobar.
3 Infobar Infobar Layout 1 2 4 5 8 1 8 2 4 5 3 6 7 3 6 7 9 1 Channel Name & Number The name and number of the channel currently listed in the Infobar. 2 3 Current Time Program Type Indicates whether you are watching Live TV, a recorded program, or a Pay-Per-View program. This may also indicate if the program is Blocked/ Restricted because of parental controls or that the Emergency Alert System is active.
3 Infobar Using the Infobar Step 1: Go To The Infobar Press INFO, the Up or Down Arrow Keys, or change channels. Step 2a: See What’s On Other Channels Press the Up or Down Arrow Keys to scroll the Infobar through what is showing on other channels without actually changing channels. If you find something you would rather watch on another channel, press OK to tune to that channel.
4 Menubar Introducing the Menubar The Menubar is a quick and easy way to access any feature of your service. Go To the Menubar To display the Menubar, press MENU on your remote control. Press the Left/Right Keys on your remote control to move the highlight through the menu. Press Menu again to exit or press Exit on your remote control. Understanding the Menubar Guide will bring up the program guide. For information on Guide, please see section 5 Guide.
4 Menubar My Library provides quick access to previously purchased programs, Reminders you have scheduled, messages regarding your service, and Caller ID history. For more information on My Library, see section 11 My Library. Settings offers access to creating parental controls and setting blocked channels, determining how things appear on the screen (such as TV caller ID), and creating, editing and deleting user accounts. For information on Settings, see section 12 Settings.
5 Guide Introducing Guide Guide is the place to quickly find out what’s on now and what’s playing later. You can set Reminders or Recordings for upcoming programs in Guide. Go To Guide There are two ways to go to Guide. Press GUIDE or Press MENU, scroll to Guide icon, and press OK. Getting Around Guide To navigate Guide… • Move to a channel by entering the channel with the Number Pad (0-9). • Use the Arrow Keys on the remote to move the highlight through the Guide, channel by channel.
5 Guide Guide Layout Favorites List Indicates the Favorites list currently in use. Info Area Provides information about the currently highlighted program. Picture-in-Picture Allows you to watch TV while you are in Guide. Highlight Indicates what program listing is currently in focus. Program Listings Shows channel number, channel abbreviation, and program listings for each channel. Program listings may include icons to indicate a setting or feature for a particular program.
6 Guide - Alerts & Recording Introducing Guide & Recording In this section, you will learn about setting or scheduling a recording, recording a series, and editing it. You will view the recordings under the DVR icon. A Reminder informs you a program is about to come on. An Autotune automatically changes the channel when the program is about to start. A Recording will automatically record the program to your set top box.
6 Guide - Alerts & Recording Step 3: Return to Guide The program listing now shows an icon. Reminder set Autotune set Recording set Step 4a: Your Reminder A few minutes before your program comes on, a box will appear on your screen telling you that you have a Reminder. Press INFO to display the Reminder. Highlight the button showing the program name and press OK to watch the program. Highlight Cancel and press OK to ignore the Reminder.
6 Guide - Alerts & Recording Step 4c: Your Recording If you set a future recording, your set top box will record it for you once your program begins (see 7 Recordings for more details). To watch your recording, go to 8 DVR - Recorded Programs. Editing a Recording Note: Recording is not available if your set top box doesn’t support it. Once you have created a recording, you can adjust when the recording begins or ends.
6 Guide - Alerts & Recording Setting a Series Recording Note: Recording is not available if your set top box doesn’t support it. If you choose to record a program that is part of a regular series, you will be offered the option to record the series. This allows you to record every episode of a favorite program. Step 1: Pick a Program Find any episode of the series you want to record. Highlight the program listing and press OK. Step 2: Set the Recording Highlight Record Series and press OK.
6 Guide - Alerts & Recording Editing a Series Recording Note: Recording is not available if your set top box doesn’t support it. Once you have created a series recording, you can adjust which episodes of the series are recorded and which are skipped. Step 1: Pick a Series Recording Locate any program in the series to be recorded. Highlight its listing and press OK. Step 2: Edit Series Recording From the options shown for this program, highlight Edit Series Recording and press OK.
6 Guide - Alerts & Recording Channels determines whether the series is recorded when aired on the channel originally set to record, or record the series on whatever channel airs it. Preference determines whether to record the program when shown in standard definition or only when shown in high definition. Episodes determines whether to record re-runs and new episodes of the series or only new episodes.
6 Guide - Alerts & Recording Canceling an Autotune, Reminder, Recording or Series Recording You can cancel any event you have previously scheduled directly from Guide. Step 1: Pick the Program Highlight the program with the event you want to cancel and press OK. Step 2: Cancel the Event Depending on the type of event you are canceling, your options will be: or Highlight the option you wish to cancel and press OK. A Yes or No confirmation screen will appear. Highlight Yes and press OK to confirm.
7 Recording Recordings Creating recordings and pausing live TV both require a DVR (Digital Video Recorder). There are several ways to record besides those covered in 6 Guide - Alerts & Recording. They are listed here. Quick Recording The fastest and easiest way to begin recording is to use the RECORD button on your remote control. Step 1: Start Recording While watching a program, press RECORD. Recording will begin immediately. You can also start a quick record in Guide.
7 Recording Controlling Live TV While watching a recorded program or live TV, you can use the Playback Control Buttons to control playback. Press PAUSE on your remote control to pause the program. Programs can be paused as long as the current channel is not changed. Press PLAY to resume watching. Press REWIND or FAST FORWARD to reverse or advance playback from the current point. Press repeatedly to increase FAST FORWARD or REWIND speed. Press STOP to exit playback of the program.
7 Recording Schedule Event With Schedule Event, you can select the channel, date, start and stop time, duration, and frequency of a recording. It is helpful when you want to record or watch a portion of a program on a reoccurring basis. Accessing the Schedule Event Screen There are two ways to access the screen. Option 1: When you select a future program in Guide and press OK, select the Schedule Event option from the pop-up menu.
7 Recording Set Type of Event Arrow Down and highlight Type and press OK. The highlight will become left/right arrows. Arrow Left or Right until you see the event type you want (Recording, Autotune, Reminder), then press OK. Set Event Frequency Arrow Down on your remote and highlight Freq and press OK. The highlight will become left/right arrows. Arrow Left or Right on your remote until you see the frequency you want (Single, Weekly, M-F, Every Day), then press OK.
8 DVR Introducing DVR In DVR, you can view current recordings, see a list of future scheduled recordings, edit and cancel recordings, sort and prioritize recordings, lock recordings, and schedule a future event. Schedule Event is the only DVR feature that enables recordings. Go To DVR Press MENU, highlight DVR and press OK. The DVR Menu Quick Reference Recorded Programs lists programs you have already recorded. Go here to watch, sort, lock or delete these recorded programs.
8 DVR Recordings not yet watched are listed with white text; those you have are listed with grey text. If a program is still being recorded a red dot icon will appear to the left of the program’s name. The Whole Home icon means that the recorded program can be viewed from any set top box in the house and will appear to the left of the program’s name. (See the end of this DVR section for more details about Whole Home DVR.
8 DVR Step 4: Return To Live TV When the recording ends, you will be prompted to keep or delete the recording and then returned to live TV. If you want to return to live TV before your recording has ended, press STOP ( ). See Playback Controls on your remote. Recorded Programs: Sorting Recordings Highlight Recorded Programs and press OK to bring up your recording list. The first listing will be highlighted.
8 DVR Step 2a: Lock the Recording Highlight Lock and press OK. Once a program is locked, a on the recording’s listing. appears Step 2b: Unlock the Recording If you select a locked program in Step 1, the Lock option will instead be Unlock. Highlight Unlock and press OK. When the program is unlocked, the padlock icon is removed. Recorded Programs: Deleting a Recording Step 1: Pick a Recording Highlight the recording you want to delete and press OK.
8 DVR To Record: Sort Future Recordings A list of your scheduled future recordings will appear to the right. The list of programs to be recorded can be sorted by title, date to be recorded, channel airing the program to be recorded, or recordings to be skipped or not. For more information on sorting items in this list, see Sort Recordings earlier in this section.
8 DVR Schedule Event Highlight Schedule Event and press OK. Setting a Schedule Event is covered in 7 Recordings. Editing instructions are covered here. Schedule Event: Editing a Schedule Event You can edit the channel number, date, time, and type of timer and frequency of the event. Highlight the setting you want to change by Arrowing to the item and press OK. Use the Right and Left Arrow Keys to change the settings and press OK on the remote to end the edit.
8 DVR Whole Home DVR As the name suggests, with Whole Home DVR all set top boxes in the household can record programs and view live or pre-recorded shows from any room in the house. You can also stop a recorded program in one room and continue watching it in another. Set a Recording You can set a recording from all set top boxes in the household, not just the DVR. Of course, you need one DVR in the household because it actually does the recording functions for all the non-DVR set top boxes.
8 DVR Watching from Room to Room If you start watching a recorded program in one room (family), and wish to move to another room (bedroom) you can view the recording there. Step 1: Stop the recording playing in the family room by pushing the stop button on your remote. (See the Playback Controls on your remote). A screen will appear giving you a choice to either Keep this Recording (highlighted) or Delete this Recording. Click OK on the highlighted Keep this Recording.
9 Pay Per View Introducing Pay Per View (PPV) Pay Per View allows you to watch exclusive sporting events, movies, and other content in the comfort and privacy of your home. Forget long lines, big crowds, expensive concessions and seats in the “nose bleed” section. Go To Pay Per View Using the Arrow Keys on your remote, scroll the menubar to PPV, then press OK. The PPV list will appear on the Guide menu.
9 Pay Per View Step 3: Confirm Your Purchase Highlight the box next to Enter PIN and enter your Pay Per View PIN using the Number Pad (0-9). For more information on PINs, see section 12 Settings. To share this video with other viewers on your system, highlight the check box next to Share PPV and press OK. For more information on Share PPV, see section 12 Settings. Finally, highlight the Buy button and press OK. Step 4: Watch Your Pay Per View You can now watch your Pay Per View program.
10 On Demand Introducing On Demand On Demand provides access to VoD (Video on Demand) movies and programs. You can pause, rewind or fast forward during viewing. To Access Press Menu on the remote control. Use the Arrow Keys to highlight On Demand. Press OK. Getting Around On Demand Rentals are grouped into categories for easier navigation. The main category selections are on the top of the screen and the listings of that category are displayed below.
10 On Demand Highlight an option and press OK on your remote. Play: Plays the video. Play From Last: Resumes the video from where you left off. More Info: Displays rental information like title, expiration date, and video length. View Trailer: Plays the movie trailer when available. Cancel: Exits from the Play menu options.
10 On Demand Once the confirm button is highlighted, press OK. The movie will then begin to play. You can use the Stop, Pause, Rewind, Fast Forward and Play buttons on the remote control anytime during the movie. On Demand Browse & Search Options The yellow ( ) button and green ( ) button will change functions depending on which menu screen you are on. When you begin browsing On Demand programs, the yellow ( ) button will say Search, and the green ( ) button will say Free Only.
10 On Demand When the on-screen keypad is up, the yellow ( ) button will change to say Exit. Press the yellow ( ) button on your remote to Exit the keypad. The green ( ) button on the On Demand menu screen will toggle between showing Free Only programs and All Movies, and is accessed by pressing the green ( ) button on your remote. When you toggle these options, the On Demand menu screen itself will change and show Free Movies and then All Movies (which include paid movies).
11 My Library Introducing My Library My Library stores all purchased programming, a list of your scheduled Reminder and Autotune events, messages about your service, and a log of your Caller ID. The My Library Menu Video provides access to your VoD Rentals you have purchased from Rentals. PPV Events allows you to view previously purchased concerts, sporting or other Pay Per View programs. Reminders lists all Reminder and Autotune events you have created. From here, you can cancel a Reminder or Autotune.
11 My Library Watching a Rental Video Step 1: Pick Your Video Rental Highlight your Video Rental and press OK. Step 2: Play Your Rental Highlight Play From Start and press OK to start playing at the beginning. If you have already watched part of the program and want to pick up where you left off, highlight Play From Last and press OK. Introducing PPV Events PPV Events allows you to view a previously purchased program. Go To PPV Arrow down to your topic and press OK.
11 My Library Introducing Reminders Reminders lists all Reminder and Autotune events you have created. From here you can cancel a Reminder or Autotune. Go To Reminders Highlight Reminders and press OK. A list of your Reminders and Autotunes appears to the right. Cancel a Reminder or Autotune Step 1: Pick the Program Highlight the Reminder or Autotune you want to cancel and press OK.
11 My Library Introducing Messages Messages may inform you of promotional offers, upcoming Video on Demand events, service upgrades or billing alerts. Whenever you receive a new message an alert will appear on your screen. Press INFO on your remote to display the message, or press EXIT to ignore the alert and view the message later. Go To Messages Highlight Messages and press OK. A list of all available messages appears to the right. Reading a Message Highlight the message listing you want to read.
11 My Library Introducing Caller ID Caller ID offers access to the Caller ID call log. You can review log entries and delete individual entries. Note: You must subscribe to Caller ID to access this feature. Additionally, only certain set top boxes support on-screen Caller ID. Please contact customer service for more information. Whenever you receive a call, an alert will appear in the upper corner of your screen. This alert will be removed after a few seconds.
12 Settings Introducing Settings Settings gives you control over your video service. You can choose to share purchased programs, change how alerts appear on your screen, create parental controls and block programs by channel or ratings. You can also create accounts for members of your family. Go To Settings Press MENU and highlight Settings. Then enter your password, highlight OK and press OK. There are two main sections of Settings: Preferences and Users. Both are used for setting up parental controls.
12 Settings other’s content. For more information about Movie and TV Ratings, see the ratings definitions in the appendix of this guide. Movie and TV ratings determine the lowest rating for programs that will be blocked. The selected rating and all levels above that rating will be blocked. Unlock Timeout (Only Available on Master Account) Unlock Timeout determines how long parental controls will remain disabled. To set Unlock Timeout, highlight the option box next to Unlock Timeout and press OK.
12 Settings You set the amount of time you want for the Unlock Timeout to be in effect under the Parental Controls settings as explained earlier in this section. To turn Parental Controls off indefinitely, uncheck the check box marked Parental Controls in Settings Preferences. Working With Additional Preferences Share Rentals Share Rentals makes purchased programs available for any user (enabled), or only available to the user who makes the purchase (disabled).
12 Settings To block channels, highlight the Channel Blocking Edit button and press OK. If no changes have been made on the Preferences screen, you will go directly to the list of all available channels. If any changes have been made to the main Preferences screen and you have not already updated them, a Save Changes box will appear. Highlight YES and press OK if you wish to save these changes. The Settings Successfully Updated notice will then appear. Highlight OK, and press the OK button.
12 Settings Theme Theme allows you to change the color and style of menu, guide and system screens using pre-set styles. These different pre-set styles are called skins. To get to Theme, highlight and select the Settings icon on the main menu bar, then scroll over to Theme. There are several choices in the drop down menu for Theme. Here are some examples of the different Guide and Menu screens. Pink Shadow 5.4/5.6 Guide Menu Bumblebee 5.
12 Settings English Default 5.4 Guide Menu Hardware Settings For service provider only. Working With Settings/Users User accounts allows you to have separate parental controls, purchase limits and themes for different family members. Users/Settings allows you to add a user account, edit an existing user account, change parental controls for a user account, or delete a user account.
12 Settings Note: The master account is the first account listed and is shown in yellow rather than white. You cannot delete the master account and cannot change the login name for the master account. Adding a User Account To create a new user account, highlight the Add button and press OK. Highlight New Login to enter the name for the new account and press OK. An onscreen keyboard appears. Use the Arrow Keys to highlight a letter or number and press OK to add it to the login name.
12 Settings Highlight New Password to enter the password for the new account. Use the Number Pad on your remote to enter the password. Highlight Confirm Password to re-enter the password for the new account. Use the Number Pad on your remote to re-enter the password. Theme Choose a theme to be used for the new account. Highlight Allowance $ to enter a limit to the amount of programs that can be purchased per month for the new account. Use the Number Pad on your remote to enter a whole dollar amount (e.g.
12 Settings The second Add User Account screen allows you to create parental controls specific to this user. These parental control settings are identical to the settings shown earlier with the exception that there is no Unlock Timeout or Block Unrated setting. Once you have entered the settings for the new account, highlight Submit and press OK. Editing a User Account To edit a user account, highlight the user account and press OK, then highlight the Edit button and press OK.
12 Settings Now highlight New Password to change the password. Use the Number Pad on your remote to enter a numeric password. Highlight Confirm Password to re-enter the password. Use the Number Pad on your remote to exactly re-enter the password. Highlight PIN and enter the account’s existing PIN. Highlight New PIN and enter a new PIN for this account. Highlight Confirm PIN to re-enter the new PIN. Highlight the Enable PIN check box and press OK to enable or disable the need to use a PIN.
13 Sign Out / Sign In Sign Out / Sign In This function is typically only used if there are more than one user account, usually when a parent adds a child as a new user. The parent’s account (master account) controls the child’s account (sub account). Go To Sign Out / Sign In Press the MENU button on the remote. Scroll the menubar to the Sign Out icon and click OK. You will then be signed out of your account, and the Sign In screen will appear. Highlight the Name entry box and press OK.
14 Favorites Introducing Favorites Save time and enjoy the channels you watch the most. Each Favorites list contains just the TV channels you wish to view. You can create multiple Favorites lists and quickly change the Guide to show them. Go To Favorites Press MENU and highlight Favorites, then press OK. A screen will appear with options to choose, edit, create or delete a list, or cancel.
14 Favorites Creating or Editing a Favorites List Step 1: Create or Edit Follow the steps in “Go To Favorites,” highlight Create or Edit, and press OK to bring up the Favorites create/edit screen. This screen displays every channel offered. Step 2: Name Your Favorites List The Name box is already highlighted. Press OK to bring up the on-screen keyboard. Then, highlight Clear All and press OK to clear the default name. Now you can enter the name for your Favorites list using the on-screen keyboard.
15 Search Introducing Search Search allows you to enter the name or partial name of a program or video and find any program matching the text you entered. Go To Search Press MENU and highlight Search, then press OK. Search for a Program Step 1: Enter the Program Title When the Search screen appears, the highlight will be on the Search text box Press OK and a keyboard will appear to the right of the screen. Usually the first three or four letters in the name will be enough to find your program.
15 Search Step 2: Search Highlight Search and press OK to perform a system-wide search of all programs that match your search criteria. The search results appear in order on the right side of the screen. Step 3: Pick a Result You can highlight any TV program or rental listing and press OK and a menu will appear, enabling you to... (1) Schedule an Event (recording - see 8 DVR). (2) Watch or record a program if it’s on now.
16 Web & Email (Coming Soon) Introducing Web & Email Web allows you to surf the web from your TV. Email provides access to an email website specified by your service provider. Now you can browse the Web or send and receive Email from your TV...no computer necessary! Go To The Web Press Menu on your remote and highlight WEB and press OK. When you press OK, your TV will display your default web browser. Use the Arrow keys to highlight where you want to enter text.
16 Web & Email (Coming Soon) Go To Email Press MENU on your remote control and highlight Email and press OK. When you press OK, your TV will display your default email web page. Use the Arrow keys to highlight where you want to enter text. The on-screen sign says PUSH THE INPUT BUTTON TO BRING UP THE ON-SCREEN KEYBOARD. The INPUT button is located on your remote. Use the on-screen keyboard and Arrow keys to select the letters or numbers you want to enter.
17 Widgets (Coming Soon) Introducing Widgets Widgets provides access to up-to-date news headlines, entertainment news, weather, finance, Twitter, sports scores and other information. Go To Widgets Press MENU on your remote control and highlight Widgets using the Arrow Keys then press OK. The main menu is replaced with the Widgets menu. Using Widgets Each icon on the Widgets menu provides access to information related to that icon.
17 Widgets (Coming Soon) Step 2: Bring Up the Keypad To access the keypad, use the Arrow Keys to highlight the white text box then press OK on the remote. The keypad will appear. Step 3: Using the Keypad Using the Arrow Keys, select a letter, then press OK. Repeat this until you’re done entering the stock ticker symbol, then select Done and press OK. The keypad will disappear and return you to the Stock Quotes window. Step 4: Acquire Stock Quotes Using the Arrow Keys, select Submit.
17 Widgets (Coming Soon) Twitter Widget This widget allows you to access your Twitter account. Follow these steps to operate the Twitter Widget. Step 1: Bring up the Twitter Widget Select the Twitter Widget from the Widget Menu Bar and press OK on your remote. The Sign In screen will appear. Step 2: Entering Username and Password Once the Sign-In screen appears, use the Arrow Keys to highlight the Username Text Box. Press OK on your remote to bring up the Keypad.
17 Widgets (Coming Soon) Step 4: Top Trends If you selected Top Trends, arrow down to the desired topic and press OK on your remote to view the Top Trend. Step 5: Search Twitter If you selected Search, arrow to white text box and press OK to bring up the Keypad. Use the same process in step 2 to enter your search topic.
17 Widgets (Coming Soon) Step 1: Bring up the Suggestions Widget Select the Suggestions Widget from the Widget Menu Bar. The Suggest A Widget window will appear, showing a text box to enter your suggestion. Step 2: Bring up the Keypad Make sure the text box is selected, and press OK on your remote to bring up the Keypad. Step 3: Using the Keypad Using the Arrow Keys, select a letter or number, then press OK. Repeat this until you’re done entering the suggestion, then select Done and press OK.
17 Widgets (Coming Soon) Step 5: Complete your Request You will then be taken through two screens (as shown below) asking you a little about yourself; one asking for your gender and another asking for your age. Answering these is optional. Use the Arrow Keys to highlight the answer you would like to give, then press OK. A Thank You screen will then appear after the process is complete.
18 Cloud TV (Coming Soon) Cloud TV The Cloud TV feature gives you the opportunity to access and watch a variety of internet programs on your TV screen. To access this feature, press Menu on your remote control and using your Arrow Keys scroll to Cloud TV then press OK. Once in Cloud TV, you will see these listings Introducing YouTube YouTube is the largest world-wide video sharing community. You can watch, upload and share videos through your digital television service.
18 Cloud TV (Coming Soon) Using YouTube The directions that follow apply to accessing all your YouTube categories except Search and Settings. Using your Arrow Keys, scroll to the category of YouTube videos you wish to browse and press OK on your remote. A list of videos will appear for that category. Once the video you wish to view is highlighted, press OK to view the YouTube video. When a video is played, the Infobar will appear at the bottom of the screen.
18 Cloud TV (Coming Soon) Settings (YouTube) YouTube Settings give you access to videos associated with a specific YouTube user account. To see your own videos, you will have to open a YouTube web account and upload them. Note: The YouTube web site requires an email address for the account’s username. This means lower case letters and an @ symbol will have to be used on the on-screen keypad to enter this information.
18 Cloud TV (Coming Soon) Now, My Videos, Subscriptions, and My Favorites will appear under the YouTube main menu screen. You can now access the videos associated with this account. If you Arrow down to Clear and press OK, your credential will not be saved. My Videos, Subscriptions and My Favorites will not appear on the YouTube Menu screen. If you arrow down to Cancel and press OK on the remote you will return to the YouTube menu screen.
18 Cloud TV (Coming Soon) When you have correctly entered all the information, highlight Done on the keypad and press OK on the remote. The keypad will disappear and the Search text box will be highlighted. Arrow down to highlight Search and press OK to bring up your search results. Use the steps from Using YouTube for viewing the videos. Introducing MetaChannels MetaChannels provides the Web’s largest index of syndication-ready Web video shows.
18 Cloud TV (Coming Soon) Using MetaChannels The directions that follow apply to accessing all MetaChannels video episodes/shows. Using the Arrow Keys on your remote, browse the A-Z listing and then select the highlighted menu item by pressing OK to bring up a list of subtopics. Using your Arrow Keys, browse the subtopics for the desired episode list. When you find the list you want to view, press OK. Then scroll to the episode and press OK to view.
18 Cloud TV (Coming Soon) Using Search (MetaChannels) While in the MetaChannels main menu, highlight Search and press OK on your remote to search the MetaChannels. The Search text box will be highlighted. Press OK to bring up the keypad. See Cloud TV (YouTube Search) for operation of keypad. Use the steps from Using MetaChannels for viewing selections. Introducing Picasa Picasa gives you access to publicly uploaded photos (Featured Photos and Recent Photos).
18 Cloud TV (Coming Soon) Using Picasa Arrow Up/Down to highlight Featured Photos or Recent Photos and press OK. Featured Photos are a collection of popular public photos. Recent Photos are a collection of the most recently uploaded public photos. Arrow Left/Right to scroll through the collection of photos. Press OK to view a photo in full-screen slideshow mode. Arrow Left/Right to scroll through the photos in full-screen mode. Press Stop button to exit from slideshow mode.
18 Cloud TV (Coming Soon) Scroll down to Settings then press OK on the remote to bring up the Picasa Settings screen. The username text box will be highlighted. Press OK on your remote to bring up the keypad. Using the Arrow Keys on your remote, select a letter or number on the keypad and then press OK. To switch from capital letters to lower case, Arrow to the (Aa) key on the bottom of the keypad and press OK. To switch the keypad to symbols, press the (#+) sign next to the (Aa) key.
18 Cloud TV (Coming Soon) If you Arrow Down to Clear and press OK, your credentials will not be saved. My Photos and People will not appear on the Picasa TV Menu screen. Arrow Down to Cancel and press OK to return to the Picasa menu screen My Photos & People The directions that follow apply to both My Photos and People . Scroll down to My Photos and press OK on the remote to bring up the My Photos album listings.
18 Cloud TV (Coming Soon) Search (Picasa) Search is the convenient way to locate photos on Picasa. Using Search (Picasa) While in the Picasa main menu, highlight Search and press OK on your remote to search Picasa. The Search text box will be highlighted. Press OK on your remote to bring up the keypad. See Cloud TV (YouTube Search) for operation of keypad. Use the steps from Using Picasa for viewing albums and photos.
19 Remote Scheduling (Coming Soon) Introducing Remote Scheduling Remote scheduling allows you to schedule new recordings and manage existing ones through any web browser while away from your home. Accessing Remote Scheduling on the Web First, enter your service provider’s website URL to pull up the sign in screen. Next, sign into your account - Type in your Username and Password and then click on Login.
19 Remote Scheduling (Coming Soon) Recording a Program Recording can be done in Home, Guide and Search Guide. Each gives you a different window to the content or programs on your home television that you can record remotely. Record Using the Home Page The Home option shows a lineup of popular programs. Click the title beneath the picture to show a list of upcoming episodes which you can choose to record. Click the program you want to record and the area will then be highlighted.
19 Remote Scheduling (Coming Soon) Record Using the Guide Page The Guide page displays guide information from which you can select a program to record. The same channels on your television will show on your web guide. Click on the Guide tab to view the guide listings. Click on the program you want to record. The Program information will display, then move your cursor down to the Record Program and Record Series buttons.
19 Remote Scheduling (Coming Soon) Using the Search Guide Option To search for a program to record, type in a keyword in the Search Guide box at the top of the web page and press enter. A list of programs with the keyword is displayed. Click on a program to access the program’s information. Select either the Record Program or Record Series for recording the selected program.
19 Remote Scheduling (Coming Soon) Managing Your DVR Recordings When you click on the Recordings tab, you’ll see a list of DVR recordings stored on your DVR set top box. Click on the (x) next to the program you want to delete. You can either delete that specific recording or delete all recordings of that program. Manage your account settings To manage your account settings, click on the Account tab. Here you can change your username, password, email address or rename your DVR set top boxes.
19 Remote Scheduling (Coming Soon) Changing Your Password You can change your password by clicking on Password or by clicking on the word change to the right. Next type in your old password, then type the new password and then confirm the new password. When finished click Save Changes. Renaming Your DVR Set Top Boxes You can rename your STB by clicking on DVR Boxes or the word Manage to the right. Next type in what you wish to rename your STB (no spaces).
Stream Management (Coming Soon) Stream Management lets you decide which channels to watch when you’ve exceeded your subscribed bandwidth to the home. When a requested stream exceeds the available bandwidth, the requesting STB displays messages that: • explain that the stream request exceeds available bandwidth. • offer alternative viewing options for the subscriber.
Set Top Box ADB 2500 Set Top Box 1 2 3 4 5 6 7 1. Power 12V DC 1.1A Provides power to the set top box. 2. USB (Universal Serial Bus) Connects the set top box to technician’s equipment and other devices. 3. Ethernet Connects the set top box to the video service using a CAT5 Ethernet cable. 4. SPDIF Connects the set top box to a home theater system to provide surround sound audio - provides audio only. 5. S-Video Connects the set top box to your TV to provide high-quality video - provides video only.
Set Top Box ADB 2721 W (WX) Set Top Box 1 2 3 4 5 6 7 1. Top: Video/Stereo Audio R/L (Video/Audio Left/Audio Right) Connects the set top box to your TV or VCR to provide good quality video and stereo audio. Bottom: Component (HD Analog) Output (Video/Audio Left/Audio Right) Connects the set top box to your TV or VCR to provide high definition quality video and stereo audio. 2. HDMI (High Definition Media Interface) Connects the set top box to your HDTV using an HDMI cable - provides audio and video.
Set Top Box ADB 3721 WN Set Top Box 1 5 2 3 6 7 8 4 9 10 11 1. Secondary Video/Stereo Audio R/L (Video/Audio Left/Audio Right) Connects the set top box to your TV or VCR to provide good quality video and stereo audio. 2. Primary Video/Stereo Audio R/L (Video/Audio Left/Audio Right) Connects the set top box to your TV or VCR to provide good quality video and stereo audio. 3. S-Video Connects the set top box to your TV to provide high-quality video - provides video only. 4.
Set Top Box ADB 3800 Set Top Box 1 2 3 4 5 6 7 8 9 1. Power 12V DC 1.7A Provides power to the set top box. 2. To TV Connects the set top box to your TV using a standard coax cable - provides audio and video. 3. S/PDIF Connects the set top box to a home theater system to provide surround sound audio - provides audio only. 4. USB (Universal Serial Bus) Connects the set top box to technician’s equipment and other devices. 5.
Set Top Box ADB 5721 WNX Set Top Box 1 5 2 3 6 7 8 4 9 10 11 1. Secondary Video/Stereo Audio R/L (Video/Audio Left/Audio Right) Connects the set top box to your TV or VCR to provide good quality video and stereo audio. 2. Primary Video/Stereo Audio R/L (Video/Audio Left/Audio Right) Connects the set top box to your TV or VCR to provide good quality video and stereo audio. 3. S-Video Connects the set top box to your TV to provide high-quality video - provides video only. 4.
Set Top Box ADB 5810 Set Top Box 1 2 3 4 5 6 7 8 9 10 11 1. USB Connects the set top box to USB compatible devices. 2. Ethernet Connects the set top box to the video service using a CAT5 Ethernet cable. 3. HDMI (High Definition Media Interface) Connects the set top box to your HDTV using an HDMI cable - provides audio and video. 4. Pr/Pb/Y (Component Video) Connects the set top box to your TV to provide very high-quality video - provides video only. 5.
Movie Ratings MPAA (Motion Picture Association of America) Ratings System G – General Audience This is a film which contains nothing which would, in the view of the MPAA Rating Board, be offensive to parents whose younger children view the film. PG – Parental Guidance Suggested The theme of a PG-rated film may itself call for parental guidance. There may be some profanity in these films. There may be some violence or brief nudity.
TV Ratings TV Parental Guidelines Ratings System The TV Parental Guidelines ratings provide program ratings and content ratings. This provides a clearer idea of the reason for a program’s rating. Program Ratings TV-Y – All Children This program is designed to be appropriate for all children. TV-Y7 – Directed to Older Children This program is designed for children age 7 and above. It may include mild fantasy violence or comedic violence.
Notes 97
Notes 98
Notes 99
Yesterday. Today. Tomorrow. Langdon Office 411 7th Ave. P.O. Box 729 Langdon, ND 58249 701-256-5156 Rolla Office 617 Main Ave. West P.O. Box 238 Rolla, ND 58367 701-477-1101 Bottineau Office 538 11th St. W, Suite 2 (located in North Central Electric Building) Bottineau, ND 58318 701-228-1101 To report trouble: 701-256-1125 Report toll free: 800-844-9638 www.utma.com This institution is an equal opportunity provider and employer.