
Specifications


42” HD Gas Plasma Display Rosen Aviation Displays, LLC
11
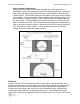
Figure 6
Unit Operation
After the installation is complete, plug the main power cord into the specified voltage outlet.
The unit has been set up at the factory so that it will turn on in the standby mode.
Remote Power On/Off
The remote control has a function that will only enable and disable the display’s screen (for
example: standby mode). The unit will remain in the standby mode when the display
screen is disabled by remote control. In this mode, the fans will not operate, and the unit
will draw only a few watts of power. The unit can be enabled again by using the IR, or by
RS232 command.
On Screen Display (OSD)
Invoking the OSD will access the system controls, which are fully detailed in Appendix C
(page 30). The primary system control functions or modes are summarized in the following
paragraphs.
Source Selection
Source selection by the remote control, in most installations, will only have to be performed
one time. Once you select the source: Computer RGB (VGA), Composite.Y, Composite.R,
Composite.W, S-Video, S-Video.A, YPbPr.1, YPbPr.2, or DVI, the system will remember
your source and you will not have to re-select it.
If you are using more than one source for video, you will have to change between the
different sources. The unit will always remember your last video source selection when
enabled from standby. However, if the unit is powered down improperly (for example: AC
power is removed), then the video source selection last saved by RS232 or the OSD’s
SAVE selection will be remembered and shown on the screen at power-up.
IR Universal Remote Control Discrete Commands (Direct IR)
Regardless of which menu the user is viewing, pressing one of the discrete command
buttons on the IR causes a corresponding immediate action. These discrete command
buttons are detailed in Appendices B and C, and are set up at the factory as defaults.
However, they are programmable through OSD menus. The Direct IR Menu is accessible
IR Sensor