
User guide


Link to Table of Contents
User Guide
108
VLS3.60, VLS4.60 and VLS6.60 Accessories
Rotary Calibration
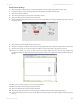
Select the System Tab and click on the CALIBRATE button in the Rotary box.1.
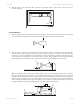
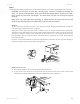
In the Y Position box, use the Y-Axis buttons to move the focus carriage back and forth. Place the focus carriage 2.
exactly at 2.625” (66.675 mm).
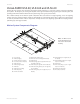
Next, use the X-Axis buttons to move the focus carriage left and right and place the red dot pointer over the 3.
at part of the concave metal xture normally located on the left hand side of the rotary.
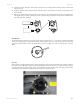
Now use the Z-Axis buttons or the Z-Axis buttons on your keypad (recommended) to move the table up and 4.
down and continue to the next step.
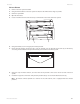
Power ON the laser system. The rotary will run through a self test and will slightly rotate. This movement is 3.
normal. If you are using the rotary for the rst time or replaced the laser system’s CPU, rotary calibration is
needed, so proceed to the next step. If rotary calibration is not needed proceed to the next page and see
“Determining Graphic Placement.”