
User guide


24
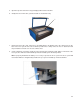
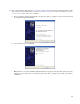
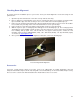
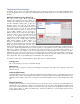
d. Pick up the laser cartridge by the ends and mount the cartridge onto the mounting blocks shown
in step b by placing the upper “V” groove on top of the mounting blocks. Slide the cartridge to the
right or left as necessary until the mounting holes in the top of the laser line up with the mounting
holes in the top of the laser mounting block.
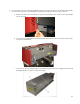
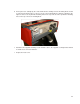
e. Attach the two supplied mounting screws marked 1 above, the supplied securing bracket marked
2 and the laser connector marked 3.
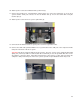
f. Replace the back cover.