
Specifications


#2 and #3 Mirror Assemblies
In
H
a
th
p
si
3. T
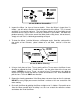
fe it sit for one
minute.
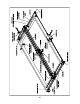
2. spect the Mirror for signs of haze or debris. Since the Mirror is larger than it’s
older, you will notice scratches around the perimeter of the Mirror. This is normal
nd there is no need for concern. The laser beam reflects off of the middle area of
e Mirror and as long as there is not dirt or scratches in the middle, the Mirror will
erform correctly. If the center area of the Mirror looks visibly clean, do not clean it,
mply re-install it to it’s Holder by proceeding to Step 8.
o clean the Mirror, hold the Mirror on a 45 degree angle, flood the surface with a
w squirts of Lens Cleaner, place it down on a soft cloth, and let
#2 and #3 Mirror Cleaning
. Repeat the cleaning procedure if the Mirror does not come clean on the first attempt.
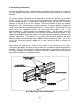
Mirror around while installing it as this can scratch the reflective surface
and reduce the life of the Mirror.
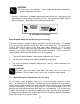
4. Using a fresh piece of Lens Tissue, gently pull the Tissue across the Mirror in one
direction to absorb the fluid. If fluid remains, use the other side of the tissue and
repeat. NEVER use a Lens Tissue, or area of a Lens Tissue twice as dust build-up
on the tissue may scratch the Mirror's surface and reduce it’s life. Also remember to
pull the Lens Tissue in ONLY one direction.
5
DO NOT use any finger pressure on the Mirror’s surface as this can scratch the soft
outer coating.
6. Re-install the Mirror by guiding the Mirror straight on to it’s holder. Be careful not to
slide the
86