
Specifications

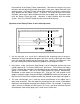


the centerline of the Rotary Fixture automatically. Now focus on the glass by using
the focus tool and adjusting the table up or down. If the glass slopes too much in the
engraving area, the Rotary Fixture can be tilted upwards to make the surface of the
glass parallel with the motion system. To do this, lift up the left end of the fixture
and place some sort of spacer underneath the fixture to prop it up. Be careful not to
raise the Rotary Fixture too high, otherwise it might interfere with the motion
system. Press the “PAUSE” button to move the arm out of the way.
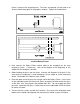
Operation of the Rotary Fixture in the Landscape mode
1. Use the top ruler as a visual aid in referencing the engraving area of the glass.
Sometimes using a ruler placed up against the glass and at a right angle to the table
rulers will help with determining the engraving area. Note this area because is will
be used in designating wher e computer screen.
diameter that was measured. Notice that while
typing in the diameter, the size of the height dimension changes automatically.
iameter of the object was typed in.
ertical page size) is 9.66 inches (245.4 mm).
e to place the graphic on th
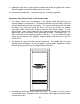
2. In the driver, make sure that the Page Setup is set to Landscape and the size set to
a width equal to 24 x 12 inches (609.6 mm x 304.8 mm). Then click on the “Rotary
Fixture” selection box and type in the
Remember or write down this new page size. Click on “OK” and go back to the
graphics software’s page setup and change it to EXACTLY match the new page size
that the ULS Printer Driver established when the d
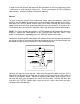
3. This new vertical page size is now the actual circumference of the object that is
going to be engraved. From the top of the engraving area (on screen) to the bottom
represents one complete revolution of the Rotary Fixture. For example, if engraving
a glass that has a diameter of 3.075 inches (78.1 mm), the driver calculates that the
circumference (and v
57