
Specifications


Since every laser has its own personality, Tickle is adjustable through the control panel
on the laser system. Tickle is set for each individual laser at the factory, but from time
to time, the Tickle setting may need to be adjusted as the internal characteristics of the
laser change over several months or several years of operation. Adjustments need only
to be done if necessary. There are two main symptoms of a laser that needs Tickle
adjustment.
Tickle Setting-Low
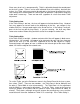
If the Tickle setting is too low, the laser will appear to hesitate before firing. Vectored
lines may appear to start off weak at the beginning of the line, get stronger in the
middle of the line, then get weak again at the end of the line. If the setting is really off,
parts of the line may be missing entirely. If you are rastering, the laser may make
some raster strokes without firing and then start to fire a couple of strokes later.
Tickle Setting-High
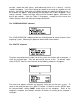
If the Tickle setting is too high, shadows and extra faint lines will appear in blank areas.
Vectored text, for example, will appear to be connected by very light lines from one
letter to the next as if the laser was supposed to turn off but stayed on slightly.
Rastered images will appear to have a shadow to the left and right of the raster stroke
about 1/2" from the edge of the rastered area.
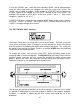
To set the Tickle, go to the Preferences menu in the Control Panel of the laser system,
then select “Tickle”. There are two numbers, the Tickle Rate in khz(or kilohertz) and
the other is Tickle Width in us(or microseconds). The Tickle Rate is a fine adjustment
and the Width is a more coarse adjustment. To set the Tickle, warm up the laser by
running a graphic at full power and full speed on some scrap material for about 15
minutes. Then draw a rectangle and raster engrave that rectangle on a very sensitive
material that will show the shadows of Tickle if it is set too high. If the Tickle setting is
45