
Specifications
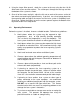
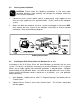
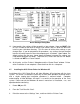

Driver Settings Dialog Box
13. How to adjust the settings will be covered in a later chapter. Now you MUST click
on “OK” in order for the driver to create a file called “Laser.ini” which the driver will
install to your c:\windows directory. This file stores all of the driver settings as you
change them. If you do not perform this procedure, any settings that get changed
later on will not be stored in when the computer gets shut down. Upon reboot, the
default settings like the ones shown above will appear instead of the settings you
used before computer shut down. To prevent this, make sure that the “OK” button
is clicked and NOT the “Cancel” button.
14. At this point, exit the “Printers” dialog box and the “Control Panel” window. Printer
driver installation is now complete. Store the driver disk in a safe place.
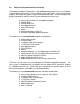
2.7 Installing the ULS Printer Driver for Windows 95
Installation of the ULS Printer Driver will allow Windows 95 to interface with the laser
system. This driver is installed the same way as most other Windows 95 printer drivers
and a simple step-by-step installation procedure is outlined below. Complete
understanding of how Windows 95 works is essential to the operation of the laser
system. Please consult the Windows 95 owner's manual on its installation, use, and
operation before continuing.
1. Power ON your PC.
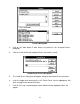
2. From the Task Bar click “Start”.
3. Point the mouse to the “Settings” icon, and then click the “Printers” icon.
19