Coagulation Meter USER GUIDE 79015 v1.
Original Instructions Any software screens, hardware details or test results shown in this manual are for illustrative purposes only. The information shown on your meter may differ. The contents of this manual, including all graphics and photographs, are the property of Universal Biosensors. No part of this document may be reproduced or transmitted in any form or by any means, electronic or mechanical, for any purpose, without the express written permission of Universal Biosensors.
1 General warnings and precautions 1 About the Xprecia Prime™ system 3 Intended Use 3 Your Xprecia Prime™ kit 4 Cleaning and disinfecting the Xprecia Prime™ system 4 Key features of the Xprecia Prime™ system 5 How the Xprecia Prime™ system works 5 Quality control 6 Integrated quality control 6 External quality control 6 Other references 7 Quick Start Guides 7 Xprecia Prime™ test strips instructions for use 7 Siemens Xprecia™ Systems PT Controls instructions for use 7 2.
Setting the date and time 11 Configuring access control 12 Log in options 12 Operator list 12 3. Running a patient test 13 What you will need 13 Warnings 14 Preparing to run a patient test 16 How to perform a patient test 16 4. Running a LQC test 21 What you will need 21 Warnings 22 Preparing to run a LQC test 24 How to perform a LQC test 25 LQC lockouts and reminders 29 5.
32 Cleaning and disinfecting your meter 32 Signs of deterioration 34 6. Historical results Past results 35 35 Viewing past patient test results 35 Viewing past LQC test results 36 Viewing past tests that ended in an error 37 Exporting past results to an external device 38 What you’ll need 38 Setting up 38 Connecting to the meter from another device 39 Exporting the results 39 7.
About 45 Device information 45 Network information 45 Advanced Settings (for Supervisors) 45 Patient settings 46 Login settings 46 Test settings – Display Time 47 Test settings – LQC Lockouts 47 Setting up an Operator list 50 About the Operator list 50 How to set up the Operator list 51 8. Troubleshooting 52 General troubleshooting 52 Liquid Quality Control (LQC) troubleshooting 53 Warning and error messages 54 9.
68 Legal notices 70 Software licences 70 Disposing of the Xprecia Prime™ meter 70 Disposing of Xprecia Prime™ test strips and liquid quality controls 70 European Union Radio Equipment Declaration 70 Radio emissions and electromagnetic compatibility 71 11.
This page is intentionally blank.
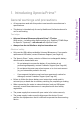
General warnings and precautions • All accessories used with this product must meet the manufacturer's specifications • This device is intended only for use by Healthcare Professionals and is not for self-testing. Test strips: • Only use Universal Biosensors Xprecia Prime™ PT strips. Other strips – including other Xprecia strips (e.g. Siemens PT/INR Strips for Xprecia™ Systems) – will not work with Xprecia Prime™. • Always close the vial lid after a strip has been taken out.
Biological safety: • Always follow the safety procedures and precautions listed here and throughout this user guide, plus those adopted by your healthcare facility. • Xprecia Prime™ should only be used by operators trained in handling biohazardous materials. Parts of the Xprecia Prime™ meter could become contaminated during testing and thus capable of transmitting blood-borne pathogens between patients and healthcare professionals.
The Xprecia Prime™ system is designed to monitor blood coagulation. It measures the time it takes for a sample of blood to clot and reports the result as an International Normalised Ratio (INR). INR results can vary from test to test due to health conditions. If it is too low, there is a greater than normal risk of blood clots forming; if it is too high, there is a greater than normal risk of bleeding. Anticoagulant medication is a common treatment in patients susceptible to blood clots.
Your Xprecia Prime™ kit Your Xprecia Prime™ kit contains the following items: 1. 2. Meter This User Guide 3. 4. Power Supply/ USB Cable Spare Cap Quick Start Guides – patient test and LQC test Cleaning and disinfecting the Xprecia Prime™ system The meter must be cleaned and disinfected after each patient test and each LQC test using the disinfecting wipe recommended by Universal Biosensors (see “Cleaning the meter” on Page 31).
• hand-held and portable (can be operated while tilted to an angle up to 45 degrees) • easy sample application with small (8 μL) sample volume • external quality control (LQC) tests with a configurable lock-out feature • barcode entry of strip information • strip ejection mechanism • rich user interface supporting multiple languages • internal battery with power monitoring • operator identification and access control • patient identification • memory feature (for displaying past test resu
Quality control Integrated quality control The Xprecia Prime™ meter has a number of integrated quality-control functions: • A check of components and functions is performed every time the meter is turned on. • The barcode information on the strip and vial are read by a scanner inside the Xprecia Prime™ meter. The meter then checks: o the strip’s expiration date and lot information; and o the strip’s calibration values. • During the test, the strip’s integrity is monitored.
Other references Quick Start Guides Your Xprecia Prime™ kit includes a quick start guide (QSG) that provides a quick description of the basic steps in a patient test and another QSG related to LQC (external liquid quality control) tests. Xprecia Prime™ test strips instructions for use Instructions for using the Xprecia Prime™ test strips are provided with the strips (sold separately). See “Ordering details” on page 64.
2. Getting started Powering the meter The Xprecia Prime™ meter is charged via a micro USB cable and AC power supply (included). It can also be charged using a micro USB cable connected to another suitable power source (such as a USB port on a computer). It is best to make sure that the meter is fully charged before first use. AC power supply and cable To charge meter, plug in AC power supply and connect the USB cable Your AC power supply comes with a range of plugs.
Power indicators A battery icon is at the top right corner of the screen with colour coding as follows: Green: power supply plugged in, battery charging. White: meter has sufficient battery charge. Red: critical battery; charge before running a test on battery power. Parts of the Xprecia Prime™ meter 4 1. Power button 2. Touch screen display 2. Getting Started Yellow: moderately-low battery; charge soon. 3 3. Test strip eject button 4. Test strip port and protective cap 2 5. USB port 6. USB 6.
Xprecia Prime™ PT test strips Electrodes: Insert this end into the meter’s strip port. Target Area: Apply sample here when prompted by meter. Strip Barcode: Scan this barcode when prompted by the meter (the barcode reader can be found on the bottom of the meter). • Use a test strip only once and dispose of it in biohazard waste after use. • Always keep unused strips in their original vial with the lid firmly closed.
Setting the date and time 1. From the Home screen, touch the SETTINGS button to navigate to the Settings screen, then select General and then Time 2. Swipe to set the correct time and then touch , then select Date 3. Swipe to set the correct date and then touch selection to confirm your 2. Getting Started Before you run any tests you should check the date and time (displayed at the top of the screen).
Configuring access control Log in options You can configure your meter to limit access. When access is limited, users will be forced to log in before reaching the home screen. You can also define special users (called Supervisors) that have access to advanced configuration options (see Page 45 for more details). In order to enable log in, you will first need to set up an operator list (see below). To log out, simply turn off the meter. Operator list An operator list is required for log in to be enabled.
3. Running a patient test What you will need 1. Your Xprecia Prime™ meter 2. A vial of Xprecia Prime™ test strips 3. A lancet (21 to 23 gauge, 1.8 to 2.0 mm depth) of your choice (purchased separately) 4. Alcohol swab/wipe and sterile gauze (purchased separately) 5. CaviWipes™ disposable disinfecting wipes (purchased separately) 1 2 4 3 3.
Warnings When running a patient test, do: 14 • Only use Universal Biosensors Xprecia Prime™ PT Test Strips. Other test strips (including other Xprecia test strips) will not work with Xprecia Prime™. • Always follow the safety procedures and precautions listed here and throughout the user guide, and those adopted by your healthcare facility. • Always wear a new pair of protective gloves when testing each patient.
• Do not insert a test strip into the strip port more than once. A test strip that is inserted twice might fail to make a proper electrical contact with the meter. • Do not bump the test strip or meter after you apply the sample or while the test is in progress. • Do not use a vial of test strips if the expiration date recorded on the label has passed. The meter will not allow you to use an expired test strip.
Preparing to run a patient test 1. Prepare a clean and tidy environment. 2. You and the patient must wash your hands in warm, soapy water and then dry them. 3. Identify the patient’s finger from which a fingerstick sample will be obtained. Ensure that the finger does not show evidence of a previous fingerstick. 4. In preparation for taking the sample, clean the patient’s finger with an alcohol wipe and allow to air dry. 5. Prepare a new lancet according to the manufacturer’s instructions.
2. From the Home screen, tap on the TEST button 3. Enter Patient ID If so configured, you will be prompted for the Patient ID. Enter the Patient ID by barcode or using the onscreen keyboard. You can switch between barcode/keyboard by touching the button at the bottom of the screen. 10 cm. / 4 inches 4. Remove a test strip from its vial 3. Running a patient test You can exit a test at any time by touching the button on the bottom left of the screen.
5. Scan strip barcode Tap the scan barcode button to scan the strip barcode. The meter will beep when the barcode is scanned. 10 cm. / 4 inches Note: When using a test strip from a new vial, you will be prompted to scan the vial after inserting the strip. 6. Insert the strip Following the on-screen instructions and with the strip's print-side facing upward, follow the direction of the arrows and gently but firmly insert the test strip into the test strip port.
8. Obtain sample Place the lancet firmly against the finger and activate the trigger (see your selected lancet’s instructions for details). If the blood smears or runs, wipe it off with a tissue and gently squeeze another drop. The drop should be about the same size as the test strip target area (the white semi-circular notch at the base of the strip). wipe first drop use second drop Use the lancet only once and dispose of it in biohazard waste after use. 9.
10. Analysis in progress During analysis, a bar on the bottom of the screen will show progress and the status of the strip’s internal quality control check. When the analysis is complete, a Result screen will appear. Be careful not to bump the meter or strip while the sample is being analysed. 11. Result screen When the test is complete, the result will be displayed. Units of INR and seconds can be shown. To switch units, touch unit specifier beside the result. To exit, touch .
4. Running a LQC test The Xprecia Prime™ meter has a number of integrated quality control functions (see page 6). To help your facility comply with regulatory requirements you can run a check of the system at any time using the optional Siemens Xprecia™ Systems PT Controls. Supervisors can configure the meter to lock out patient tests if LQC tests are not performed often enough or if a LQC test fails. See Page 47 for details.
Warnings When running a LQC test, do: 22 • Only use Universal Biosensors Xprecia Prime™ PT Test Strips. Other test strips (including other Xprecia test strips) will not work with Xprecia Prime™. • Only use Siemens Xprecia™ Systems PT Controls with the Xprecia Prime™ meter. • Always follow the safety procedures and precautions listed here and throughout the user guide, and those adopted by your healthcare facility. • Always wear protective gloves when performing LQC tests.
• Do not use a vial of test strips if the expiration date or discard date recorded on the label has passed. An error will be displayed if an expired strip is used. • Do not touch a test strip with wet hands or wet gloves because moisture can damage the strip. • Do not use a test strip that has been dropped or which may have been contaminated. • Do not use a test strip if it appears damaged in any way. • Do not apply control solution to a test strip until you are prompted to do so by the meter.
Preparing to run a LQC test Before running a LQC test you will need to prepare the control solution using the materials provided in your Siemens Xprecia™ Systems PT Controls kit. To do this: Open a plasma and diluent bottle Remove the screw caps from the plasma bottle and from one of the diluent bottles. Add diluent to plasma Transfer the full contents of the diluent bottle into the bottle of plasma using a transfer pipette. Take care to leave the diluent bottle as empty as possible.
How to perform a LQC test 1. Touch and hold the power button until the meter turns on When the meter boot process is complete, the home screen will appear. You may need to log in with your Operator ID and password (check with your administrator for details). 4. Running a LQC test 2. From the Home screen, tap on the LQC button You can exit a test at any time by touching the button on the bottom left of the screen. 3.
4. Remove a test strip from its vial Firmly close the vial immediately. Ensure that your hands are clean and dry to avoid contaminating or damaging the test strips. Once you have removed the test strip from a vial, you should conduct the test within 10 minutes. To avoid a potentially inaccurate test result, you must use the strip within 10 minutes of removing it from the vial. Do not use test strips that are past their expiration date (printed on the label of the vial). 5.
7. Meter prepares Wait for the meter to prepare. When the meter is ready, the Apply sample now screen will appear. DO NOT apply the sample until prompted. 8. Obtain sample Remember to use the solution within 25 minutes of dilution (or 60 minutes if refrigerated). 9. Apply the sample When the meter moves to the Analysing screen, transfer the hanging drop of LQC solution from the pipette to the target area (the white semi-circular notch to the base of the strip).
10. Analysis in progress During analysis, a bar on the bottom of the screen will show progress and the status of the strip’s internal quality control check. When the analysis is complete, a Result screen will appear. Be careful not to bump the meter or strip while the sample is being analysed. 11. Result screen If the LQC test is successful, the result will be displayed. If the LQC test fails, an error screen will be displayed.
13. Safely dispose of LQC materials LQC lockouts and reminders The Xprecia Prime™ meter offers a LQC lockout feature. This will block patient testing functionality until a successful liquid quality control test is performed. See “LQC lockouts” on page 47 for further details. 4. Running a LQC test Dispose of all used materials in a biohazard container or according to the practices of your facility.
This page is intentionally blank.
5. Cleaning the meter Parts of the Xprecia Prime™ meter could become contaminated during testing resulting in meter errors or in the transmission of blood-borne pathogens to users. The meter must be cleaned and disinfected between every test. The meter must be cleaned between each test, otherwise parts of the meter could become contaminated and capable of transmitting blood-borne pathogens to the user. • Disinfecting wipes as recommended by Universal Biosensors (see below).
Warnings \ Follow the recommended disinfecting instructions and contact times listed in this User Guide. Do not use any other disinfectant other than the wipes recommended above as it may damage the meter. Squeeze excess liquid out of each wipe before use so that the wipe is damp but not dripping wet. Do not let liquid accumulate around the strip port or the strip port cover. If fluid enters the strip port, your meter might be damaged. Don’t let liquid pool in the USB port as it may damage the meter.
Continue on the four edges and the back of the meter wiping two forward and backward strokes and two left and right strokes on each surface. D. Pick up the strip port cover and gently clean its front and back using your thumb and forefinger. Ensure the cap is visibly damp on all surfaces. You should pay particular attention to places where debris and fluids can gather (e.g. around the strip entry slot and in the channels inside the strip port cover). 5.
E. Wait at least two minutes to allow the disinfecting properties of the CaviWipes™ to take effect. F. Dry the meter thoroughly with lint free tissues or cloths. Thoroughly dry the entire surface of the meter being careful to not allow liquid to enter directly into the strip port connector by wiping in similar order and direction as shown in the cleaning sequence.
6. Historical results The Xprecia Prime™ meter keeps a record of past tests. A summary of these tests (including tests that ended in an error) can be viewed on the meter. There is capacity for up to one thousand records. Once capacity has been reached, a new record will overwrite the oldest record. Past records on the meter cannot be edited or deleted. Test results on the meter can also be exported to an external device for further processing or storage. See Page 39 for more details.
Past results are retained, even when the meter is turned off. Viewing past LQC test results To view the results of previous LQC tests: 36 1. After logging in (if required) and reaching the Home screen, touch the HISTORY button. 2. In the result list, look for LQC results identified with a LQC bottle icon. Past results are listed with the most recent result at the top. If the list extends beyond the screen, swipe up and down on the screen to scroll through the list. 3.
Viewing past tests that ended in an error Tests that end in an error (including LQC failure) are also recorded in the result list. These tests are identified in the result list with the icon. To view the results of tests that ended in an error: 1. After logging in (if required) and reaching the Home screen, touch the HISTORY button. 2. Past results are listed with the most recent result at the top. Tests that ended in an error are identified with the icon.
Exporting past results to an external device Test results on the meter can be exported to an external device in text (comma-delimited) format. What you’ll need 1. Your Xprecia Prime™ meter connected to a wireless network (see Page 43 for instructions) or by USB to a PC (using the USB cable that came with your meter) 2. An external device with a web browser that is connected to the same wireless network as the meter (e.g.
Connecting to the meter from another device 1. If connecting by Wireless: on the external device, open a browser and navigate to your Xprecia Prime™ meter’s IP address (see “Setting up” above) 2. If connecting by USB: use the IP address 172.16.71.1 the website not being secure (because the meter uses the http rather than the https protocol). This is not of concern because the connection between the meter and your device is happening within your wireless network or over USB. Exporting the results 1.
2. Select the Results tab, then click on the “Export” button and specify a location and filename. Your results will be exported as a ZIP file. Inside the ZIP file will be a CSV (comma-delimited text) file (called “results_all.csv”) which contains all of the historical results on the meter. This file can be opened in any spreadsheet program for easy filtering, sorting and analysing. The first row contains headings for each column. 3. 40 Click logout when you are finished to go back to the login page.
7. Settings General settings This section describes settings available to all operators. For advanced settings available only to Supervisor operators, see Page 45. Brightness The brightness of the screen can be modified. 7. Settings To adjust meter settings, log in (if applicable) and then, on the Home screen, tap on Settings and then General. The default value is 100%. Tap or to increase or decrease the screen brightness. Press to accept the new brightness level.
Sound volume The meter emits audible alerts at various times, including when: • a key event occurs during a test • an error or warning occurs Tap or to increase or decrease the sound volume of audible alerts. Press to accept the new volume level. Time and time format The time format can be set to 12 or 24 hour time. To set the time, swipe up or down on hour, minutes and AM/PM. Touch to accept the time details. Date and date format The date format can be set to YYYY MM DD or DD MM YYYY.
Language To set the language, select the desired language then press . You may need to swipe to scroll to your desired language. Auto power-off The meter can be configured to automatically turn off after a period of inactivity. This feature can be disabled by selecting “Never”. To configure auto power-off, select the desired . Connectivity (wireless) Connecting to a wireless network A wireless (WiFi) network connection may be required for the meter to download results to an external device. 7.
5. After the connection is established, press to confirm your selection NOTE: the meter will not connect to unsecured WiFi networks (for security reasons) Forgetting a wireless network To forget a wireless network (so that the meter no longer connects to that network), select Known Wi-Fi Networks on the Connectivity settings screen, then select a network name and touch the bin button.
About Device information Information about the meter such as serial number and software version can be found by selecting SETTINGS on the Home screen, then About, then Device Information. Network information 7. Settings Information about the wireless network connection such as IP address and MAC address can be found by selecting SETTINGS on the Home screen, then About, then Network Information.
After selecting Settings on the Home screen, the Supervisor will find three extra menu items on the Settings menu: Patient, Login and Tests. Patient settings The patient settings provide the Supervisor with option of turning on or off the collection of Patient ID during the test.
Test settings – Display Time By selecting Tests, then PT and then Result Display Time, the Supervisor can change how long the test result is shown before the user is prompted to eject the strip and clean the meter. Swipe up and down on the Result Display Time screen to increase or decrease the display time. Test settings – LQC Lockouts About LQC Lockouts • • the most recently performed LQC test failed or a LQC reminder expires.
The Supervisor can also turn LQC lockouts on for one or both of the LQC levels. Enabling LQC Reminder Lockouts Once LQC Lockouts are enabled, the Supervisor can set the frequency of LQC reminders. When a LQC reminder expires, the meter will lock out until a successful LQC test is performed for each selected level. Enabling LQC Lockout Alerts The supervisor can set up an alert to warn the user that a LQC reminder is about to expire.
When a LQC alert is due, the Test button on the Home screen will glow yellow. Enabling LQC Bypass (STAT) Sometimes a LQC reminder lockout will occur when STAT (Short Turn Around Time) patient test must be performed. To address this need, the Supervisor can allow defined operators to bypass a LQC reminder lockout. Each LQC lockout can only be bypassed up to five times. See Page 50 for more details.
Setting up an Operator list About the Operator list To enable log in functionality, the Supervisor must first set up an Operator list. The Operator list contains a list of operators with the following fields defined for each: Field Description Operator ID A free-text ID specific to this operator. See warning below. Password A free-text password (which can also be left blank). See warning below. Name A free-text field containing the Operators name.
How to set up the Operator list To set up the Operator list, follow these steps: 1. Log into the web server using the instructions on Page 38. 2. Navigate to the Operator list tab. 3. Right click on a row to add or edit an operator’s details. 4. If you need to set up a large number of operators, you can export the operator list to a CSV file using the Export to CSV File… button.
8. Troubleshooting Service, repairs and modifications must be done by parties explicitly authorized by Universal Biosensors. Service, repairs and modifications done by unauthorized parties will render the warranty void. General troubleshooting Situation Solution The test generated an unexpected result The test should be repeated with a fresh sample. If a similar result is obtained, you may choose to confirm the result by other means.
Liquid Quality Control (LQC) troubleshooting In the event that a LQC test fails, consider performing the following actions in turn until a passing result is achieved: Step Description 1 Repeat the test using a new strip from the same vial with a freshly prepared control solution. 2 Repeat the test using a new strip from a different vial (from the same lot) with a freshly prepared control solution. If you don’t have a different vial from the same lot, move to the next step.
Warning and error messages Warnings and errors are listed below in number order. To find the warning or error number, check the area under the WARNING or ERROR text in the top half of the screen. Whether a warning or error appears depends on the situation: • Warnings inform you of something that needs to be corrected before a process can continue • Errors inform you of an issue that is not recoverable (e.g.
Warning/Error Screen Cause 100% WARNING 20-04 Strip not valid The strip is not valid. Use only test strips supplied by Universal Biosensors. The meter tried to scan a strip barcode, but the barcode that was scanned was not valid. Solution When prompted to scan a strip, always scan an Xprecia Prime PT strip. You must only use Xprecia Prime PT strips. All other strips (including Siemens PT/INR Strips for Xprecia Systems) will not work.
Warning/Error Screen Cause 100% WARNING 20-09 Invalid strip barcode The strip barcode is not valid. Use only test strips supplied by Universal Biosensors. The meter tried to scan a strip barcode, but the barcode that was scanned was not valid. 100% WARNING 20-10 Invalid vial barcode The vial barcode is not valid. Use only test strips supplied by Universal Biosensors. The meter tried to scan a strip vial barcode, but the barcode that was scanned was not valid.
Warning/Error Screen WARNING 20-15 Battery critical The battery must be charged. Connect the analyzer to power before starting a new test. (This row also applies to 20-16 and 20-20) Cause The battery level has become critical (less than 20%) while a test is in progress. If a test has already been started prior to this warning message appearing, the test can be completed.
Warning/Error Screen Cause Solution 30-02 (Bad fill error) See error 50-09 See error 50-09 An analysis error occurred and the test result could not be calculated. Discard the test strip and start the test again. Apply the sample as instructed on page 19. 100% ERROR 30-03 Analysis error The result could not be calculated. Restart the test with a new strip.
Warning/Error Screen Cause Solution 100% 40-05 Above LQC maximum The LQC test failed. See your User Manual for guidance. 50-02 (Test timeout) There are a number of possible causes for this. See Page 53 for guidance. See error 30-03 100% The test strip’s on-board control (OBC) has detected that the strip is damaged and cannot be used. ERROR 50-03 Perform the troubleshooting steps on Page 53. See error 30-03 Discard the strip and start a test with a new strip from the same vial (if available).
Warning/Error Screen Cause Solution The sample could not reach the strip’s reaction chamber correctly. Discard the test strip and start the test again. Apply the sample as instructed on page 19. 100% ERROR 50-09 Uneven fill The sample was not applied correctly. Restart the test with a new strip. Possible causes include too much meter movement, an unsupported sample type or a system fault. If the error persists, contact Customer Support (see page 64).
Warning/Error Screen Cause Solution The sample was applied too early. Discard the strip before starting a new test. Apply the sample only when prompted by the meter. The test strip was removed before the test was finished. Discard the strip before starting a new test. Ensure the strip is pushed fully into the strip port, and don’t remove the strip until instructed. The test strip is past its expiry date. Start the test again with a new strip from a vial that has not expired.
Warning/Error Screen Cause Solution The sample was not applied at the time requested by the meter. Discard the strip before starting a new test. Apply the sample when prompted by the meter. During sample application, the meter was tilted too much or was bumped. Discard the strip before starting a new test. Do not bump or tilt the meter after the sample is applied. 100% ERROR 70-21 Sample not applied The sample was not detected. Be sure to apply enough sample when prompted.
Warning/Error Screen Cause Solution The battery is too low for the meter to operate, most likely because the meter has not been used for a very long time. Before the meter can be used, you must connect the meter to an external power source to charge the battery enough for it to be used safely. This may take 30 minutes or more. ERROR 17-0000 Battery too low Connect to external power and wait for the battery to charge enough 8.
9. Customer support If you have unanswered questions, or the Xprecia Prime™ system is still not working as expected after you have tried the various troubleshooting options listed in chapter 8, contact your authorized distributor (see www.universalbiosensors.com). Ordering details If you need replacement parts, contact your authorised distributor (see www.universalbiosensors.com). Software updates There may be occasional software updates for your meter made available by Universal Biosensors.
10.
Labels and symbols Label or symbol Explanation Manufacturer Manufacturer’s declaration that the product complies with applicable European Union directives Read the User Manual before use Consult the instructions for use for important cautionary information such as warnings and precautions that cannot, for a variety of reasons, be presented on the device itself Fragile Handle with care Single use only SN LOT Serial number Product batch code Expiry date Keep dry This symbol indicates that the product ha
Explanation Recycle This way up Contains sufficient strips for tests The Regulatory Compliance Mark (for Australia and New Zealand) In vitro diagnostic device Biohazard – take appropriate precautions This symbol indicates that the product has an operational temperature limitation and should only be operated in environment temperatures between 15 °C to 32 °C (59 °F to 89 °F) This symbol indicates that the product has an operational humidity limitation and should only be operated in environments where rel
Technical specifications General Input 5V 0.9A Rating 3.7V Capacity 1.85Ah (LI-ION) Water Ingress Rating IPX0 Pollution Degree Rating Pollution Degree II Overvoltage Category Category I 0.
Power Supply Model GTM46161-165.0-USB Input 100 – 240 V~, 50-60 Hz, 0.45 A Mains Supply Voltage Fluctuation +/-10% Rating 5V 3.2A Operating Altitude up to 5000 m Operating Humidity 0 to 93 % Operating Air Pressure 54 to 1060 hPa Operating Temperature 0 ºC to 40 ºC (32 °F to 104 °F) Features Measurement range 0.8 to 8.0 INR Interface Wireless (2.4GHz) Automatic power off Configurable: disabled, 5 mins, 15 mins, 30 mins Dimensions 147 × 84 × 32 mm (5.79 × 3.31 × 1.
Legal notices Software licences The Xprecia Prime™ meter uses proprietary, third party and open source software. Details of licenses are available at: https://www.universalbiosensors.com/Modified-Third-Party-Software/ Use of the Xprecia Prime™ meter is subject to the terms of those licenses. Disposing of the Xprecia Prime™ meter The meter must not be disposed of with general rubbish. Contact your local distributor and/or local authorities for instructions on the disposal of the meter.
Radio emissions and electromagnetic compatibility FCC Compliance Statement This device complies with part 15 of the FCC Rules. Operation is subject to the following two conditions: (1) this device may not cause harmful interference, and (2) this device must accept any interference received, including interference that may cause undesired operation. CAUTION: The grantee is not responsible for any changes or modifications not expressly approved by the party responsible for compliance.
11. Index Abbreviations and terms ..... 65 Auto power-off settings ...... 43 Brightness (of screen) ......... 41 Cleaning the meter ............................... 30 Configuring the meter ......... 41 Connectivity ....... See Wireless Ordering details ................... 64 Power auto power-off ...................... 43 external ................................... 8 indicators ................................ 9 on/off button .......................... 9 turning on and off .................
Test results exporting ............................... 38 viewing LQC tests ................. 36 viewing patient tests ............ 35 viewing tests that end in error ........................................... 37 Test strips ejecting from meter ........ 20, 28 Time format.................................... 42 how to set ....................... 11, 42 Troubleshooting general .................................. 52 LQC failure ............................ 53 warnings and errors .............
Notes:
Notes: 75
Notes:
Notes: 77
Printed in China Designed by Universal Biosensors Pty Ltd 1 Corporate Avenue Rowville, 3178, Victoria Australia MediMark Europe Sarl 11, rue Emile Zola. BP 2332 F- 38033 Grenoble Cedex 2. France. www.universalbiosensors.com 79015 v1.