
User Manual


Table Of Contents
- UAD Powered Plug-Ins
- Introduction
- UAD Installation
- Overview
- QuickStart DVD
- System Requirements
- Supported Hosts
- Latest Information & Software Updates
- UAD Software Installation
- Install Software First
- UAD Hardware Installation
- Authorization
- Authorize Plug-Ins Procedure
- Load Authorization File
- Offline Authorization
- Using Unlicensed Plug-Ins
- Verifying Installation
- Learn More
- Software Removal
- UAD System Overview
- My.uaudio.com
- Using Multiple UAD Cards
- UAD Meter & Control Panel
- Overview
- Launching the UAD Meter & Control Panel Application
- Using the UAD Meter
- UAD Meter Elements
- UAD Control Panel
- System Information Panel
- Plug-Ins Panel
- Configuration Panel
- Help & Support Panel
- Using UAD Powered Plug-Ins
- Tempo Sync
- UAD Delay Compensation
- UAD-Xpander & UAD-Xtenda
- LA-2A and 1176LN
- LA-3A Compressor
- Fairchild 670
- Precision Multiband
- Precision Limiter
- Precision Buss Compressor
- Neve 33609 Compressor
- VCA VU
- Neve 88RS Channel Strip
- CS-1 Channel Strip
- Precision Equalizer
- Cambridge EQ
- Pultec and Pultec-Pro
- Neve 1073 Equalizer
- Neve 1081 Equalizer
- Helios Type 69 Equalizer
- Roland CE-1
- Roland Dimension D
- Roland RE-201
- RealVerb Pro
- DreamVerb
- Plate 140
- Precision Maximizer
- Precision De-Esser
- Precision Enhancer kHz
- SPL Transient Designer
- Nigel
- Introducing Nigel
- Preflex Plug-in
- Preflex Modules
- Gate/Comp Module
- Amp Module
- Amp Controls
- Cabinet Module
- Phasor Module
- Mod Filter Module
- TremModEcho plug-in
- Trem/Fade Module
- Mod Delay Module
- Echo Module
- Moog Multimode Filter
- History
- Index
UAD Powered Plug-Ins Manual - 30 - Chapter 2: UAD Installation
•If you already have a my.uaudio.com account, login with your email ad-
dress and password. If your password is lost, the store can email it to you.
6. Your card will be automatically registered and added to your “My Systems”
Computer group, and your authorization file is generated.
7. The authorization file should begin downloading automatically. Click the
“Download Authorization” link to download the auth file if not.
8. Transfer the authorization file to the UAD computer.
9. “Drag and drop” the authorization file onto any UAD Meter & Control
Panel application icon/shortcut/alias. Drag and drop means click then
hold the downloaded authorization file with the mouse, drag it on top of
any UAD Meter & Control Panel application icon until the icon is high-
lighted, then release the mouse (see Figure 3 on page 29).
10. The authorization is loaded onto the UAD card(s) and after a few seconds
the “Authorizations Updated Successfully” window appears (Figure 3).
Online UAD authorization is now complete, and UAD Powered Plug-Ins are ready for use.
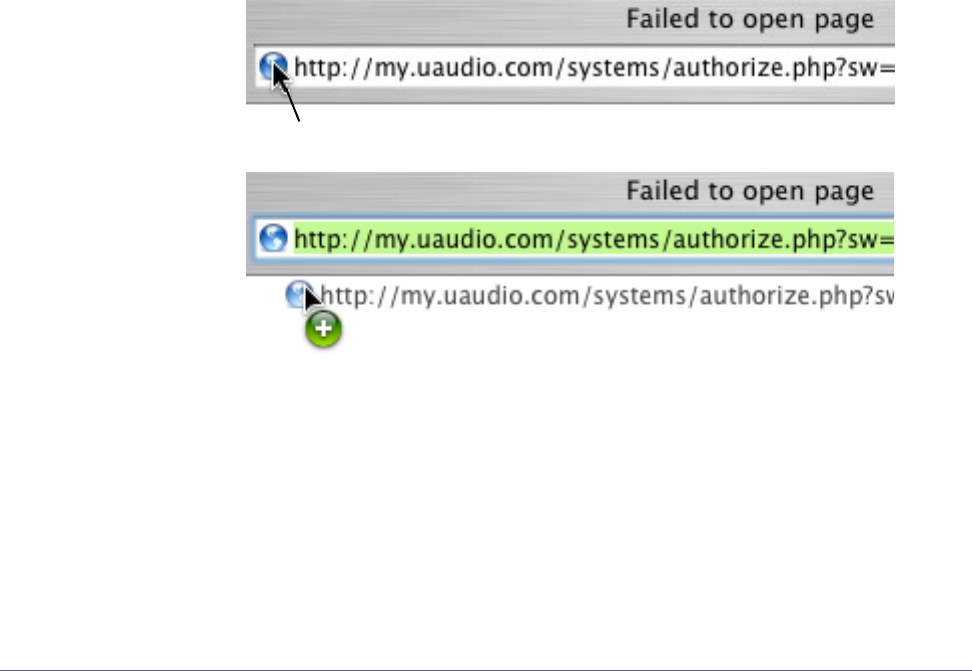
Figure 4. Creating the URL shortcut
Drag this URL icon in the browser’s address bar...
...to the Desktop to create a weblink shortcut for easier transfer.