
User Manual


Table Of Contents
- UAD Powered Plug-Ins
- Introduction
- UAD Installation
- Overview
- QuickStart DVD
- System Requirements
- Supported Hosts
- Latest Information & Software Updates
- UAD Software Installation
- Install Software First
- UAD Hardware Installation
- Authorization
- Authorize Plug-Ins Procedure
- Load Authorization File
- Offline Authorization
- Using Unlicensed Plug-Ins
- Verifying Installation
- Learn More
- Software Removal
- UAD System Overview
- My.uaudio.com
- Using Multiple UAD Cards
- UAD Meter & Control Panel
- Overview
- Launching the UAD Meter & Control Panel Application
- Using the UAD Meter
- UAD Meter Elements
- UAD Control Panel
- System Information Panel
- Plug-Ins Panel
- Configuration Panel
- Help & Support Panel
- Using UAD Powered Plug-Ins
- Tempo Sync
- UAD Delay Compensation
- UAD-Xpander & UAD-Xtenda
- LA-2A and 1176LN
- LA-3A Compressor
- Fairchild 670
- Precision Multiband
- Precision Limiter
- Precision Buss Compressor
- Neve 33609 Compressor
- VCA VU
- Neve 88RS Channel Strip
- CS-1 Channel Strip
- Precision Equalizer
- Cambridge EQ
- Pultec and Pultec-Pro
- Neve 1073 Equalizer
- Neve 1081 Equalizer
- Helios Type 69 Equalizer
- Roland CE-1
- Roland Dimension D
- Roland RE-201
- RealVerb Pro
- DreamVerb
- Plate 140
- Precision Maximizer
- Precision De-Esser
- Precision Enhancer kHz
- SPL Transient Designer
- Nigel
- Introducing Nigel
- Preflex Plug-in
- Preflex Modules
- Gate/Comp Module
- Amp Module
- Amp Controls
- Cabinet Module
- Phasor Module
- Mod Filter Module
- TremModEcho plug-in
- Trem/Fade Module
- Mod Delay Module
- Echo Module
- Moog Multimode Filter
- History
- Index
UAD Powered Plug-Ins Manual - 254 - Chapter 30: RealVerb Pro
Note: While materials are used to control decay rates as a function of fre-
quency, the overall decay rate of the late-field reverberation is controlled from
the Timing panel (see Figure 89 on page 259).
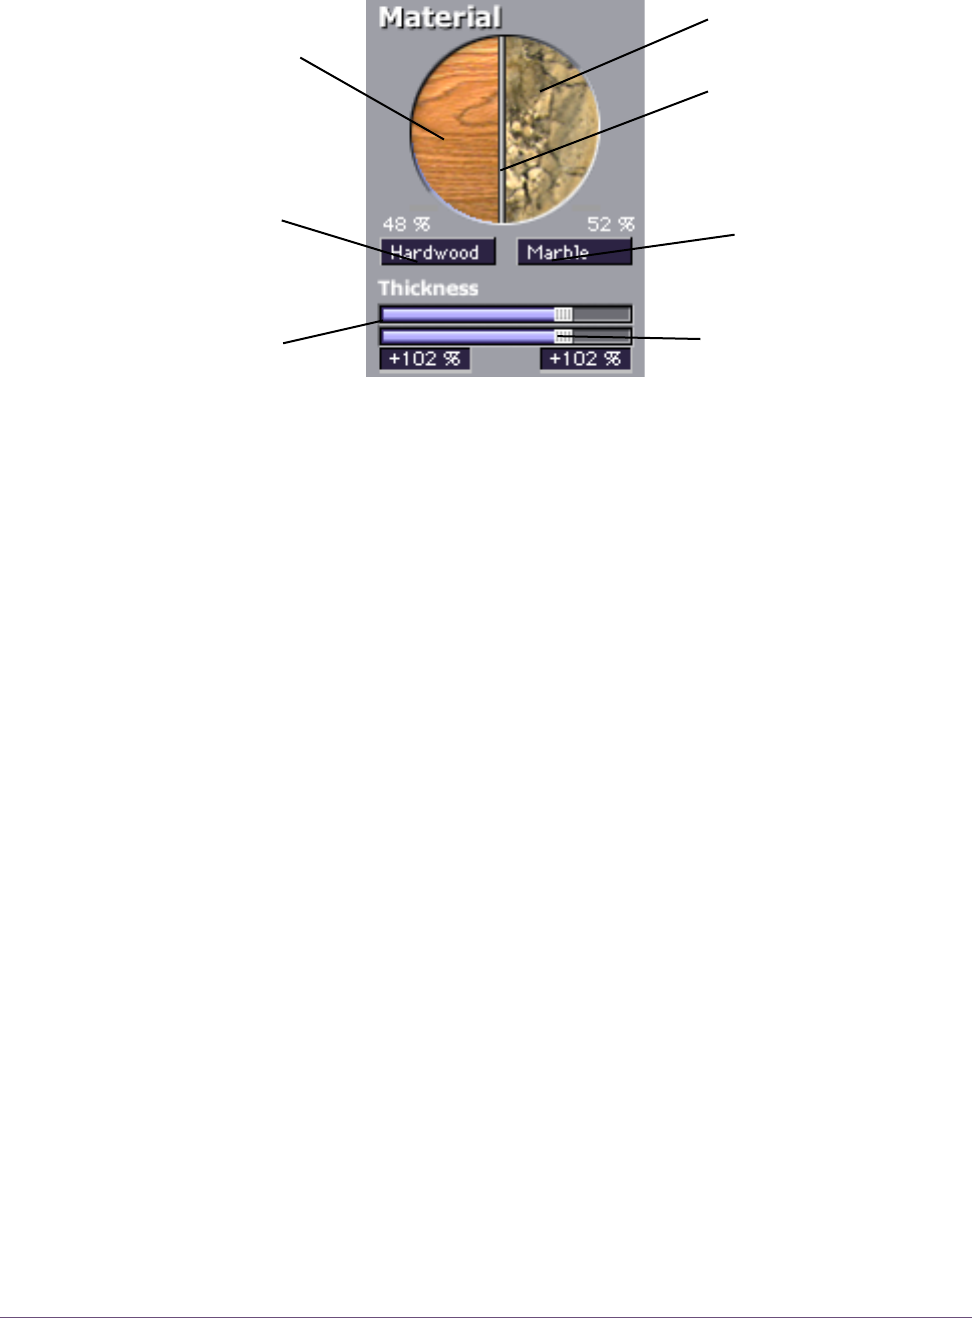
To configure the room material and thickness:
1. Select a room material from the first (left) pop-up menu. The selected mate-
rial appears in the left side of the Material circle.
2. Adjust the thickness for the first material with the top horizontal slider:
• A default thickness of +100% yields normal, real-world decays for the ma-
terial.
• Thicknesses beyond the default (up to +200%) exaggerate how the frequen-
cies are absorbed and reflected.
• Negative thicknesses invert the response of the material. If the material nor-
mally absorbs high frequencies (causing them to decay quickly) and reflects
low frequencies (causing them to decay slowly), a negative thickness will in-
stead absorb low frequencies (causing them to decay quickly) and reflect
high frequencies (causing them to decay slowly).
• A thickness of 0% yields decay rates that are not affected by the material.
3. Select a material from the second (right) pop-up menu. The selected mate-
rial appears in the right side of the Material circle. Adjust the material thick-
ness with the bottom horizontal slider.
Figure 87. RealVerb Pro Material panel
First material
selector pop-
up menu
First material
First material
Thickness
control
Second material
Thickness control
Second material
selector pop-up
menu
S
econ
d
material
Blending bar