PA969 PDA Scanner - PA969 - User’s Manual Version 1.0 Copyright 2011 unitech Electronics Co., Ltd. All rights reserved. Unitech is a registered trademark of unitech Electronics Co., Ltd.
Copyright 2011 unitech Electronics Co., Ltd. All rights reserved. Unitech is a registered trademark of unitech Electronics Co., Ltd.
Preface About This Manual This manual explains how to install, operate and maintain the PA969 PDA Scanner. No part of this publication may be reproduced or used in any form, or by any electrical or mechanical means, without permission in writing from the manufacturer. This includes electronic or mechanical means, such as photocopying, recording, or information storage and retrieval systems. The material in this manual is subject to change without notice. © Copyright 2011 Unitech Electronics Co., Ltd.
Regulatory Compliance Statements FCC Warning Statement This equipment has been tested and found to comply with the limits for a Class B dig-ital device, pursuant to part 15 of the FCC rules. These limits are designed to provide reasonable protection against harmful interference in a residential installation. This equipment generates, uses and can radiate radio frequency energy and, if not installed and used in accordance with the instructions, may cause harmful interference to radio communications.
RF Radiation Exposure Statement For body worn operation, this phone has been tested and meets FCC RF exposure guidelines when used with an accessory that contains no metal and that positions the handset a minimum of 1.5 cm from the body. Use of other accessories may not ensure compliance with FCC RF exposure guidelines. Canadian Compliance Statement This Class B Digital apparatus meets all requirements of the Canadian Interference-Causing Equipment Regulations.
Laser Information The Unitech PA969 series is certified in the U.S. to conform to the requirements of DHHS/CDRH 21CFR Subchapter J and to the requirements of IEC 825-1. Class II and Class 2 products are not considered to be hazardous. The PA600 series contains internally a Visible Laser Diode (VLD) whose emissions do not exceed the maximum limits as set forth in the above regulations.
If the main battery is removed, the backup battery ensures the data on SDRAM is safe for up to 6 hours. To prevent data loss, do not leave the PA969 uncharged with the main battery removed for an extended period. See Charging the Battery on page8 for more details. Note: Rechargeable batteries are advised to replace every year or when 500 charge/discharge cycles achieved to guarantee optimal performance. It is normal that the battery balloons or expands beyond one year or the maximum of 500 cycles.
Storage and safety notice Although charged Lithium-Ion batteries may be left unused for several months, their capacity may be depleted due to build up of internal resistance. If this happens they will require recharging prior to use. Lithium-Ion batteries may be stored at temperatures between -20°C to 60°C, however they may deplete more rapidly at the higher temperature ranges. It is recommended to store batteries within normal room temperature ranges.
Table of Contents Preface About This Manual..........................................................................................i Regulatory Compliance Statements ............................................................. ii FCC Warning Statement ........................................................................... ii FCC Label Statement ............................................................................... ii RF Radiation Exposure Statement............................................
Keypads and Function Buttons.....................................................................4 Using Function keys .................................................................................5 Using Alpha keys ......................................................................................6 Installing the Battery .................................................................................6 Charging the Battery...............................................................................
ix Copyright 2011 unitech Electronics Co., Ltd. All rights reserved. Unitech is a registered trademark of unitech Electronics Co., Ltd.
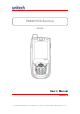
Chapter 1 Getting Started Introducing the PA969 Thank you for purchasing the PA969 PDA Scanner. Your PA969 was designed for users who need a compact and durable mobile computer for data collection and real time transactions. The PA969 is a rugged, compact and lightweight palm-size mobile computer using Windows Mobile 6.5 operating system, and incorporating an integral bar code scanning device, high-resolution digital camera, color LCD with touchscreen, and keypad.
PA969 Product Introduction & Accessory Kit PA969 Terminal Manual CD Stylus Battery Elastic Stylus String Hand Strap Stylus Holder PA969 Cradle USB Cable for Cradle Power Adapter 2 Copyright 2011 unitech Electronics Co., Ltd. All rights reserved. Unitech is a registered trademark of unitech Electronics Co., Ltd.
Tour of the PA969 The following sections describe the main components and features of the PA969. PA969 Front View 1 Status indicator 6 Receiver 2 LCD Touch screen 7 Scanner trigger button 8 Keypad 4 Power button 9 Universal connector 5 Fingerprint reader Turning ON the PA969 for the First Time After you have initially charged your device for about 16 hours, the device is ready to be used.
PA969 Rear View 1 Earphone jack 2 Reset button 6 Antenna 7 Digital still camera 3 Speaker 8 LED Flash light 4 Battery compartment 9 Memory card slot 5 Barcode scanner window 10 Battery compartment tab Keypads and Function Buttons 4 Copyright 2011 unitech Electronics Co., Ltd. All rights reserved. Unitech is a registered trademark of unitech Electronics Co., Ltd.
Key ~ Description Key Description Power button Escape key Enter key Backspace key Tab key Function key Alpha key, toggle between numeric and alphabetic entrymodes Four way cursor keys Alphanumeric keys Punctuation key Answer key Hang-off key Windows key When PA969 boots, the default condition is Numeric Mode on. When you toggle to Alpha Mode, the default condition is CAPS mode off. Please use the alpha Key to toggle to CAPS.
Using Alpha keys Key Alpha Off Alpha On CAPS Off CAPS On 0 Space, @, $, “, 0 Space, @, $, “, 0 1 +, -, \, %, 1 +, -, \, %, 1 2 a, b, c, 2 A, B, C, 2 3 d, e, f, 3 D, E, F, 3 4 g, h, i, 4 G, H, I, 4 5 j, k, l, 5 J, K, L, 5 6 m, n, o, 6 M, N, O, 6 7 p, q, r, 7 P, Q, R, 7 8 t, u, v, 8 T, U, V, 8 9 w, x, y, z, 9 W, X, Y, Z, 9 * ,;!./ ,;!.
A backup battery cell is embedded into your device to prevent data loss when the removable battery pack is removed or completely discharged. This backup battery will keep the data and system setting for up to 8 hour if the main battery is removed. NOTE: To enable the internal battery cell to provide backup power supply, charge your device with the main battery pack for at least 16 hours. NOTE: To power on the device properly, make sure replacing the battery compartment cover after installing the battery. 1.
Charging the Battery Before using the terminal for the first time, you need to charge it for about 16 hours. After that, you can charge the terminal for 4 hours to recharge the battery to full capacity. Charge the terminal using the USB charging cable or the docking station. CAUTION! Operating the terminal for the first time without the AC adapter, and without fully charging the backup battery may result in loss of data stored in RAM memory.
4. The connection is secure when the bottom edge of the terminal is aligned with the cradle, and the LED indicator on the terminal lights up red. Checking the LED status LED Status Description Flashing Yellow GPRS module is enabled. GPRS/Bluetooth Terminal Scan Power Cradle Flashing Blue Bluetooth module is enabled.
Chapter 2 Using the Hardware Using the SD Memory Card PA969 has an expansion slot compatible with a range of SD storage cards, which are primarily used to backup or transfer files and data. Inserting a Storage Card 1. Remove the two screws on the SD compartment cover and remove the cover. 2. Insert the SD card with the notched corner as shown. 3. Push the card into the slot until you feel the SD card click into place. 4. Screw the SD compartment cover. Removing the Storage Card 1.
Inserting the SIM card 1. 2. Remove the battery compartment cover and the main battery. Slide the cover of the SIM card slot to the left to release the latch. 3. Lift the cover and insert the SIM card into the cover with notched corner up, contacts down as shown. 4. Put down the cover on the slot, and then slide the cover to the right to lock the SIM card. 5. Put the battery back into the battery compartment and replace the battery compartment cover. 11 Copyright 2011 unitech Electronics Co., Ltd.
Chapter 3 Advanced Settings Performing a Hardware Reset You may have to perform a reset if the device freezes (i.e., the device no longer responds to the buttons or tapping on the screen). A soft reset allows your device to get a fresh start, similar to rebooting a computer. This will restart your device and adjust memory allocation. All records and entries are retained after a soft reset. Unsaved data in open programs may be lost. Performing a Warm Boot 1. 2. Remove the stylus from its holder.
Method 1: From Windows Mobile 1. Tap Start → BootMode. The BootMode Screen appears. 2. Tap Cold Boot. The system is reset and you will lose all data including all files in the RAM memory. Method 2: From Hardware 1. Remove the battery compartment cover and the main battery. See the section of Installing the Battery. 2. Turn the backup battery switch off. 3. 4. Turn the backup battery switch on. Put the battery back into the battery compartment and replace the battery compartment cover.
Appendix I System Specification CPU Memory OS Samsumg S3C6410 800Mhz RAM 256 MB RAM ROM 512 MB ROM (Nand mDoc) Microsoft® Windows CE6 R3 Keypad Modularized backlight keypad with 24 keys or 44 keys Display Full VGA (480 x 640), 3.
Limit Option; 2D Imager, 3.5GWAN, BT (No GPS, No camera, No WLAN installed) Full Option; 2D Imager, GPS, 3.5GWAN, BT (No camera, No WLAN installed) Regulatory Approvals CE, FCC, UL, RoHS compliant Stylus Accessories Handstrap Single Slot Ethernet cradle AC adaptor (with regional power cord) 15 Copyright 2011 unitech Electronics Co., Ltd. All rights reserved. Unitech is a registered trademark of unitech Electronics Co., Ltd.
Appendix II Worldwide Support Unitech’s professional support team is available to quickly answer questions or technical-related issues. Should an equipment problem occur, please contact the nearest Unitech regional service representative. For complete contact information please visit the Web sites listed below: Region Web Site Global Operation Center http://www.ute.com Unitech Taiwan http://tw.ute.com Unitech Asia Pacific & Middle East http://apac.ute.com http://india.ute.