
User Manual
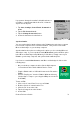
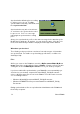
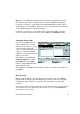
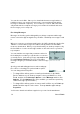
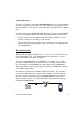
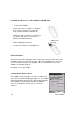
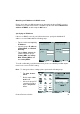
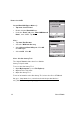
Table Of Contents
- PA962 Product Reference Guide RevA.pdf
- Chapter 1. Introduction
- Unitech PA962 & Accessories
- Tour of the Unitech PA962
- PA962 Back
- First Setp with the Unitech PA962
- Installing the Battery Pack
- Supplying Power to the PA962
- Charging the Main and Backup Batteries for the First Time
- Using the Stylus
- PCMCIA Pulling Tags
- Insert CF card to PA962
- Protective Screen Film
- First Operation of the Unitech PA962
- Pressing the ON/OFF Key
- Adjusting Screen Contrast
- Calibrating the PA962
- Setting Time Zone, Date, and Time
- Flash Memory
- Chapter2. Using the Keypad and Scanner
- Chapter3. Power systme
- Chapter4. Communication
- Introduction
- Connecting
- ActiveSync
- Installing Microsoft ActiveSync
- Using the Mobile Devices Window
- Changing Communications Settings
- Synchronization
- What Gets Synchronized
- Changing Synchronization Options
- Installing and Removing Software
- InBox
- Sending and Receiving E-Mail with InBox
- Sending Mail Remotely
- Setting Up Remote Mail
- Work Remotely
- Receiving Messages
- Sending Messages
- RF Communication
- Installing the Wireless Local Area Network (WLAN) Card
- RF Card Cushion
- Setting Up the Wireless Card
- Chapter5. Useful Application Program
- Appendix A
- Appendix B
- Appendix C
- Chapter 1. Introduction

35
Product Reference Guide
Note: If you’re setting up an Internet mail account with an ISP (Internet Service
Provider), the ISP must use a POP3 mail server and an SMTP mail gateway.
For dial-up connections, you’ll require an internal PCMCIA type modem card or
external modem for the PA962. You’ll also need to set up the remote connection
on the PA962 using the Connections program.
For wireless connections, you’ll require an RF card for the PA962. You’ll also
need to set up the remote connection on the PA962 via the Network setting.
The software for creating an Internet Mail connection to an ISP is pre-installed on
the PA962.
Setting Up Remote Mail
You can use multiple mail ser-
vices to obtain mail. For each
mail service you will access, first
set up and name each mail
service. If you will use the same
service to connect to different
mailboxes, set up and name each
mailbox connection.
In the InBox on the PA962, tap
Compose, Options, the Ser-
vices tab, and then the Add
button. A setup wizard will walk
you through the steps.
Work Remotely
Mail received via dial-up connection appears in the InBox folder on the PA962,
together with the mail you synchronize with your desktop computer. Messages
received remotely are linked to your mail server rather than to your desktop
computer.
You can work online, which means that you read and respond to messages while
connected to the server. Messages are sent as soon as you tap Send, which
saves space on your device.