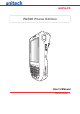
unitech PA600 Phone Edition User’s Manual 400646G Version 1.
Preface About This Manual This manual explains how to install, operate and maintain the PA600 II Rugged Mobile Computer. No part of this publication may be reproduced or used in any form, or by any electrical or mechanical means, without permission in writing from the manufacturer. This includes electronic or mechanical means, such as photocopying, recording, or information storage and retrieval systems. The material in this manual is subject to change without notice.
• Connect the equipment into an outlet on a circuit different from that to which the receiver is connected. • Consult the dealer or an experienced radio/TV technician for help. 1. This equipment complies with FCC RF radiation exposure limits set forth for an uncontrolled environment. 2. Any changes or modifications (including the antennas) made to this device that are not expressly approved by the manufacturer may void the user’s authority to operate the equipment.
About This Manual Laser Information The unitech PA600 II series is certified in the U.S. to conform to the requirements of DHHS/CDRH 21CFR Subchapter J and to the requirements of IEC 825-1. Class II and Class 2 products are not considered to be hazardous. The PA600 II series contains internally a Visible Laser Diode (VLD) whose emissions do not exceed the maximum limits as set forth in the above regulations.
Storage and safety notice Although charged Lithium-Ion batteries may be left unused for several months, their capacity may be depleted due to build up of internal resistance. If this happens they will require recharging prior to use. Lithium-Ion batteries may be stored at temperatures between -20°C to 60°C, however they may be depleted more rapidly at the high end of this range. It is recommended to store batteries within normal room temperature.
Table of Contents Preface About This Manual i Regulatory Compliance Statements ............................................................................. i FCC Warning Statement.......................................................................................................... i FCC Label Statement .............................................................................................................. ii Canadian Compliance Statement .........................................................
Using the Phone ................................................................................................................. 20 Making a Call Using the Phone Keypad ............................................................................... Using the Contact List........................................................................................................... Using the Speed Dial ............................................................................................................
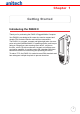
Chapter 1 Getting Star ted Introducing the PA600 II Thank you for purchasing the PA600 II Rugged Mobile Computer. Your PA600 II was designed for users who need a compact and durable PDA for data collection and real time transactions. The PA600 II is a rugged, compact and lightweight palm-size computer using the Windows Mobile 5.0 operating system, and incorporating an integral bar code scanning laser device, cell phone function, color LCD with touchscreen, keypad, and wireless communication capability.
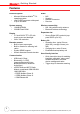
Chapter 1 Getting Started Features Powerful system • • Microsoft Windows MobileTM 5.0 operating system Intel PXA270 processor with speed of up to 624 MHz Audio • MIC • Speaker • Headset Connector • Receiver System memory • 128 MB SDRAM • 320 MB Flash ROM Wireless connectivity • 802.11b/g with diversity antenna • Bluetooth wireless technology Display • 3.
Chapter 1 Getting Started Package Contents After opening the box, ensure the following accessories for the PA600 II are present: PA600 II Terminal AC Adapter with universal plugs Battery Pack USB Charging Cables Stylus CD-ROM Quick Reference Guide If anything is missing or appear damaged in any way, contact your dealer. A Tour of the PA600 II The following sections describe the main components and features of the PA600 II.
Chapter 1 Getting Started Front Left View 8 1 7 6 2 5 3 4 No. Component Description 1. Status indicator 2. Left scanner trigger button Power button Indicates the battery charging and barcode scanning status. Green - Battery is fully charged, or barcode scanning process is completed without error. Red - Battery is charging, barcode scanner is fired/ activated. Yellow - GPRS is on Blue - Bluetooth is on Press to activate the barcode laser scanner. 3. 4. 5. Microphone Universal connector 6.
Chapter 1 Getting Started Back View 9 10 11 12 13 14 15 16 17 No. 9. Component Battery compartment 10. 11. Battery compartment release latch Reset button 12. Handstrap 13. 14. Speaker Stylus 15. Strap holder 16. Memory card slot 17. Barcode scanner window Description Houses the removable and rechargeable 3.7 V, 2200 mAH battery pack Opens the battery compartment. Press the end of the stylus into the button to reset your device. Enables you to securely hold the PA600 II while using it.
Chapter 1 Getting Started Getting Started This section explains how to install and charge the battery, how to check battery status, how to turn on the PA600 II, and how to calibrate the screen. Installing the Battery WARNING! There is a risk of fire and burns if the battery pack is handled improperly. DO NOT disassemble, crush, puncture, short external contacts, or dispose the battery pack in fire or water. DO NOT attempt to open or service the battery pack.
Chapter 1 Getting Started 2. Locate the backup battery switch and turn it on. Backup battery switch 3. Position the battery pack, making sure the battery contacts are aligned with the contacts in the compartment and the battery is placed on top of the plastic tab, as shown in the following illustration. Contacts Plastic tab 4. Slide the battery pack into the battery bay while simultaneously pulling the battery hook until the battery clicks into place. Battery hook 5.
Chapter 1 Getting Started Charging the Battery Before using the PA600 II for the first time, you need to charge it for about 16 hours. After that, you can charge the PA600 II 4 hours to recharge the battery to full capacity. Charge the PA600 II using the USB charging cable or the docking station. CAUTION! Operating the PA600 II for the first time without the AC adapter, and without fully charging the backup battery may result in loss of data stored in RAM memory.
Chapter 1 Getting Started Charging the Battery with the Docking Station 1. Plug the AC adapter cable into the power jack on the docking station, then connect the AC adapter into an electrical outlet. 2. Slide the device into the docking station until it clicks into place. 3. The connection is secure when the bottom edge of the device is aligned with the docking station, and the LED indicator on the device lights up red.
Chapter 1 Getting Started Connecting the PA600 II to a PC Use the USB cable to connect the PA600 II to a PC, in order to use with ActiveSync. 1. Press and hold the connector button on the USB charging cable and connect it to the PA600 II (1). 2. Plug the USB connector into the USB port on the PC and connect the AC adapter into the USB connector (2). 3. Connect the AC adapter into an electrical outlet (3). 2 3 1 10 Copyright 2008 unitech Electronics Co., Ltd. All rights reserved.
Chapter 1 Getting Started Turning the PA600 II on for the First Time After you have initially charged your device for about 16 hours, the device is ready to be used. You can now start up your device where you’ll calibrate the display, learn some basic stylus usage, and set up the system time zone, date and time. Powering On 1. Turn on your device by pressing the power button on the front panel. NOTE: The PA600 II screen ships with a protective plastic film.
Chapter 1 Getting Started Calibrating the PA600 II Screen The calibrate screen automatically appears when the unit is powered-on for the first time or after the system is reset. To calibrate the screen at any time, follow these instructions. 1. Tap Start → Settings, and then switch to System tab. 2. Tap the Screen icon. Or Press Func key and ESC key simultaneously. The Screen Settings window appears. This Window enables you to customize the screen settings. 3. Tap Align Screen to calibrate the screen.
Chapter 1 Getting Started The cross hair moves to the next location. 5. Continue tapping the cross hairs until the screen has been calibrated.
Chapter 2 Using the Hardware Keypads and Function Buttons The keypad enables you to both enter information and interact with the PDA operating system and also operate secondary functions using the function button. When the green function button is pressed, the green icon functions on the keypad become available. Function activated icon When the Function button is pressed, an icon appears in the operating system: The following table describes the keypad keys.
Chapter 2 Using the Hardware Key Main Function Secondary Function Number 1 Left soft key - activates function above in LCD screen. Alphanumeric 2, a, b, c Up navigation key Alphanumeric 3, d, e, f Right soft key - activates function above in LCD screen.
Chapter 2 Using the Hardware Adjusting the Screen Brightness Adjust the screen brightness by pressing the Function button to enable the soft keys and pressing the 7 (decrease brightness) or 9 (increase brightness) buttons. Function Button ALPHA FUNC abc Rs Ls ESC ghi Decrease Brightness jkl pqrs 7 TAB mno 6 5 4 def 3 2 1 OK ENTER wxyz tuv 8 9 0 . key Increase Brightness Using the Stylus CAUTION! Never use anything other than the PA600 II stylus on the screen.
Chapter 2 Using the Hardware Using the SD/MMC memory card Your device has an expansion slot compatible with a range of SD and MMC storage cards, which are primarily used to back up or transfer files and data. The slot also supports SDIO cards for added connectivity options. Inserting a Storage Card 1. Remove the four screws from the SD compartment cover and remove the cover. 2. Insert the SD card with the notched corner as shown by the icon on the case. 3.
Chapter 2 Using the Hardware Using the Laser Scanner The PA600 II has an integrated laser scanner which reads all major bar code labels with excellent performance. NOTE: Scanning software must be enabled in order to operate the scanner. This can be a user-loaded application or a pre-loaded utility such as Scanner Setting and Scan2Key. Activate the laser scanner by pressing either one of the trigger keys located on the left and right side of the unit.
Chapter 2 Using the Hardware 3. To test the barcode scanner, tap the Test tab. 4. Tap Tools 5. Tap Enable Scan 6. To perform auto scan, Tap Tools → Auto Scan → Start Auto- Scan 7. Choose Interval: 3 secs 8. Tap: Start 9. Laser scans every 3 seconds and barcode is scanned automatically. 10. Tap Tools → Auto-Scan → Stop AutoScan. Using the SIM Card The PA600 II has a slot for GPRS SIM card. It is placed inside the battery compartment. Inserting the SIM Card 1. Take out the battery cover and the main battery.
Chapter 2 Using the Hardware Using the Phone The PA600 II has an integrated phone keypad, which allows you to make, receive, and send messages via the built-in module. NOTE: Make sure you insert the SIM card properly. To open the Phone screen, do one of the following. 1. Tap Phone on the bottom left corner of the screen. 2. Press Talk/Send button. Press End button when you want to exit the Phone screen.
Chapter 2 Using the Hardware Speaker icon Tap the speaker icon on the upper right corner of the screen. You can adjust the device/ phone volume by moving the sliders and change the ring volume by tapping On, Vibrate, or Off. Making a Call Using the Phone Keypad 1. 2. 3. 4. Tap Phone or press Talk/Send button. Enter the desired phone numbers. Tap the Talk button on the Phone screen. When the call connects, you can tap Hold to place the first number on hold. 5.
Chapter 2 Using the Hardware Using the Speed Dial 1. Tap Speed Dial on the Phone keypad. 2. Tap Menu, and select New. 3. Select a contact in your contact list by tapping the desired contact. 4. Assign an available location for the new speed dial entry. Tap OK, and then OK to exit the speed dial list. NOTE: The first speed dial location is reserved for voice mail. To make speed dial call, do one of the following. 1. Tap and hold the speed dial location number assigned to a contact on the Phone keypad. 2.
Chapter 3 Getting Connected Establishing Device-PC Connection Installing Microsoft ActiveSync In order to exchange data between your computer and PA600 II, Microsoft ActiveSync must be installed on your computer. Use the USB charging cable that comes with your device to connect the device to your computer. NOTE: If you have a previous version of the Microsoft ActiveSync installed in your computer, uninstall it first before installing the latest version of Microsoft ActiveSync.
Chapter 3 Getting Connected 4. Click Next. You are prompted to read the End User License Agreement (EULA). 5. Accept the license agreement terms and click Next. You are prompted for user information. 6. Type the user name and organization and click Next. You are prompted for the destination folder. 24 Copyright 2008 unitech Electronics Co., Ltd. All rights reserved. unitech is a registered trademark of unitech Electronics Co., Ltd.
Chapter 3 Getting Connected 7. Select a drive to install the program and click Next. The installation wizard has gathered the information it needs to install ActiveSync and prompts you to begin the installation. 8. Click Install. The program begin the installation After the program has finished installing you see the following screen.