
Instruction manual


Calibration, Maintenance, Troubleshooting and Warranty
Vertical Engagement Scanners—Installation, Use, and Maintenance
330 MultiMode SPM Instruction Manual Rev. B
15.16.1 Hardware Installation
Installation of the vertical scanner is very similar to earlier models. To install the vertical scanner,
do the following:
1. Remove old scanner: If the SPM is engaged, disengage from the sample by clicking on the
Withdraw icon several times. Unplug and remove the SPM head from the microscope.
Remove the sample, then unplug and remove the old scanner body.
2. Install vertical scanner:
a. Set the vertical scanner atop the MultiMode AFM or LFM support ring with the
scanner’s leadscrew at the back. The leadscrew should slip into the flexible coupling. If
the leadscrew does not seat completely into the coupling, toggle the Tip Up-Down
switch on the microscope base; this will rotate the coupling until the leadscrew seats.
b. Plug the vertical scanner cable into the receptacle on the left-rear edge of the support
ring.
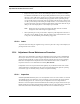
c. Secure the scanner to the ring using one of two screws supplied (see Figure 15.16b).
Figure 15.16b Stabilizing screw for securing the vertical scanner to the support ring. MultiMode AFM screw
(left), and screw for other SPMs (right).
One screw is supplied with a longer shoulder (P/N 130-000-145); this screw should be used with all
MultiMode SPM bases. The screw is inserted through a small hole on the front-underside of the
support ring. Turn the screw until snug; do not overtighten.
IMPORTANT! The use of a fastening screw is necessary to ensure optimal system resolution and
noise-free operation. For high resolution imaging, be sure to use the fastening screw.
3. Install scanner file: The vertical scanner is shipped with a CD containing its corresponding
scanner file; this file must be loaded into the computer’s EQUIP directory. To load the file:
a. Exit the NanoScope software
b. Place the CD in the CD-ROM.
c. Locate the EQUIP directory on the computer’s hard drive
d. Transfer the XXXX.SCN file onto it.
Note: There may be more than one \EQUIP directory, especially if the SPM uses
more than one version of the NanoScope software. If so, copy the file to ALL
directories and sub-directories labeled “EQUIP.”