
Specifications


Table Of Contents
f3il
Timewave
PK.96
XMT DCO
CON STA MAIL
6@@@C
POWER
or
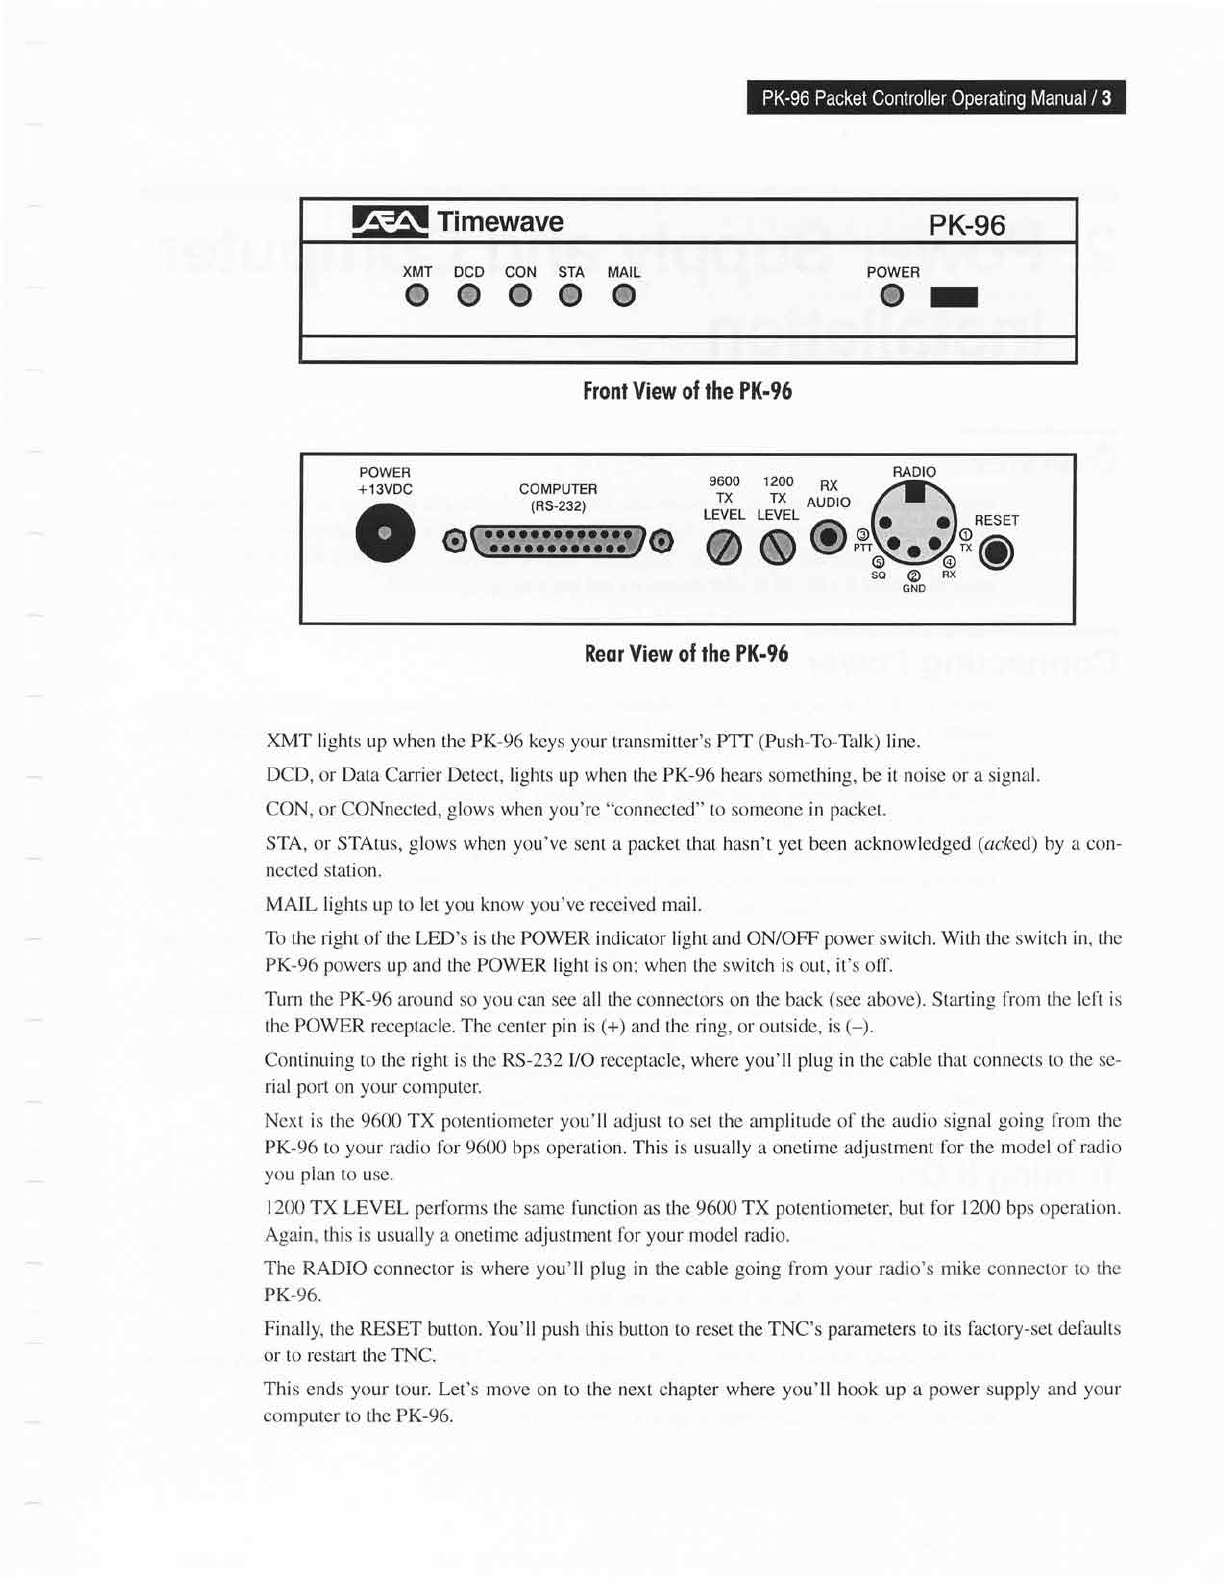
Fronl View of the PK-96
POWER
+13VDC
-
@
v
RADIO
o,iJo
1C\
lss,SJ
so@BX
9600
TX
LEVEL
&
Y
1200
TX
LEVEL
&,
w
COMPUTER
(RS-232)
RESET
*g
(a
Reor
View of
the PK-96
XMT
lights up when the PK-96 keys
your
transmitter's PTT
(Push-To-Thlk)
line.
DCD,
or
Data
Carrier Detect, lights up when the PK-96 hears something, be it noise or a signal.
CON,
or CONnected,
glows
when
you're
"connected"
to someone in
packet.
STA,
or STAtus,
glows
when
you've
sent a
packet
that hasn't
yet
been acknowledged
(acked)
by a con-
nected station.
MAIL lights up to let
you
know
you've
received mail.
To
the
right
of the LED's is the POWER indicator light and ON/OFF
power
switch. With the switch
in, the
PK-96 powers
up and the POWER light is
on;
when
the switch
is
out,
it's off.
Turn
lhe
PK-96
around so
you
can see all the connectors on the back
(see
above). Starting from the
left is
the POWER
receptacle. The center
pin
is
(+)
and the ring, or outside, is
(-).
Continuing to the right is the RS-232 VO receptacle, where
you'll
plug
in the cable that connects
to the se-
rial
port
on
your
computer.
Next is the 9600 TX
potentiometer you'll
adjust
to set the amplitude of the audio signal
going
fiom the
PK-96
to
your radio fbr
9600 bps operation. This
is
usually a onetime adjustment
for the model of
radio
you plan
to use.
1200 TX LEVEL performs
the same function as the
9600
TX
potentiometer,
but for
1200
bps
operation.
Again,
this
is
usually a onetime
adjustment
for
your
model radio.
The RADIO connector is where
you'll plug
in
the cable
going
from
your
radio's mike connector tcl the
PK-96.
Finally,
the
RESET
button. You'll
push
this button to reset the TNC's
parameters
to
its factory-set defaults
or to restafi the TNC.
This
ends
your
tour. Let's move on to
the
next
chapter
where
you'll
hook up a
power
supply and
your
computer to the PK-96.