
User Manual
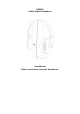


Headphone Receiver
7. Charging contacts
8. Volume Up(+)
9. Volume Down(-)
10. Direct Line In
11. Power/Signal link LED indicator
12. ON/OFF Control
Accessories
13. RCA cable
14. 3.5mm ~ 3.5mm Direct Line-In Cable
15. AC/DC adaptor
16. NiMH AAA size batteries for Headphone (2 pieces)
17. 3.5mm ~ 6.3mm
stereo plug
INSTALLATION
TRANSMITTER
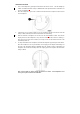
1. Connect the supplied AC/DC power adaptor to an electrical wall outlet.
2. Plug the AC/DC power adaptor in the DC jack located on the rear of the transmitter. Slide the
power switch located on the rear of the transmitter to “ON”. The triangle shape LED starts to flash
in AMBER for around 15 seconds and then light up steadily. The rear of the transmitter has audio
sockets with Left and Right for connecting the Audio Cable to the audio output jack of TV, DVD,
VCD, VCR, Hi-Fi, iPod or MP3.
3. For TV/DVD/VCD/VCR/Hi-Fi, switch to “-8dB”. For portable devices, like CD/MP3 and IPod,
switch to “0dB”.
4. Turn on audio source, then the LED will light up in AMBER steadily when it receives an audio
signal. The LED change to BLUE in about 5 minutes if the transmitter does not connect and
receive any audio signal from the audio source.