
User guide


Live Viewing Menu
4-13
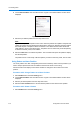
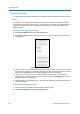
3 Choose Select Scan from the Scans/Sequences menu. Figure 4-16 the Select Scan screen
will be displayed.
Figure 4-16 Select Scan screen
4 Select the type of scan to perform from the drop-down menu:
• smooth - slowly pans between the left and right scan limits, starting at the left scan limit.
When the right scan limit is reached, the scan reverses.
• stepped - pans slowly, pausing briefly every 10° between the left and right scan limits. Once
the right scan limit is reached, the scan reverses.
• random - pans randomly between the left and right scan limits. For example, the scan may
start at 10°, then pan right 40° and pause, pan right 20° and pause, pan left 30° and pause,
and pan right until it reaches the right scan limit.
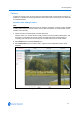
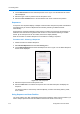
5 Select the Start button to activate the scan. The Live Web Video pane will update and display
the selected scan.
The scan will run continuously until interrupted by a camera command, pattern, preset or alarm.
Using Scan as Home Position
The home position runs after a designated period of dome inactivity. Select a home position if you
want to keep a specific area under surveillance whenever the dome is not moving.
Follow Procedure 5-6 Display Current Home Position to change the return time for the home
position.
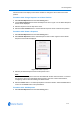
Procedure 4-26 Using a Scan as a Home Position
1 Select Scans/Sequences from the Live Viewing menu.