
User guide


Live Viewing Menu
4-5
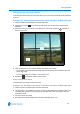
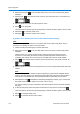
3 Choose Select Preset from the Presets menu. Figure 4-8 the Select Preset section will be
displayed.
Figure 4-8 Select Preset
4 Select the pre-defined preset from the drop-down menu.
5 Select the Goto button to activate the preset. The Live Web Video pane will update to display
the selected preset.
The preset will run continuously until interrupted by a camera command, pattern, scan or alarm.
Procedure 4-17 Editing a Preset
1 Select Presets from the Live Viewing menu.
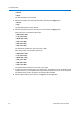
2 Choose Select Preset from the Presets menu. Figure 4-8 the Select Preset section will be
displayed.
3 Select a pre-defined preset from the drop-down menu. Select the Goto button to activate the
preset.
4 Make the necessary camera adjustments.
The following controls can be modified and saved as part of the preset. The pan, tilt and zoom
can be accessed using Procedure 3-7 Controlling the camera via the Live Web Video pane.
The remaining controls can be accessed via the Camera Adjust menu.
• Pan, Tilt and Zoom
• Focus Mode and Iris Mode
• Electronic Image Stabilization and Wide Dynamic Range
• White Balance
• Infrared Mode and Day Night Mode
• Shutter Limit and Gain
• Brightness, Contrast, Hue and Saturation
Select Presets from the Live Viewing menu when you have finished the camera adjustments.
5 Select the Set button when you have finished any modifications. You will be prompted to
confirm the update.Select the OK button to confirm or the Cancel button to stop the update.
The camera settings you have configured on the camera will be used for the preset.