
Installation Guide

6060 Boat Rock Blvd SW, Suite 800, Atlanta, GA 30336 USA | Toll Free: 1.855.774.0002 Phone: 1.404.691.6872 Fax: 1.404.691.6870 | dassoXTR.com
Version: June 20, 2018 3:25 PM | Page 1 of 4
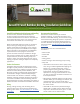
The EISEN
®
D-PLUG SYSTEM for dassoXTR Installation Instructions
Included in the EISEN
®
D-PLUG SYSTEM Kit
1. Fused Bamboo D-Plugs – 100 units
2. Stainless Steel Face Screw #8, Grade 316, 2-1/2"
(62mm) – 100 units
3. Hexagon Driver Bits with Star Head Driver #8
Items Needed for Installation:
1. Counter Sink Drill Bits matching D-Plug diameter.
Depending on the number of holes and your
woodworking skill, extra replacement bits may be
necessary (dassoXTR offers matching counter sink
drill bits).
2. Waterproof Exterior Glue for Wood/Bamboo.
Recommended options:
• Titebond
®
III
• Elmer’s Waterproof Wood Glue
3. Power Drill — corded drill recommended.
4. Belt Sander and Sand Paper — P60 (#60 grit).
Avoid using a rotary sander.
5. Compressed Air Unit — For cleaning drill holes.
6. Rubber Mallet
7. Rags for Cleaning
Safety
Follow recommended instruction and guideline from
power tools manufacturer. Use safety glasses, ear
plugs and safety mask as recommended.
How To Use The EISEN
®
D-PLUG SYSTEM
Read your FUSED BAMBOO
®
decking, siding and porch flooring installation
instructions (see dassoXTR.com).
1. Determine the locations where screws are
needed.
2. Pre-drill holes with the Counter Sink Drill Bits.
The hole is complete when the stop collar stops
spinning. Blow out sawdust from the holes with
compressed air.
3. Drive EISEN
®
Stainless Steel Face Screw with Driver
Bit so that they are flush with the countersink
holes at the bottom of each hole. (Note: FUSED
BAMBOO
®
should be kept dry and holes free of
debris before gluing and inserting plugs.)
4. Follow the glue manufacturer’s usage
recommendations, including working temperature
and set time.
5. Gently squeeze glue onto the side of counter
sink holes. Turn the bottle a 1/4 turn to ensure
full coverage of the side wall. Pull the nozzle out
of the hole. The objective is to coat the inside
walls of the hole while leaving as little glue at the
bottom of the hole as possible.
6. You can glue several holes at a time and then
go back to insert the plugs, so long as you do so
before the glue begins to set. Use a rag to wipe off
any excess glue that builds up on the nozzle tip.
7. Insert a EISEN
®
D-PLUG SYSTEM Plug in each
hole, chamfered end first, with the wood grain
aligned with the workpiece. (Note: All plugs are
face grained.) Using moderate force, pound plugs
in with a rubber mallet until flush or nearly flush
with the work surface. Wipe any excess glue clean
with a damp rag.
8. Sand the work surface. We recommend delaying
sanding until the glue has set, following the glue
manufacturer’s directions.