
Installation Guide
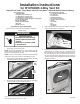


— 7 —
W10712331 A
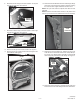
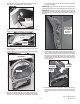
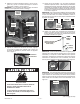
10. Reattach a total of eleven (11) screws to the front panel and
door assembly, starting at the top: Four (4) T-20 torx-head
screws on the top front panel bracket, three (3) Phillips-head
screws around the door opening, the smallest screw being
in the 12 o’clock position, and four (4) ¼” hex-head screws
along the bottom front. See Figure 4.
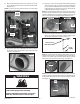
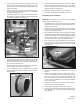
11. Slide the dryer top and console assembly forward, making
sure the top catches the two slide-hooks, one on either side
near the front. See Figure 28.
figure 28
DRYER TOP
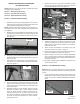
12. R e a t t a c h t w o ( 2 ) s c r e w s i n t h e b a c k f o r t h e t o p .
See Figure 2.
13. Reattach the rear shelf plate with three (3) screws.
See Figure 1.
14. Reposition dryer to operating position.
15. Connect external exhaust vent to dryer.
16. Plug in dryer or reconnect power.
NOTE: For gas dryer application, connect exible gas supply line
to rear of dryer. Turn on gas supply and check for leaks by brush-
ing or spraying approved non-corrosive leak detection solution
onto connection at rear of dryer. If any bubbles are present turn
off gas supply, tighten the leaking connection and retest for leaks.
17. Check to assure all components are attached securely in
place and lint screen has been installed to dryer.
18. Check that dryer is working properly.
WARNING
Plug into a grounded 3 prong outlet.
Failure to follow these instructions can result in
Do not use an extension cord.
Do not use an adapter.
Do not remove ground prong.
© Whirlpool Corporation 2014
(All Rights Reserved)