
Installation Guide


57
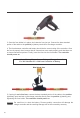
The panel MUST be covered with a dark cloth to prevent the solar cells from producing
energy; this will prevent and reduce shock hazard, which can be life threatening.
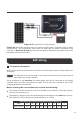
5. If opting for
no in-line fuse
, connect the bare stranded portion of the adapter cable to the
positive (+)
solar input terminal on the charge controller. Remove the protective cloth. If there
is enough sunlight present, the controller’s solar LED indicator/icon on the LCD display should
show that it is now charging your battery(s).
HAZARD
Once the battery is connected to the charge controller and the panel(s) are positioned and
mounted in the desired location, we are ready to connect the panel(s) to the charge controller.
Panels should be mounted in a place that is free from shading by neighboring obstacles such
as vents, air-conditioners, TV antennas, etc.
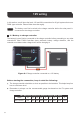
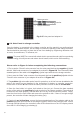
6.4 Solar Panel to charge controller
Please refer to Figure 6.4 when completing the following connections:
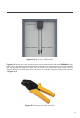
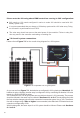
Fig. 6.3
Solar panel and adapter kit
Male connector
To Charge Controller
Female connector
1. First, mate the “Female” solar connector from the solar panel that has the
negative (−)
label
with the “Male” solar connector of your adapter kit as shown in
Figure 6.4
. Then connect the bare
stranded portion of the cable to the
negative (−)
solar input terminal on the charge controller.
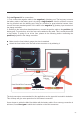
2. Next, mate the “Male” solar connector from the panel that has the
positive (+)
label with the
“Female” solar connector of your adapter kit as show in
Figure 6.4
.
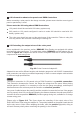
3. The
positive (+)
solar cable can be fused for protection; an in-line fuse can be added to this
cable in the same way as described in the instructions for battery to controller connection.
Please refer to section
6.1
and follow the same procedure on how to add an
in-line fuse.
4. Once the fuse holder is in place, don’t attach a fuse just yet. Connect the bare stranded
portion of the cable to the
positive (+)
solar terminal on the charge controller. Ensure that all
connections are made properly, and that there are not any loose connections present. Finally,
insert the fuse into the fuse holder and remove the protective cloth. If there is enough sunlight
present, the controller will start charging the battery (ies).