
Installation Guide
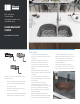

THE STEPS
• Using the template provided with your
purchase, measure and cut the hole in the
countertop.
• Determine the locations for the clip
brackets around the perimeter of the
sink. Pre-drill holes for the clips using
appropriate methods for the countertop
material.
• With denatured alcohol, clean the area
where the surface of the sink will meet the
countertop.
• On the underside of the counter, apply a
bead of silicone along the perimeter edge
of the opening.
• Carefully align the sink under the
countertop opening and raise it into
position, applying pressure to secure a seal
of the silicone against the countertop.
• Re-check that the sink is evenly aligned
with the countertop.
• Attach and tighten the clip brackets
against the edge of the sink. Do not tighten
one screw completely before the others.
To begin, partially tighten one clip. Then,
tighten the clip directly across from it, and
so on, until all clips are fully tightened.
This will safeguard against an uneven or
insecure installation.
• With denatured alcohol and a cloth,
wipe along the perimeter of the sink and
countertop to remove any excess sealant.
872.241.0016
Toledo, Ohio
sales@renesinks.com
renesinks.com
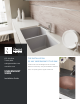
UNDERMOUNT
SINKS
Installation Guide
An undermount sink can be installed in three
different fashions:
• A ush mount allows the well of the sink
to line up perfectly with the edge of the
countertop opening.
• A positive reveal allows a portion of the
sink rim to be exposed.
• A negative reveal allows the countertop to
slightly overlap the interior of the basin.