
User manual
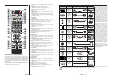


English - 47 -
Power Up Mode
7KLVVHWWLQJFRQ¿JXUHVWKHSRZHUXSPRGHSUHIHUHQFHLast State and Standby options are
available.
Virtual Remote Enable or disable the virtual remote feature.
CEC
With this setting you can enable and disable CEC functionality completely. Press Left or
Right button to enable or disable the feature.
CEC Auto Power On
This function allows the connected HDMI-CEC compatible device to turn on the TV and switch
to its input source automatically. Press Left or Right button to enable or disable the feature.
Speakers
To hear the TV audio from the connected compatible audio device set as $PSOL¿HU. You can
use the remote control of the TV to control the volume of the audio device.
OSS Displays Open Source Software license information.
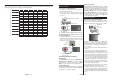
Installation Menu Contents
Automatic
channel scan
(Retune)
Displays automatic tuning options. Digital Aerial: Searches and stores aerial DVB stations. Digital
Cable: Searches and stores cable DVB stations. Analogue: Searches and stores analogue stations.
Satellite: Searches and stores satellite stations.
Manual channel
scan
This feature can be used for direct broadcast entry.
Network
channel scan
Searches for the linked channels in the broadcast system. Digital Aerial: Searches for aerial
network channels. Digital Cable: Searches for cable network channels.
$QDORJXH¿QH
tune
<RXFDQXVHWKLVVHWWLQJIRU¿QHWXQLQJDQDORJXHFKDQQHOV7KLVIHDWXUHLVQRWDYDLODEOHLIQR
analogue channels are stored.
Satellite
Settings
Displays satellite settings. Satellite list: Displays available satellites. You can Add, Delete satellites or
Edit satellite settings on the list. Antenna installation: You can change satellite anntenna settings and/
or start a satellite scan. SatcoDX: You can upload or download SatcoDX data using the related options.
Installation
Settings
(Optional)
Displays installation settings menu. Standby Search(*): Your TV will search for new or missing channels
while in standby. Any new found broadcasts will be shown. Dynamic Channel Update(*): If this option
is set as Enabled, the changes on the broadcasts such as frequency, channel name, subtitle language
etc., will be applied automatically while watching.
(*) Availability depends on model.
Clear Service
List
Use this setting to clear channels stored. This setting is visible only when the Country option is set to
Denmark, Sweden, Norway or Finland.
Select Active
Network
This setting allows you to select only the broadcasts within the selected network to be listed in the
channel list. This feature is available only for the country option of Norway.
First time
installation
Deletes all stored channels and settings, resets TV to factory settings.
English - 48 -
General TV Operation
Using the Channel List
The TV sorts all stored stations in the Channel List.
You can edit this channel list, set favourites or set
active stations to be listed by using the Channel List
options. Press the OK/TV button to open the Channel
List<RXFDQ¿OWHUWKHOLVWHGFKDQQHOVE\SUHVVLQJWKH
Blue button or open the Edit Channel List menu by
pressing the Green button in order to make advanced
changes in the current list.
Managing the Favourite Lists
You can create four different lists of your favourite
channels. Enter the Channel List in the main menu
or press the Green button while the Channel List
is displayed on the screen in order to open the Edit
Channel List menu. Select the desired channel on the
list. You can make multiple choices by pressing the
Yellow button. Then press the OK button to open the
Channel Edit Options menu and select Add/Remove
Favourites option. Press the OK button again. Set the
desired list option to On. The selected channel/s will
be added to the list. In order to remove a channel or
channels from a favourite list follow the same steps
and set the desired list option to Off.
You can use the Filter function in the Edit Channel
ListPHQX WR¿OWHUWKHFKDQQHOVLQWKHChannel list
permanently according to your preferences. Using this
Filter option, you can set one of your four favourite lists
to be displayed everytime the Channel list is opened.
7KH¿OWHULQJIXQFWLRQLQWKHChannel list menu will only
¿OWHUWKHFXUUHQWO\GLVSOD\HGChannel list in order to
¿QGDFKDQQHODQGWXQHLQWRLW7KHVHFKDQJHVZLOO
not remain the next time the Channel list is opened if
you don’t save them. To save the changes on the list
press the RedEXWWRQDIWHU¿OWHULQJZKLOHWKHChannel
list is displayed on the screen.
&RQ¿JXULQJ3DUHQWDO6HWWLQJV
The Parental Settings menu options can be used to
prohibit users from viewing of certain programmes,
channels and using of menus. These settings are
located in the System>Settings>Parental menu.
To display parental lock menu options, a PIN number
should be entered. After coding the correct PIN
number, Parental Settings menu will be displayed.
Menu Lock: This setting enables or disables access
to all menus or installation menus of the TV.
Maturity Lock: If this option is set, TV gets the maturity
information from the broadcast and if this maturity level
is disabled, disables access to the broadcast.
Note:,IWKHFRXQWU\ RSWLRQLQWKH First Time Installation is
VHWDV)UDQFH,WDO\RU$XVWULDMaturity Lock’s value will be
set to 18 as default.
Child Lock: If this option is set to ON, the TV can only
be controlled by the remote control. In this case the
control buttons on the TV will not work.
Internet Lock: If this option is set to ON, the open
browser application in the portal will be disabled. Set
to OFF to release the application again.
Set PIN:'H¿QHVDQHZ3,1QXPEHU
Default CICAM PIN: This option will appear as greyed
out if no CI module is inserted into the CI slot of the
TV. You can change the default PIN of the CI CAM
using this option.
Note: 'HIDXOW 3,1 FDQ EHVHW WR 0000 or 1234 ,I \RX KDYH
GHILQHG WKH 3,1LV UHTXHVWHGGHSHQGLQJ RQ WKH FRXQWU\
selection) during the First Time InstallationXVHWKH3,1WKDW
\RXKDYHGH¿QHG
Some options may not be available depending on the model
and/or on the country selection in the First Time Installation.
Electronic Programme Guide (EPG)
Some channels send information about their broadcast
schedules. Press the Epg button to view the
Programme Guide menu.
There are 3 different types of schedule layouts
available, Timeline Schedule, List Schedule and
Now/Next Schedule. To switch between them follow
the instructions on the bottom of the screen.
Timeline Schedule
Zoom (Yellow button): Press the Yellow button to
see events in a wider time interval.
Filter (Blue button): 9LHZV¿OWHULQJRSWLRQV
Select Genre (Subtitles button): Displays Select
Genre menu. Using this feature, you can search the
programme guide database in accordance with the
genre. Info available in the programme guide will be
searched and results matching your criteria will be
highlighted.
Options (OK button): Displays event options.
Event Details (Info button): Displays detailed
information about selected events.
Next/Prev Day (Programme +/- buttons): Displays
the events of previous or next day.
Search (Text button): Displays Guide Search menu.
Now (Swap button): Displays current event of the
highlighted channel.
List Schedule(*)
(*) ,Q WKLV OD\RXW RSWLRQ RQO\ the events of the highlighted
channel will be listed.
Prev. Time Slice (Red button): Displays the events
of previous time slice.
Next/Prev Day (Programme +/- buttons): Displays
the events of previous or next day.
Event Details (Info button): Displays detailed
information about selected events.
Filter (Text button): 9LHZV¿OWHULQJRSWLRQV
Next Time Slice (Green button): Displays the events
of next time slice.