
Instructions / Assembly


[Type here]
4
you to create a perfect flat area but will firmly hold the 3D wall panels in place and prevent any travel or
movement.
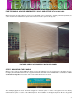
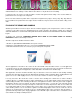
Lay out panels with a laser level (preferred), starting from the bottom up and mark with a hand level or chalk line
to ensure uniform installation. If panels are being placed directly up against one another, use the first panel as a
reference point for adjoining panels to be installed.
The goal in the installation process is to have the panels firmly ATTACHED and GLUED to the surface to prevent
any type of movement that can result in the seams cracking. Panels should be installed from the bottom up with
thin-set mortar applied to the wall with screws firmly attaching the panel to the wall. The first panel sets the
direction and flow for the rest so it is imperative that the panel be straight and square to the floor.
Steps:
a. Line the first row of panels to be installed starting from the bottom left corner.
b. The first panel to be installed is the most important one so make sure it follows the line drawn with the laser.
INSERTING ANCHORS:
c. With the first panel positioned against the wall precisely in the location where it will be installed, using the
countersink drill once again drill through the holes that were previously drilled to mark the anchor locations on
the wall. Draw a line also on the edge.
d. Using a standard drill, make a hole in the spot that was marked with the countersunk drill and next insert the
anchor on the wall screwed flush to the surface. If the anchor point is over a stud, then do not insert an
anchor and screw directly to the stud. The length of the insert should allow the length of the screw without
bottoming out. If it bottoms out it will strip the substrate and the panel will not adhere tight against the wall.
e. Mix a batch of thin-set mortar with a drill mixer and once it achieves a thick consistency apply the compound
on the wall using a notched ¼ trowel and distribute it evenly on the surface.
f. Install the first panel on the lower left side of the wall and insert the flat head screws into the anchors. The
excess filling compound on the back will fill the recessed area of the tile and the proceed with the installation
of all the tiles. Do not drive the screws so tightly that it will crack the tile, but just firm enough to hold the tile.
You might want to leave the screws a bit loose until the pattern flow is assured and then tighten. It is
important as the tiles are installed that there is a perfect pattern flow between the panels as once the glue
hardens it will not be possible to re-align them.
g. As the panels are installed leave a 1mm gap so that when the filler is applied to the seams it will have space
to fill in.
h. Using a plastic spatula remove the excess mortar glue between the panels and use it to fill the screw holes.
STEP 8. CUTTING AND SANDING
ARTPOLE PANELS are made from gypsum so they can be cut with standard wood cutting saws and equipment.
It is recommended that a fine blade be used to avoid edge chipping and proper wood cutting rules followed
including the use of dust masks and eye protection. Gypsum dust requires that dust masks be worn you must