
Installation Guide


50
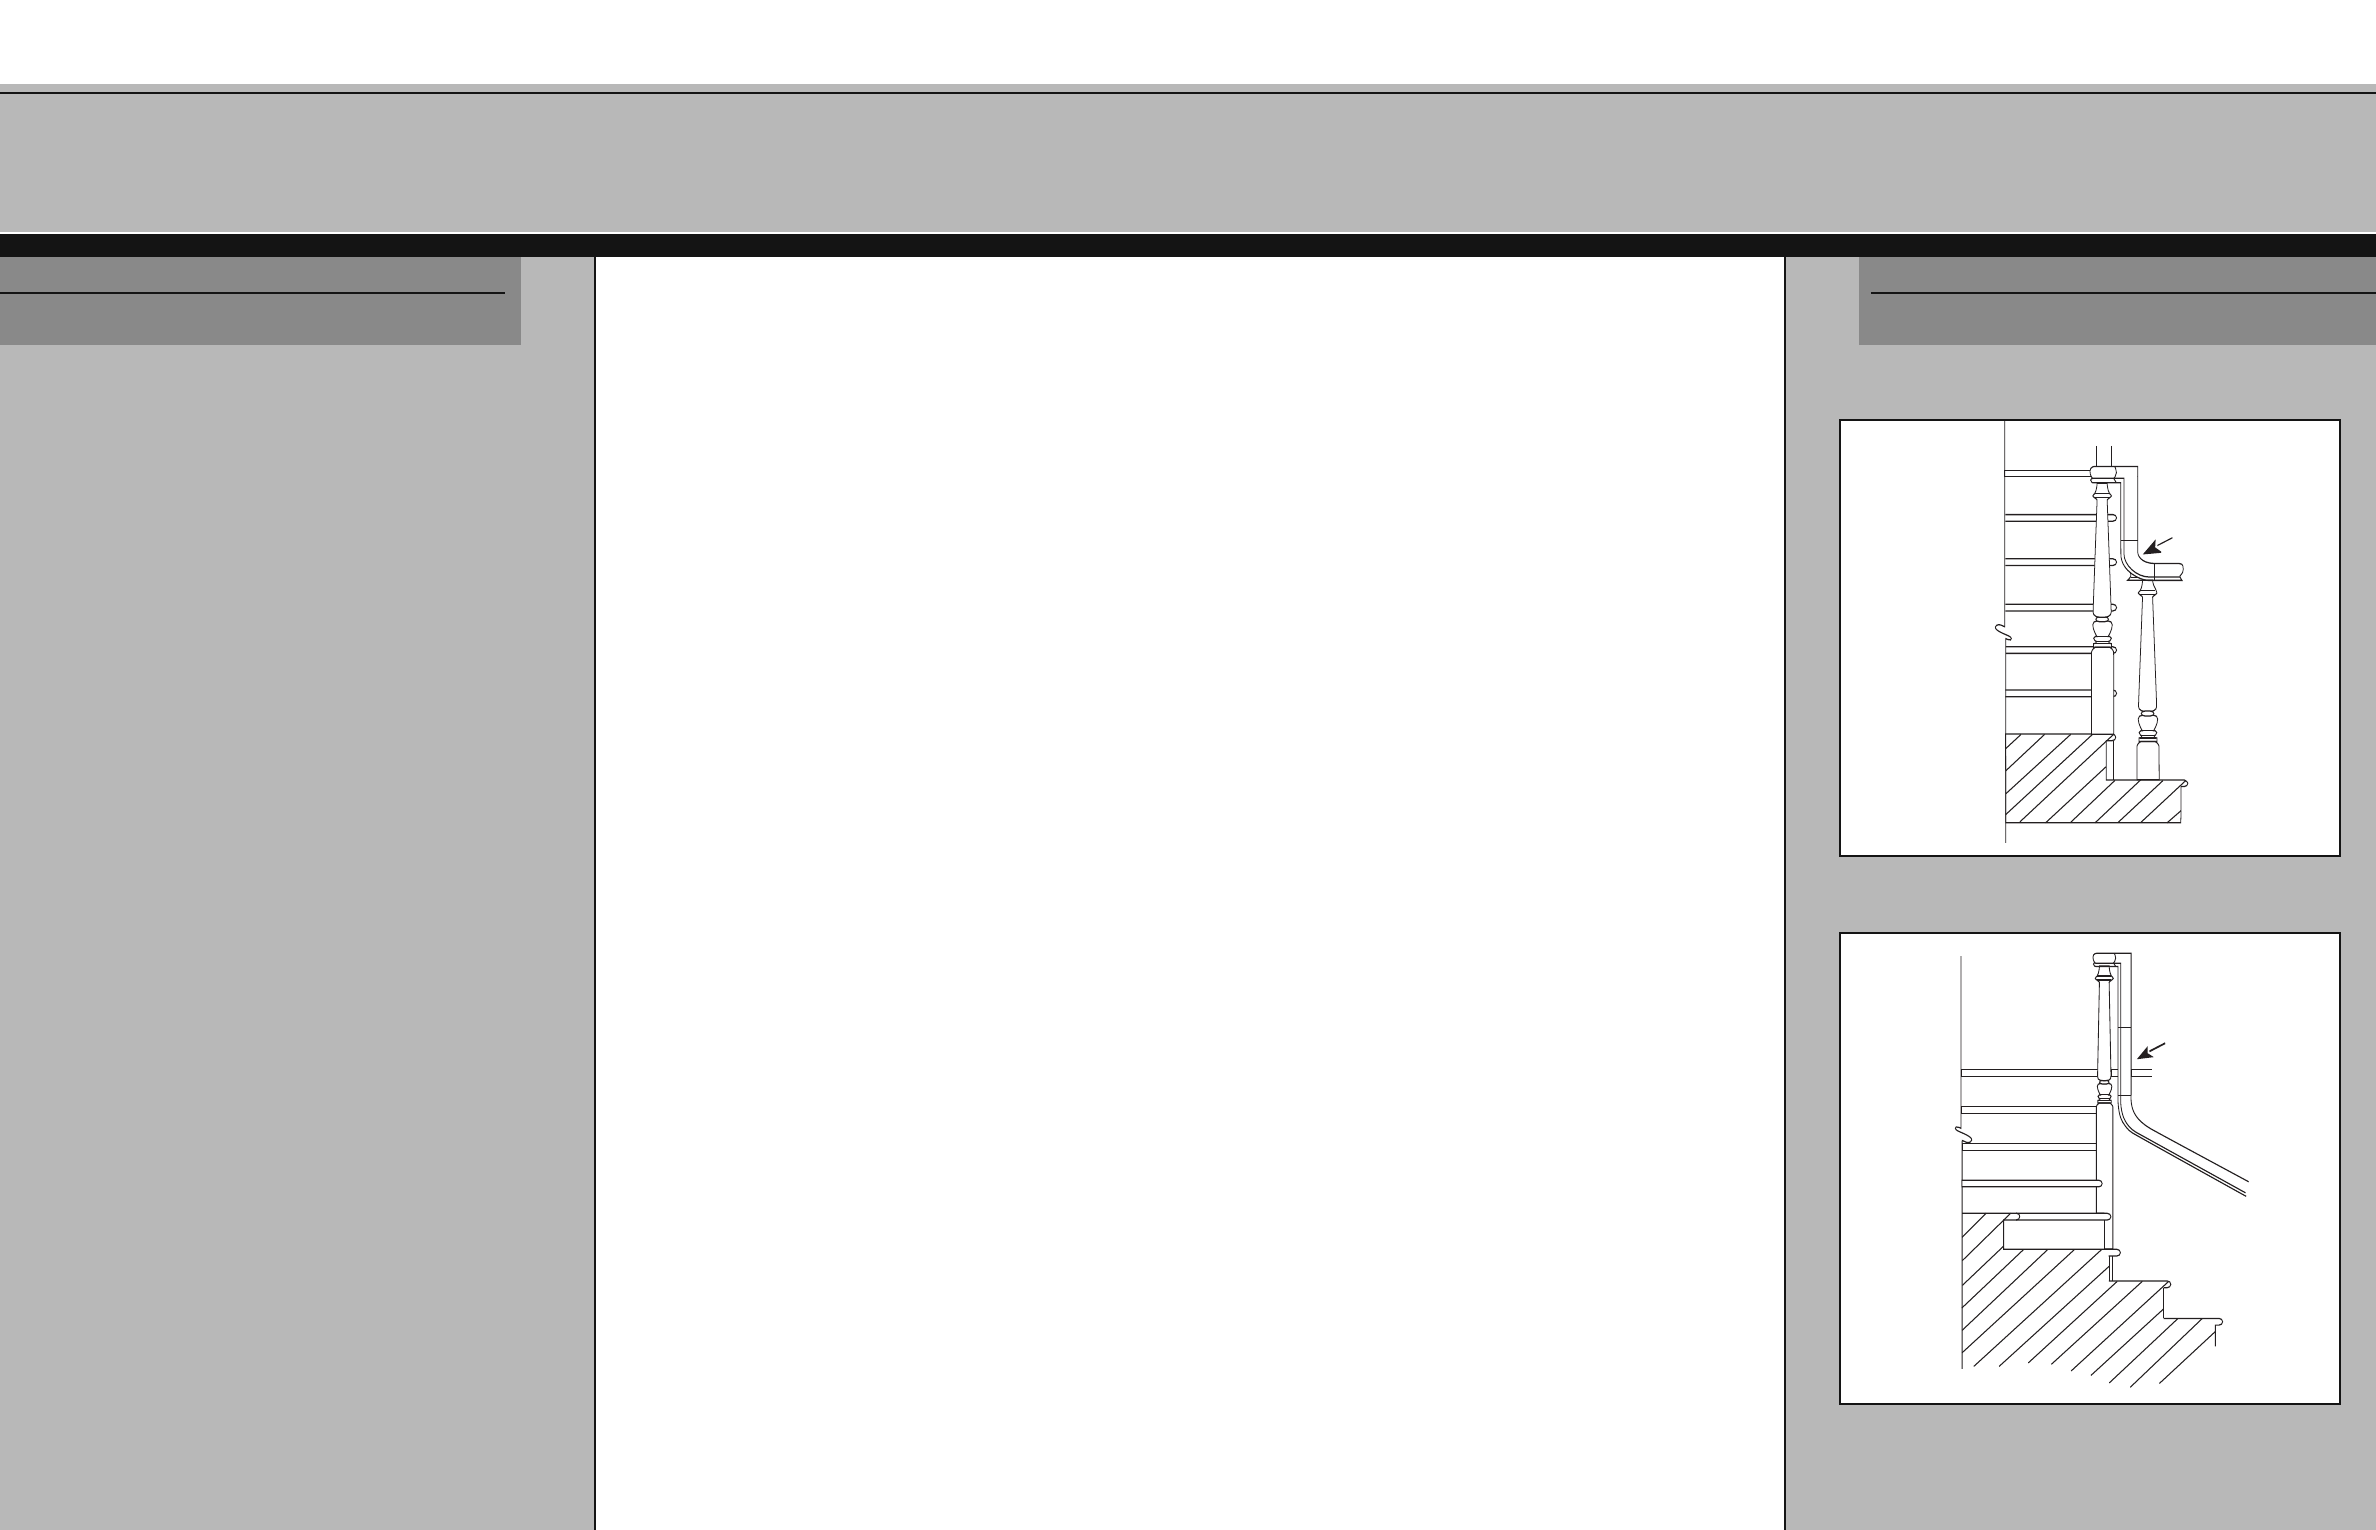
PROBLEM:
A standard up easing will not work with the necessary
newel locations.
SOLUTION:
Use of a 90˚ up easing may enable an effective transition to
the handrail rake. The starting step may require an
increased run (see Fig. A2-1).
Install 90º
up easing
T ROUBLESHOOTING
R EFERENCE
APPENDIX 2
FIG. A2-1 - Use of 90˚ up easing with unique newel location
4
9
Normally bending rails may be removed from the bending
guides in 24 to 48 hours. Extra drying time is recommended
when the rail is bent to a tight radius. Unclamp the rail and
remove the bending guides. Separate the rail from the
bending mold. The excess glue can be removed with a hand
belt sander or an electric hand planer.
STEP 4: Finishing the Bending Rail Balustrade
Install newels, fittings and balusters according to normal
instructions. It is best to install and finish the bending
rail immediately.
APPENDIX 1
B ENDING R AIL
I NSTALLATION
Use a length
of handrail to
increase rail drop
FIG. A2-2 - Increasing rail drop
PROBLEM:
Rail drop is greater than available with a 2-rise gooseneck.
SOLUTION:
An additional length of handrail can be added to the
gooseneck to increase rail drop (see Fig. A2-2).