
Installation Guide


32
BALCONY GOOSENECK FITTINGS
These fittings come in 1-rise and 2-rise variations. The 2-rise
has a loose up easing. The up easing in the 1-rise variation
is factory-attached. To trim a 1-rise gooseneck, place the
fitting so that the rail-drop portion that is attached to the
up easing lies on a flat surface. This will likely require that
the top part of the fitting hang off of the flat surface. Place
the pitch block on its “rise” side and slide the “rake” edge
up to the underside of the up easing until it barely makes
contact. Make a mark at this point. Place the pitch block on
the “run” edge and slide it along side of the up easing with
the “rake” edge facing the uncut end of the up easing. Align
the “rake” edge with the tangent point and draw a line that
transfers the “rake” edge to the fitting. This is the cut line.
The pitch block may be used as a support while making the
angled cut (see Fig. 16-2).
The 2-rise gooseneck consists of an up easing and a
transition assembly. The transition assembly must first be
attached to the balcony rail. Then the balcony rail section
must be placed so that it is aligned with the balcony
balus
tr
ade cent
er
line and the hole in the bottom of the
transition assembly is centered over the balcony newel
location. This whole assembly must also rest on temporary
blocks so that when the rake rail is placed on the noses of
the treads, the balcony rail will be in the correct relative
position. Use the following formula to calculate the height
of the temporary blocks:
S TEP
B.9a
SECTION B
3
1
GOOSENECK LANDING FITTINGS
These fittings consist of a loose up easing and a transition
piece that has an attached up easing on the upper end. Trim
the transition up easing first just as described in the Starting
Fitting section. Then join the upper section of rail to the
trimmed end of the transition piece. This assembly is then
clamped to the tread noses, centered on the balustrade
centerline. Then slide the assembly up or down the rake
until the hole in the bottom of the fitting is centered at the
intersection of the upper and lower balustrade centerlines.
The lower up easing needs to be attached to the lower rail
before it can be marked properly. With the handrail on a
flat surface, place the pitch block on its “rise” side and slide
the “rake” edge up to the underside of the up easing until it
barely makes contact. Make a mark at this point. (An
alternate way of finding the tangent point is to place the rail
assembly on the nose of the treads, centered on the
balustrade centerline, and slid it up the rake until the up
easing comes in contact with the rail-drop of the transition
piece that it is clamped on the upper flight. The point
wher
e cont
act is made is t
he t
angent point.) Place the pitch
block on the “run” edge and slide it along side of the up
easing with the “rake” edge facing the uncut end of the up
easing. Align the “rake” edge with the tangent point and
draw a line that transfers the “rake” edge to the fitting. This
is the cut line (see Fig. 16-2).
Once cut, this section is placed back on the tread noses and
moved over from the balustrade centerline just enough to
allo
w the lower assembly to pass by the rail-drop of the
transition piece. Slide the lower assembly up the rake until
the back of the lower up easing is flush with the back of the
rail-drop. Make a mark at the top of the up easing on the
rail drop and then cut the rail drop. The lower assembly is
now ready to join to the upper assembly.
SECTION B
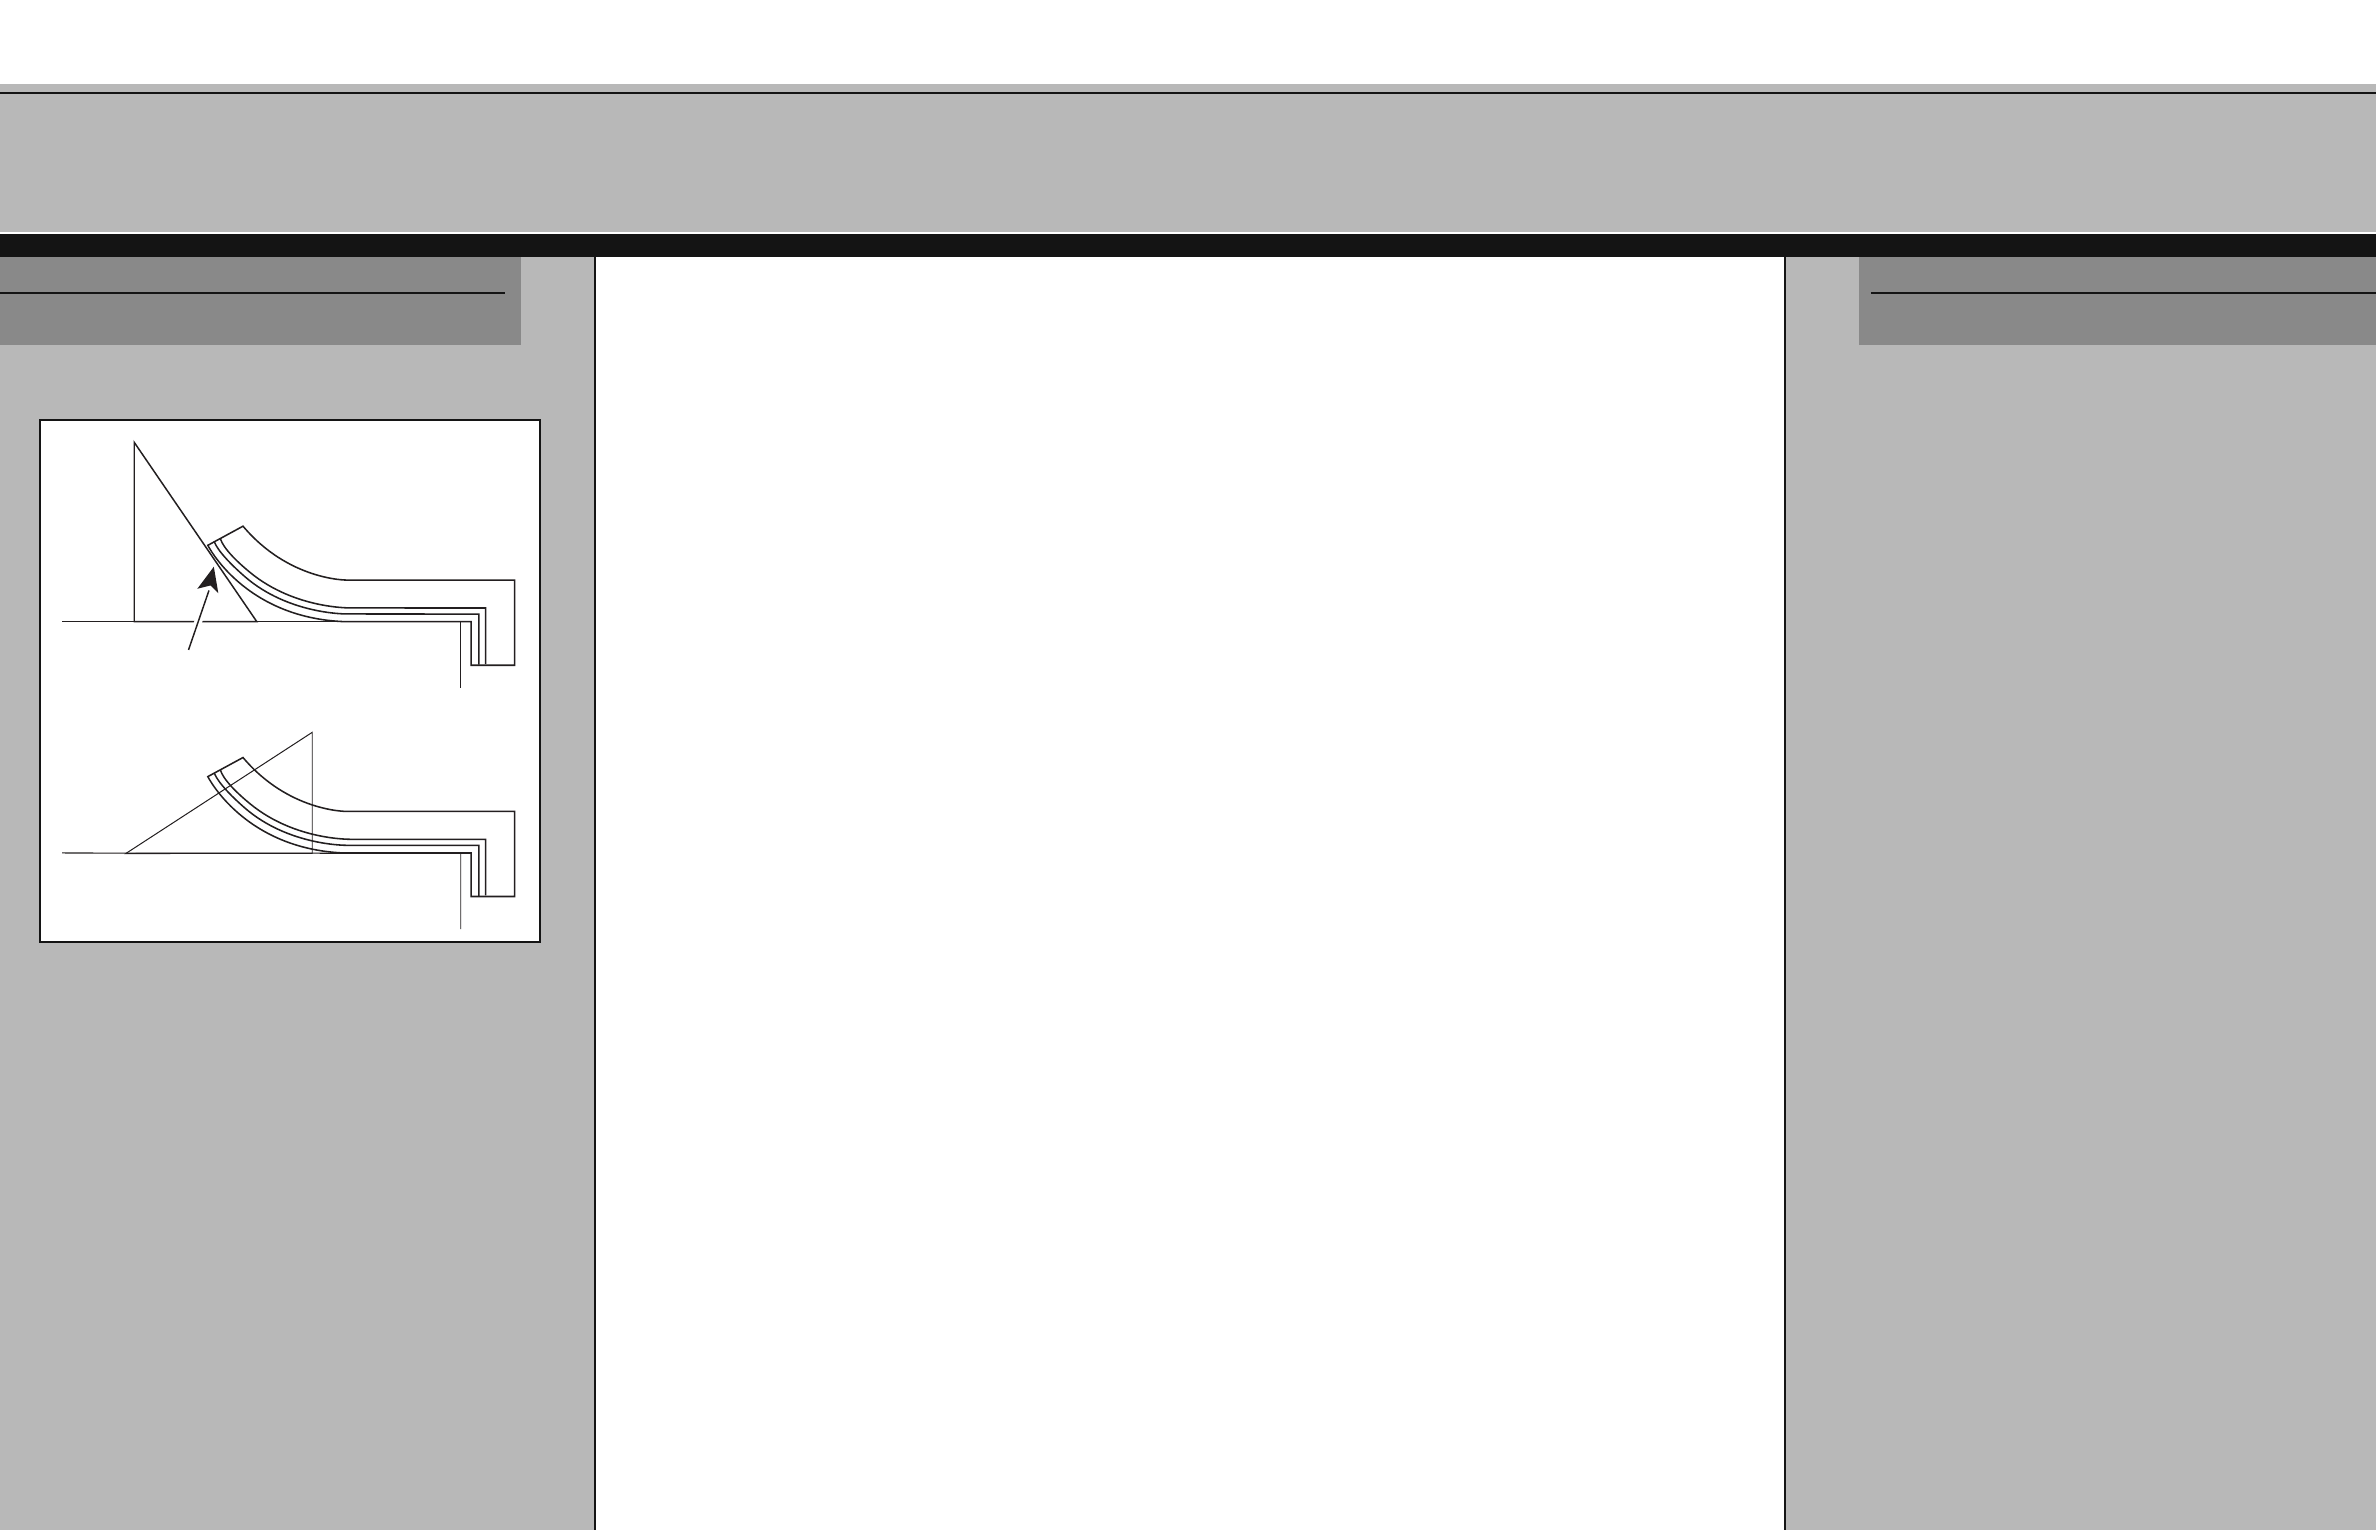
S TEP
B.9a
Rise
Mark the tangent (contact) point
Rise
Rake
Run
Rake
Run
Align with rake and complete mark
FIG. 16-2 - Marking the gooseneck for trimming
run
no. of balusters
=
distance between centerpoints of
balusters (and newels) throughout
the overall run (see Fig. 8-6)
run –
baluster square
thickness
distance from front
edge of tread to
center of first baluster
(see Fig. 8-5)
=
10" – is the same as 10" –
7
/
8
" = 9
1
/
8
"
1
3
/
4
"
2
10
1
/
2
"
3
= 3
1
/
2
"
2
tread
overhang
+
distance from top
of starting tread to bottom
of starting fitting
rake
rail
height
vertical
thickness
of rail
+
–
block
height
balcony
rail
height
balcony
rail
thickness
rake
rail
height
rake rail
thickness measured
on the plumb
=
–––
(
)