
Installation Guide


26
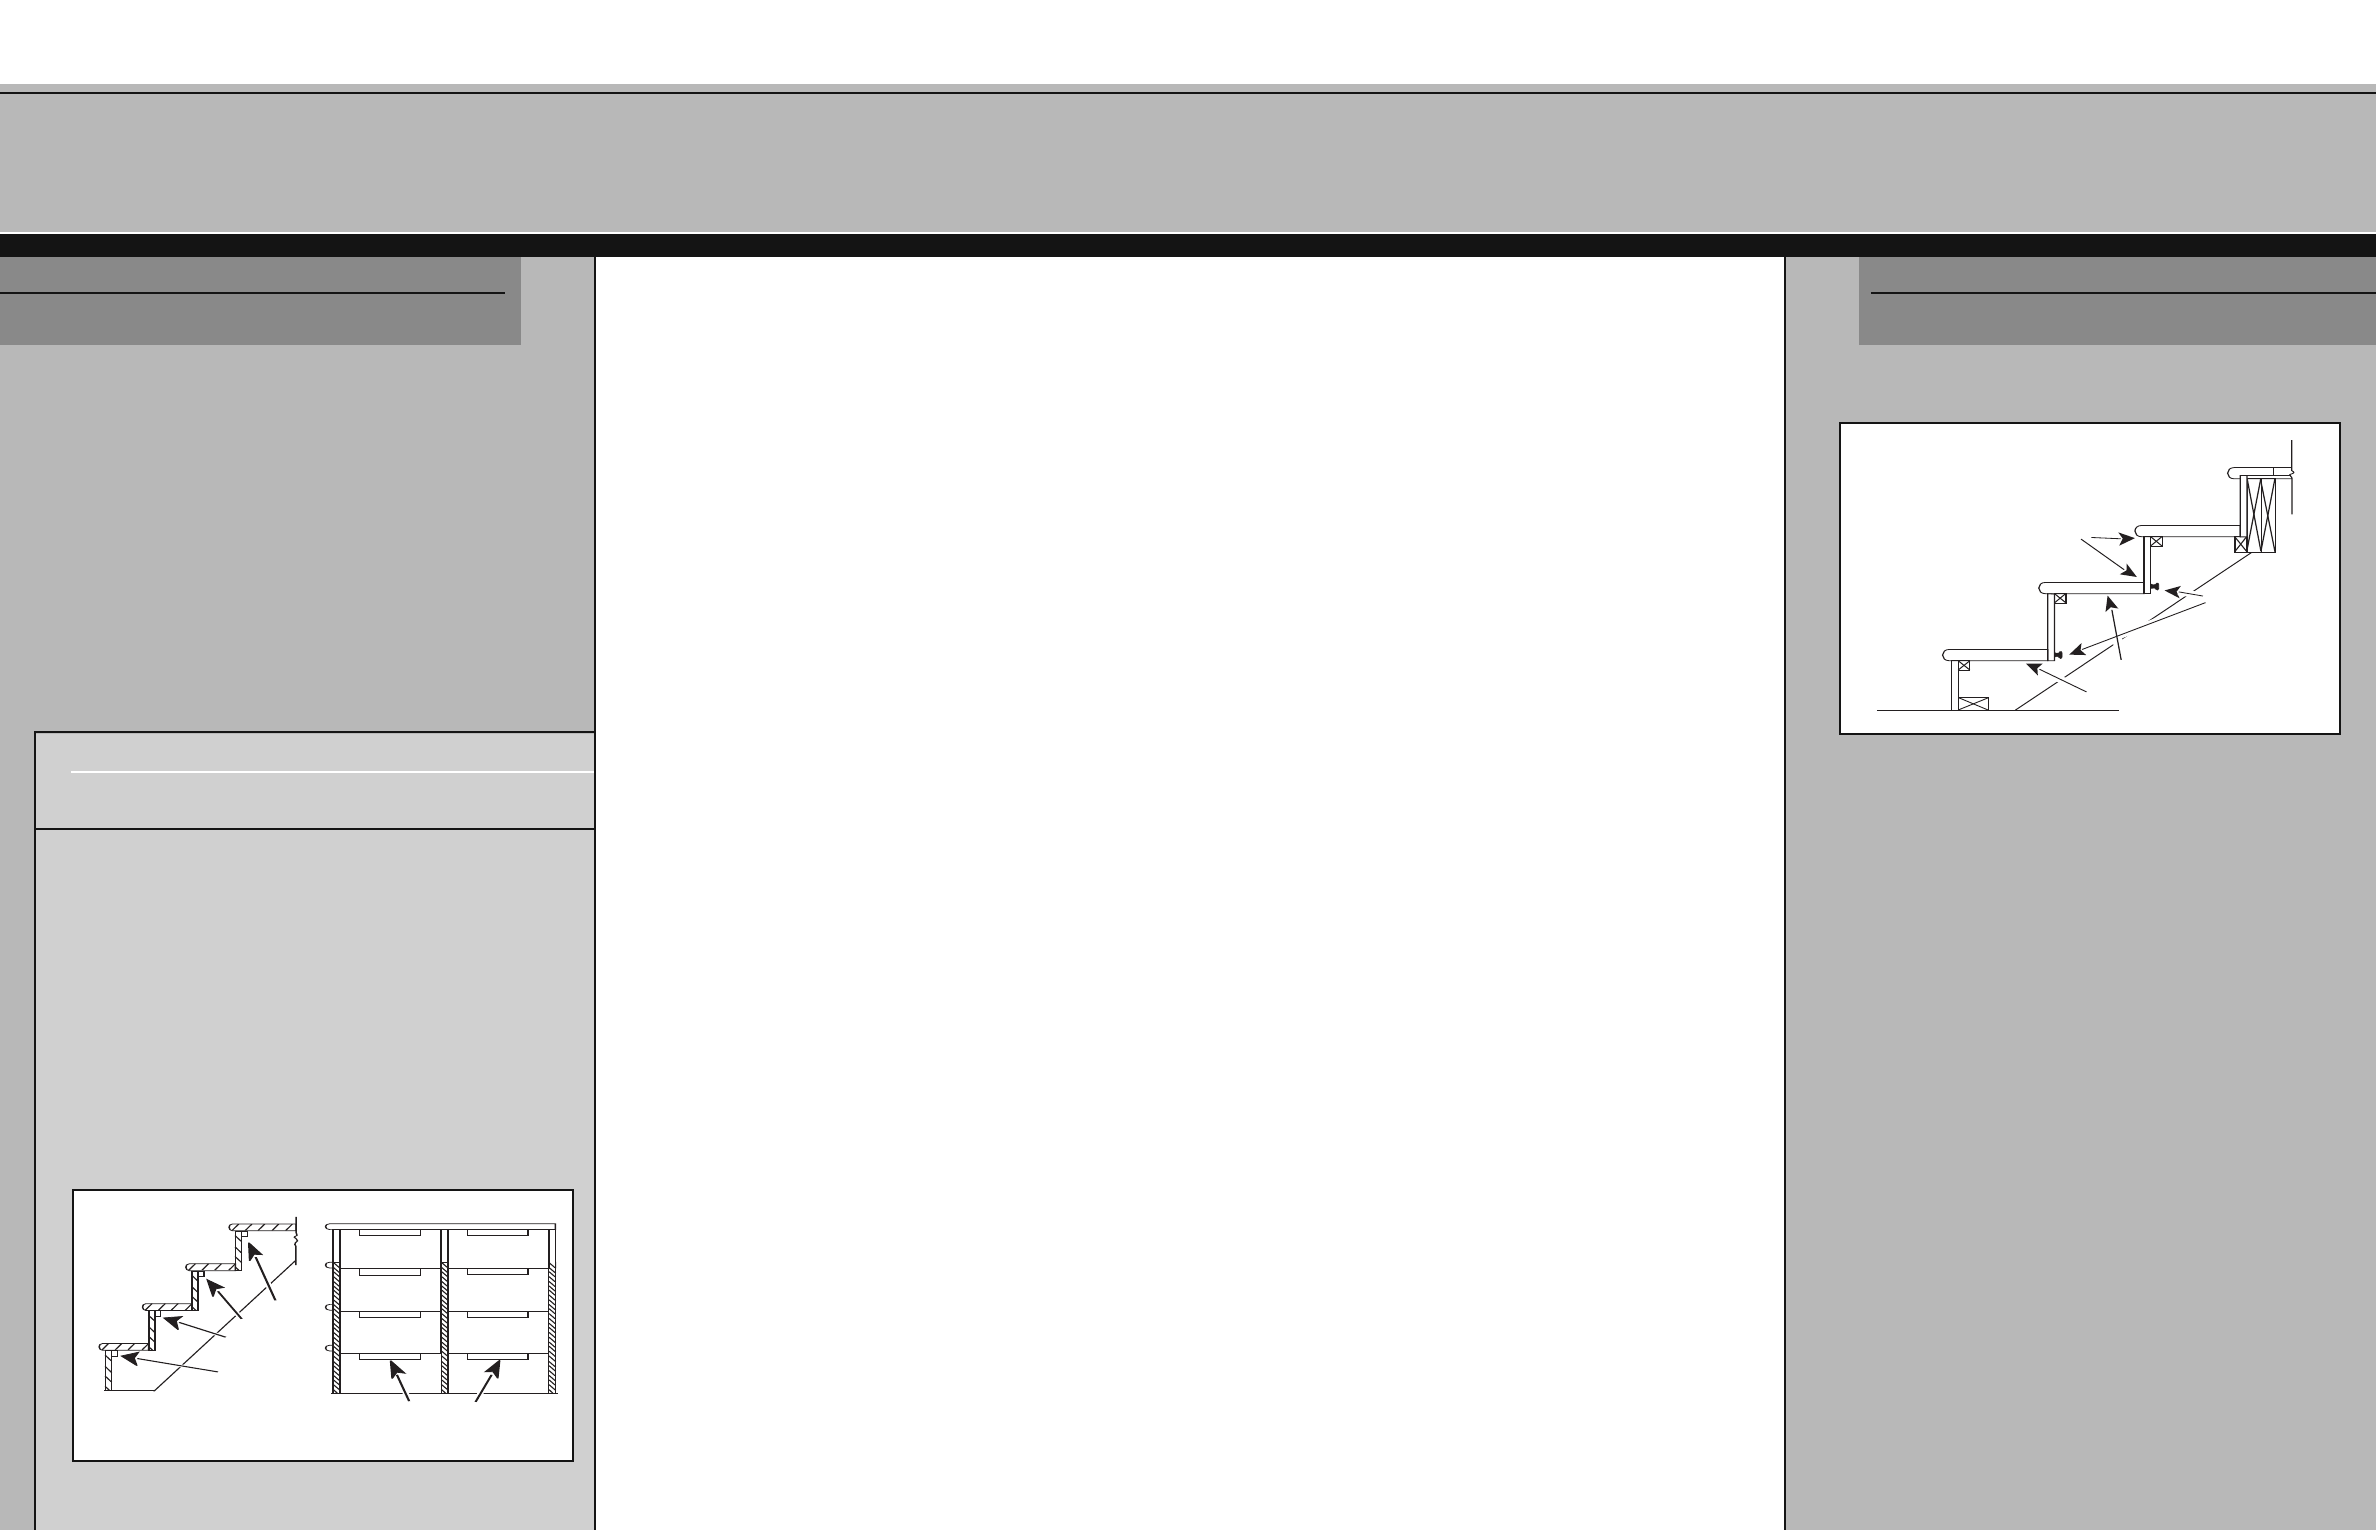
STEP B.5 – Install the Remaining Treads
See StairNote Nine: Squeakless Stairways
In Step A.7 the treads were dry fitted. Permanently install
the treads, beginning with the first plain tread or mitered
tread. (When you are using a starting step, the first plain
tread is the second step.) Apply construction adhesive to
the stringers, then apply carpenter’s wood glue to the top
edge of the first riser and the back edge of the tread
(see Fig. 12-1).
If you have access to the underside of the stairway, secure
the tread to the cleats, if used, with screws. Also, place
screws through the bottom of the riser to secure the back
edge of the tread (see Fig. 12-1).
If you do not have access to the underside of the stairway,
reach through the open space for the next tread to secure
the tread to the cleats and riser with screws.
If you do not use cleats (
StairNote Nine: Squeakless
Stairways), nail down through the face of the tread. Use
10d or 12d finish nails, and nail into each stringer, ensuring
the tread is pulled flat. Countersink the heads so they can
be f
illed later. Another installation option is to drill for
wood plugs and use screws instead of nails.
R
epeat these instructions for all remaining treads.
C
arpenters' glue
S
crews
Construction
adhesive
S TEP
B.5
SECTION B
FIG. 12-1 - Permanent installation of treads
2
5
STEP B.4 – Install the Starting Step
Go to Step B.5 when using plain tread for the first step.
Apply adhesive to the floor cleat installed in Step A.6 and to
the back edge of the starting step tread, and move the
assembly into its final position. A few 8d finishing nails
through the riser will hold it to the cleat while the adhesive
sets. Where possible, use screws to attach the second riser
to the back of the starting step tread.
Cleats
on backside
and flush with
top edge of
each riser
(Side view of staircase
with outside stringer removed)
Cleats centered
between stringers
SECTION B
S TEP
B.4
FIG. S-9 - Installation of cleats
S T AIRN O TE
N INE
S QUEAKLESS
S TAIRWAYS
The use of cleats in staircase construction will provide extra
sturdiness. Before permanently installing stair treads, use
carpenter’s glue to attach square cleats (approximately 1
1
/4" x 10")
flush with the top edge, and on the backside, of each riser. Cleats
must be cent
ered between stringers (see Fig. S-9).
Construction adhesive at the joints between stringers/risers and
treads, and car
penter’s glue on cleated joints between risers and
treads will help assure a sturdy, “squeakless” installation.